Stretch ceiling is one of the most durable types of finishes. It also differs in its decorative qualities. It is not recommended to glue ceiling plinths to the bending surface of the decorative canvas - it is quite difficult and fraught with damage to the decorative coating. To hide the gaps between the stretch ceiling and the walls, special fillets are used - planks made of polymer material, in which groove locks are formed on the back side. The grooves are inserted into the barbed mounting profile (harpoon attachment). However, such skirting boards are produced in a limited range, which is why standard ceiling skirting boards are most often used, which are glued to the wall.
Why you can't glue ceiling plinths to a stretch ceiling
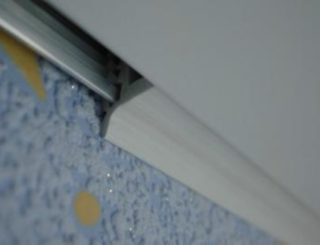
The canvas, which is stretched over the entire area of the ceiling, is made of thin PVC film. If you glue fillets directly to it, negative consequences are possible:
- the film will sag under the weight of the skirting board;
- chemical reagents that make up the glue can damage the film;
- when the glue dries, wrinkles and folds form on the canvas;
- it is impossible to dismantle the skirting board without damaging the curtain.
The tensioning sheet is not rigidly fixed and when gluing the plinth it can change its position, which will not allow creating a reliable adhesive connection.
Varieties of ceiling plinth
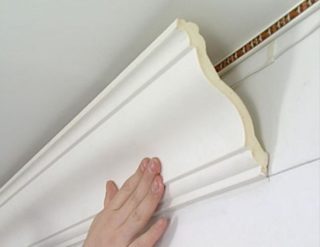
Smooth backed ceiling skirting boards are made of the following materials:
- Styrofoam;
- expanded polystyrene (duropolymer);
- soft polyurethane;
- rubber, etc.
It is best to use polyurethane skirting boards - they are the lightest and after painting they practically do not differ from plaster moldings.
The cheapest foam plinths "dry up" over time and gaps will appear between the butted fillets over time, which will have to be repaired.
Styrofoam
Foam curtain rods, the mass of which basically consists of gas, differ:
- low weight;
- durability;
- moisture resistance.
Skirting boards are easy to clean, but can deform with careless pressure. They can be installed in rooms with high air humidity (baths, kitchens, etc.).
Foam fillets have a number of disadvantages that reduce their performance:
- instability when exposed to chemically active substances;
- low mechanical strength.
Foam skirting boards turn yellow when exposed to sunlight. They are not able to withstand high temperatures (for example, the heat from a spotlight) and ignite easily, while releasing toxic fumes. Therefore, recessed luminaires must be located at least 10 cm from the wall.
Polyurethane
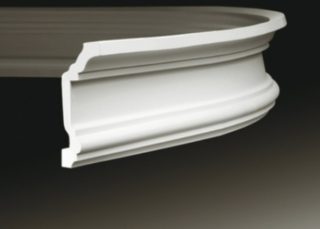
Polyurethane ceiling cornices are similar in appearance to gypsum stucco molding, but differ from the latter in flexibility, which is inherent in almost all polymers. Their surface is smooth, but may also have a relief pattern.
Characterized by polyurethane skirting boards:
- high flexibility, which allows them to be used when finishing curved surfaces and difficult corners;
- strength;
- resistance to temperature extremes.
Polyurethane fillets and high humidity are not afraid. They do not absorb odors, which makes it possible to use them when decorating bathrooms and kitchens.
The disadvantages of polyurethane baguettes include their large mass - in order to glue them to the wall, you will need to use special glue. In some cases, self-tapping screws may also be required, but this can spoil the appearance of the decor. These skirting boards are difficult to cut - the edge of the baguette at a given angle can be cut with a miter saw or using a special device for cutting corners (miter box).
Expanded polystyrene
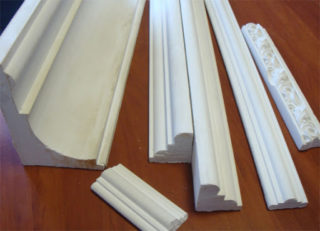
Expanded polystyrene is one of the types of polystyrene foam. It is more dense, but its performance is not much better.
One of the latest developments of the Belgian company Orac Decor is high density polystyrene foam, called "duropolymer" or "duroprofile". It is made of high pressure treated polystyrene foam. The new technology has significantly improved the technical parameters of old analogs, and its optimal version, proposed by the Chinese company "Perfect", has made it possible to halve the price of this unique material.
Rubber
Rubber fillets are used only when decorating stretch ceilings. They are also called "caps", "skirting boards" or "masking tapes". With the help of rubber skirting boards, the gaps between the walls and the ceiling are hidden. They are attached to the mounting profile using special grooves of various shapes - T, TM, TL, TLP, etc.
Externally, the rubber skirting board is a flat or angled white tape.
Installation of ceiling fillets to a stretch ceiling
The installation of the plinth on the stretch ceiling is carried out depending on the condition of the walls and the stage at which it is planned to fix the baguette. Most often, these works are carried out at the final stage, when the wall decoration is completed and the stretch ceiling has already been installed. It is also possible when the plinth is glued before finishing the walls. Such a solution is preferable when the walls will be pasted over with wallpaper - this will allow not to tear off the glued fillets during repairs.
Installing a ceiling plinth on a stretch ceiling with your own hands requires a number of preparatory work:
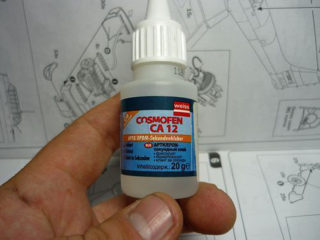
- choose glue;
- determine the number of baguettes and glue;
- pick up the necessary tools and accessories;
- prepare the walls.
It is recommended to glue light decorative elements with transparent or white adhesives that do not darken over time. These include:
- liquid nails of a special composition "Installation Express Decor";
- polymer compounds designed specifically for polystyrene;
- PVA glue.
Heavier elements can be installed on an acrylic filler that can withstand heavy loads.
Fillets made of plaster or wood are best glued with special means, for example, Tytan Professional mounting glue. Polymer solutions and specialized putties are also suitable.
To determine the amount of glue required to glue the ceiling plinth to the stretch ceiling with your own hands, you need:
- calculate the perimeter of the room;
- determine if there will be gaps in the places where fillets are installed;
- calculate the back surface area of all baguettes.
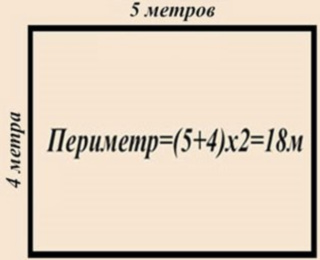
The total area of the back side of all planks is determined as follows: add up the length of all skirting boards and multiply the resulting value by their height. Then on the package you need to look at the glue consumption per 1 sq. M and multiply this amount by the total area of the back side of the baguettes.
To make sure that there is a sufficient number of fillets, a corner margin (10-20 cm for each corner) is added to the perimeter of the room and the result is divided by the length of a single plinth, the standard size of which is 2.0 m.The result will show the required number of skirting boards.
Tools and fixtures
In addition to the stepladder, to attach the ceiling plinth to the stretch ceiling, you will need:
- roulette;
- painting cord;
- stationery knife;
- pencil;
- hacksaw;
- miter saw or miter box;
- a brush or rubber spatula for applying glue;
- sealant for sealing gaps at the joints between fillets;
- polyethylene film;
- wipes to remove excess glue.
Before starting work, you need to protect the suspended ceiling with plastic wrap.
Wall surface preparation
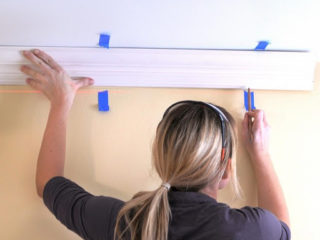
Wall preparation work begins with cleaning and priming. Then the wall is marked. To do this, fillets are alternately applied to the place where they will be located, and their lower contour is marked with a pencil.
It is most convenient to use a piece of plinth with a length of 10-20 cm for marking. Marks are applied along the entire perimeter of the room, after which they are connected, beating off the line on the wall with a paint cord.
In order not to spoil the suspended ceiling, it is recommended to tighten its entire surface with plastic wrap.
Installation of ceiling plinths
Before proceeding with the installation work, you must first check the correctness of the calculations carried out earlier.
- The cornices are laid out on the floor along the walls in such a way that 2 plinths lie along the long walls, and one along the short ones.
- The pieces of fillets cut to size are laid on the remaining places. In the center of the wall, parts cut in production should be joined, and those that were cut off by themselves should go to the corners.
- Corner parts are cut using a miter saw or miter box. With the use of special corner pieces, the installation process is greatly simplified.
- Again, the skirting boards are laid out on the floor, checking the accuracy of the docking with each other.
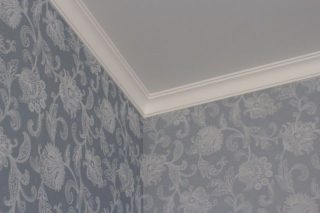
After completing these works, they begin to install the skirting boards on the wall.
- Installation of fillets begins from the corner of the room, which is located opposite the entrance door to the room.
- The wide side of the baguette is greased with glue and after a few seconds is applied to the wall, guided by the previously made markings.
- Press the plinth against the wall for a minute.
- Remove excess glue with a napkin.
- The next plinth is applied to the glued one. In addition to the wide part, you need to grease with glue and its end.
- Baguettes are glued around the entire perimeter of the room until the work is finished. After the glue has seized and the skirting boards will not be painted, the protective film is removed from the ceiling.
- After the glue has completely dried, all the gaps between the skirting board and the walls are filled with a sealant. The drying time is indicated on the packaging.
Skirting boards are painted only after the glue has completely dried.


