In almost all cases, when people move into secondary housing, they have to face the need to carry out, if not major, then cosmetic repairs, which means replacing the entire decoration. It is not always possible to carry out work associated with even a short-term cessation of access to premises such as a bathroom, kitchen and toilet. An effective way out of this situation is the decision to put tiles on tiles. This process is quite peculiar, it is possible to carry it out only in the presence of favorable concomitant conditions.
Reasons to keep old tiles
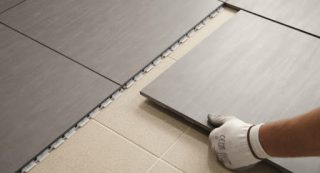
Renovation in an apartment involves a waste of time, effort and money. Every property owner strives to minimize each of these factors as much as possible.
There are several reasons for the decision to put the tiles on the floor on the tiles:
- There is no need to remove furniture and household appliances from the room. The tiles can be laid in stages, without interrupting the functioning of the premises as intended.
- Lack of dirty and dusty work associated with the dismantling of the old coating and the manufacture of a new screed.
- Significant reduction in repair time. Minimum labor costs. There is no need to wait for the new screed to harden.
- There is no need to spend effort and money on the disposal of construction waste.
- Chipping of the tiles can damage the base or the leveling system. Their repair will significantly complicate and raise the cost of the estimate for the restoration of housing.
To apply this technology in practice, you need to really assess the condition of the facility where the repair is planned.
Conditions for laying tiles on tiles
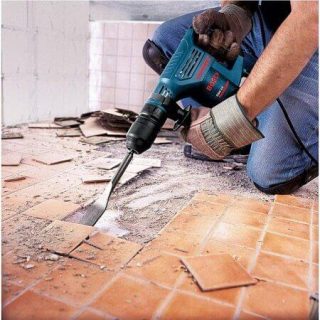
The decision to lay a new tile on top of the old one is made on the basis of a thorough and objective analysis of the condition of the old coating.
When examining it, you need to pay attention to the following points:
- Tensile strength of floor slabs and load-bearing walls. If the structures are not designed for additional weight, then the old floor covering will have to be removed.
- The presence of curvature. Over time, the ceilings are deformed, and the screed over the front finish is not poured. This means that it will be necessary to completely remove the old finish down to the concrete.
- Tile condition. If its surface is covered with cracks, it will not work as a basis for fastening.
- The strength of the mortar on which the coating was previously laid. It must be strong enough to support the additional load.
Check how much the floor will rise after laying the new floor, taking into account the layer of adhesive. The surface should not be higher than the level of the door sill.
Possible difficulties and contraindications to work
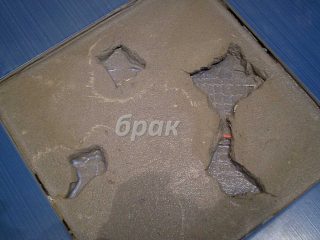
It is not always possible to put tiles on the floor on top of a similar material.
Contraindications to the use of this technology:
- The presence of voids under the cladding. The bearing capacity of the finish is insufficient, at any time it can move away from the base.
- Some fragments came off the screed. This circumstance testifies that low quality tile adhesive was used during installation, there is a tendency for further peeling of the tile.
- The presence of old worn-out pipes under the coating.In the event of a breakdown, it will be necessary to destroy both the old and new finishes, capturing the screed.
- Low ceiling in the room, low threshold. Raising the floor can visually degrade the design of the room. It is not always possible to increase the threshold if the doors and plastic frame are made of valuable wood.
- The unsatisfactory condition of the old tiles. A dirty surface covered with a network of cracks cannot be a reliable base on which tiles can be glued.
It is worth making a final decision only after a detailed inspection of the working area has been carried out, all defects have been identified and the possibility of their influence on the quality of the final result has been assessed.
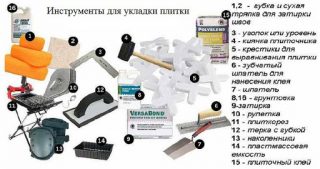
Required tools and materials
- grinder, tile cutter;
- roulette, level;
- hammer, mallet;
- chisel;
- notched trowel, rubber trowel;
- construction mixer;
- waterproof tile adhesive, grout;
- foam rubber;
- primer "concrete-contact";
- acetone;
- rags;
- goggles, gloves, respirator;
- plastic crosses;
- containers for mixing the solution;
- marker.
In any case, when laying the tiles, scraps and mortar waste will be formed. It is necessary to prepare in advance dense bags for collecting garbage, and to protect interior items from dirt and dust - a special film.
Preparatory work
Install new flooring on a properly prepared substrate. It should be perfectly clean, strong and even.
- Use a level to check how even the floor is. Level drops of no more than 1% are allowed.
- Assess the state of adhesion of the old finish, the presence of voids under it. This is done with a hammer. When struck, defective places emit a sonorous rattling sound. With good grip, the sound is dull.
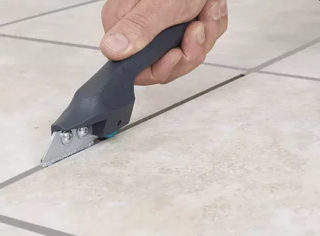
- Inspect the seams. If they are crumbled, the grout should be removed. This can be done with a knife, grinder or a special factory-made tool. After removing the solution, the seams are finally cleaned with a vacuum cleaner and primed. You do not need to close them up again, the openings will be an additional basis for the glue.
- Wipe the surface with acetone to remove fat deposits that accumulate on all coatings in the apartment.
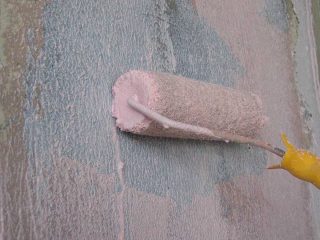
It is necessary to roughen the tile. This can be done in one of the following ways:
- Grinder. Grooves are made at intervals of 3-4 cm. You can grind off the glaze with an abrasive nozzle, but this is longer and more difficult. In all cases, a large amount of dust is generated.
- With a chisel and a hammer. Notches are knocked out at a distance of 2-3 cm from each other, which should cover at least 50% of the facing area. Also not the easiest thing to do, but there will be no dust.
- Primer "concrete-contact". The solution adheres perfectly to any surface. Has sufficient adhesion to withstand any load. It is applied very easily and quickly. The downside is that you have to spend money.
In conclusion, furniture is taken out of the room, the rest of the planes and objects are covered with a protective film.
Do-it-yourself installation of tiles on tiles
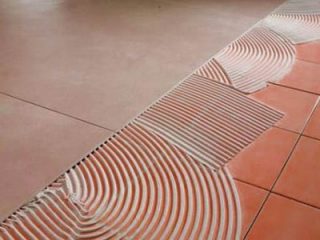
The process of laying tiles on a similar surface is practically no different from the standard, but with certain nuances. The placement of the ceramic should be calculated so that the new joints do not line up with the old ones. In addition, the mortar layer should not exceed 3 mm, so as not to create additional load on the supporting structures.
Facing the surface with tiles is recommended in the following sequence:
- Apply markings to the base, taking into account the requirement for mismatching seams. This may require trimming the material.
- Wipe the products from dirt and dust. Put them on the floor, choose the best location so that patterns and patterns are combined. Mark fragments.
- Mix the adhesive. This is done in accordance with the instructions on the package.The volume of the solution should be such as to have time to use it before the moment of hardening. Here you need to focus on your mastery skills.
- Start laying from one of the far corners of the room. The mortar is applied with a notched trowel by even distribution over the entire area of the tile. It is recommended to wet the tiles and the floor beforehand in order to achieve better adhesion. The alignment of the fragments is carried out using a level and a mallet. Plastic crosses are inserted between their sides.
- Close the rows. As a rule, you cannot do without it. Pruning is done with a grinder or tile cutter. This should be done so that the cut edges are facing the wall.
It is recommended to stand for at least a day so that the glue completely crystallizes and it is safe to walk on the tile.
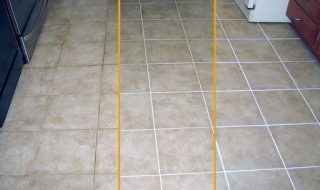
The next stage of the repair is grouting, which must be performed as follows:
- Remove the crosses, clean the openings from dust and crumbs. Primer the edges of the tiles. Wait an hour for it to dry.
- Prepare the solution, if it is ready-made, then mix thoroughly.
- Fill the joints with a rubber spatula, bringing the mortar flush with the facing surface. The surplus is collected and used again.
- After 10-15 minutes, walk along the seams with wet foam rubber to make the composition smooth.
- Wait 5-6 hours, remove the protective film, carry out wet cleaning of the room.
It remains to install the plinth and return the previously removed items to their places.

