The technology of erecting prefabricated structures from insulated panels is at the peak of its popularity. The houses assembled in this way are distinguished by high strength, durability and excellent thermal insulation characteristics. Developers appreciate the speed of building construction and the affordable cost of the materials used. However, only a high-quality exterior decoration of a house made of SIP panels can guarantee all these characteristics. This procedure is simple and can be done by hand. It is necessary to choose the right facing material and correctly apply it.
Features of the exterior decoration of the house from SIP panels
Finishing of prefabricated structures from panels has its own characteristics related to the structure and performance characteristics of the outer surface of the walls. Structural insulating panels are a plate consisting of insulation (dense polyurethane) of two layers of OSB (oriented strand board), connected with polymer glue. OSBs are made from multidirectional wood chips and acrylic resins. Achieving the proper strength and strength is achieved by pressing the mixture under high pressure. As a result, dense, absolutely sealed sheets are obtained, which are reliable protection for the insulation.
They cannot be a finishing cladding and there are reasons for this:
- The outer cladding protects the boards from ultraviolet radiation and moisture. Under the influence of these factors, the material quickly deteriorates. The dampness is transferred to the timber, which leads to the destruction of the entire building.
- The strength of the OSB is limited. It can be easily damaged by hitting it with a heavy and sharp object. The wall can be destroyed even with hand tools.
A definite plus is that SIP panels are devoid of vapor permeability. You can decorate them with any materials without looking at their ventilation characteristics.
Exterior requirements
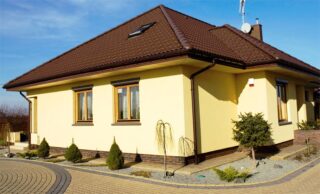
For private and industrial housing construction, slabs with a height of 280 cm, a width of 60-125 cm and a thickness of up to 12.5 cm are used. Products with a thickness of 20 cm or more are used for arranging floors between floors. The light weight of the fragments allows for construction in small teams without the involvement of heavy equipment. With the correct organization of labor, it takes up to two weeks to lift the box, after which the building is clad outside and inside. This can also take up to two weeks, depending on the choice of installation technology. Time for facing is not wasted in vain, since this procedure performs a number of important functions to create a healthy and comfortable microclimate in the interior.
Based on this, the following requirements are imposed on the exterior decoration:
- strength;
- waterproofness;
- UV resistance;
- biological inertness;
- immunity to chemically active reagents;
- presentable appearance;
- maintainability.
When choosing the type and methods of cladding, it is necessary to take into account the climatic conditions and features of the building itself.
Options for finishing a house from SIP panels
There are several options for exterior decoration of a house from SIP panels, each of which has its own advantages and disadvantages.
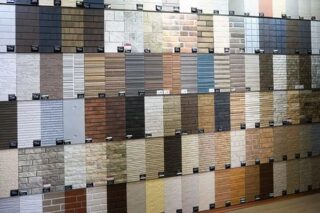
The most common techniques are:
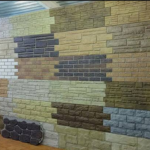
- Facade panels. They are ready-made in all respects structures that do not require additional refinement.The front side is made of metal or plastic, faithfully imitates any natural and synthetic coatings - board, timber, stone, brick, fabric.
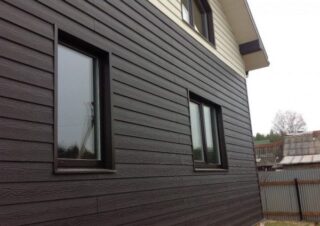
- Siding. Manufacturers produce lamellas from plastic, iron and aluminum. The assortment of colors is very diverse. The specificity of the products allows you to install an additional layer of insulation under them and make a ventilated facade. When installing, you need to take into account the low density of OSB, leading part of the fasteners to the floors.
- Plaster. The most simple, budgetary, but rather laborious way. Allows you to create a monolithic layer without joints and gaps. With regard to buildings made of SIP panels, there is a restriction - you can use only polymer waterproof mixtures, since gypsum and cement are hygroscopic, which is unacceptable for wood-based panels.
- Fiber cement panels. Inexpensive and quite suitable in terms of design option. The only drawback is the rather large weight of the products. They create additional stress on walls and foundations. This method is suitable for buildings on solid rocky ground that can support a curtain wall.
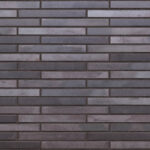
- Clinker tiles. The cladding is light, beautiful, practical, but very expensive. Mounted on mortar or steel rails, which further increases the event budget. If the goal is to create low-cost housing, this option will not suit everyone.
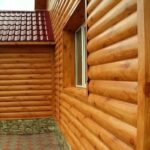
- Block house. An excellent solution to radically transform the far from the most presentable look of OSB walls. Imitation of log masonry is made of plastic or natural wood, fixed directly on slabs or guides. When using a sealant in the grooves of the strips, a complete tightness of the coating is achieved.
- Plywood. One of the ways to save money on finishing. A prerequisite is the use of waterproof sheets with a thickness of 12-16 mm. After sealing the joints, the coating is painted with acrylic paint or varnished.
When deciding what is the best way to finish your property, it is not necessary to dwell on one material. You can approach the issue creatively, using several coatings on the same plane or using an expensive cladding on the facade, and letting on the rest of the walls more affordable.
Required tools and materials
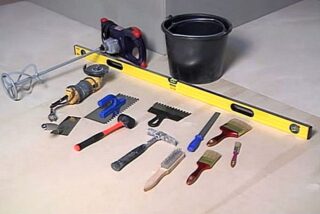
Since each material has a different application method, the mounting kits will vary.
To apply the adhesive coating you will need:
- level;
- roulette;
- mallet;
- paint brush;
- primer;
- notched trowel;
- rubber spatula;
- special glue;
- grout for joints;
- plastic crosses;
- grinder or tile cutter;
- corner and starting profiles.
To install the cover on the frame, you need to have:
- screwdriver;
- level;
- square;
- drill;
- scissors for metal or a saw;
- stapler;
- stationery knife;
- profiles for the frame.
Protective goggles and gloves should be worn, and trestles, ladders or scaffolding should be prepared for working at heights.
DIY finishing
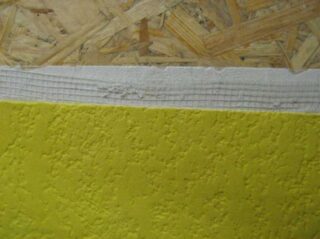
Before finishing the walls of SIP panels with this or that material, it is necessary to carry out a preparatory stage:
- dismantling of wiring, plates, lamps and other objects;
- removal of protruding fasteners, grinding of bulges;
- surface treatment with an antiseptic and a primer.
To sheathe a building with slats or slabs along the frame, you need to perform the following manipulations:
- Process blanks for the frame. Soak the wood with an antiseptic and hydrophobic impregnation, remove rust from the metal and paint over damaged areas.
- Marking. The distance between the profiles must be made to the size of the finishing boards so that their edges are on a rigid base.
- Installation of vapor barrier and lathing. The strips of film are applied 15 cm and glued with tape.
- Attaching the starting bottom and corner profiles, securing the guides with locks.
- Laying a heat insulator, if provided by the project. The slabs are inserted into the spine, the remaining cracks are sealed with polyurethane foam.
- Installation of panels. They are inserted into sockets and locks and are rigidly fixed using one mechanism or another.
- Fastening is carried out from one of the lower corners in rows upward.
The last row is adjusted in height and inserted into the guides.
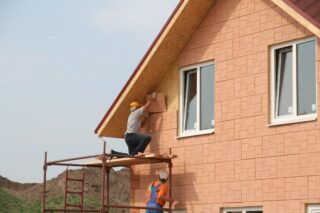
The procedure for finishing with glue tiles:
- Drawing on the walls of the layout of the coating. It is advisable to pre-spread it on the ground and sort it according to patterns, drawings and stains.
- Installation of the starter profile on the base. It will prevent the finish from sliding down under its own weight.
- Mixing the solution. This is usually done in two steps. You need to do so much of the mixture to have time to completely use it up, until it begins to thicken.
- Laying tiles. The mortar is applied to the substrate or tiles, it is a matter of habit and experience. Then the fragment is applied and leveled using a level and a mallet. The gaps are fixed with plastic crosses. The last products in a row are trimmed to the width.
- The laying is done to the very top with an offset of each new level by half or a third of the figure. The last row is trimmed in height.
- Grouting. After a day, the crosses are removed, the slots are cleaned and primed. The joints are filled with a rubber trowel. For outdoor work, it is advisable to use a polymer mixture that is impervious to moisture. The final leveling is done with a wet sponge.
The mixture hardens for 4-6 hours. After that, the surface can be wiped with a wet cloth.

