To build a second floor in a private house, you need correctly drawn up diagrams and drawings and the correct calculation of the load on the base and interfloor floors. If the homeowner overestimates the strength of the foundation, instead of a reliable two-story building, he can get a building in need of major repairs.
- Base and floor loads
- Attic or full floor
- Assessment of risks during construction
- Features of the construction of the second floor
- Ways to strengthen the foundation and walls
- Replacing the foundation support
- Strengthening the foundation with an armopoyas
- Erection of an external or internal frame
- DIY construction of the second floor
Base and floor loads
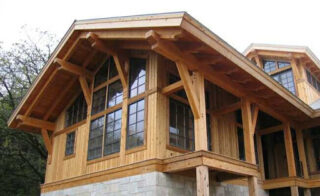
If the construction of the second floor in a private house is being carried out for a new building being erected according to the project, the homeowner does not have to worry that the base and walls will not withstand the overload. They are already designed for specific weights.
If the owner decided to expand the area of the dwelling by means of the second floor, he should contact an expert who will assess the condition of the foundation and load-bearing walls, their ability to withstand the load, and suggest suitable measures to strengthen the partitions. The specialist will advise the add-on option that is most suitable for the given case, and will carry out the necessary calculations.
Attic or full floor
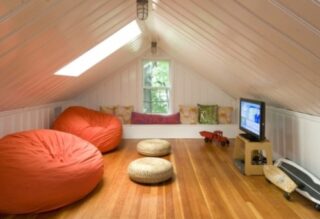
Having decided to organize the second floor in the country, in a residential frame house or a massive building, you should determine how best to organize the space. Depending on the needs of the family and financial capabilities, this can be an attic or a full-fledged floor with or without heating. The first option is the cheapest.
The bulk of the cost of arranging the attic will go towards creating a warm roofing cake. You will not have to spend money on the construction of capital wall structures. In addition, in this case, the pressure on the foundation is the least. However, using a number of pieces of furniture (bunk beds, wardrobes, etc.) in the attic is often problematic.
Attics are hip, with one or two slopes, can be supplied with a "cuckoo". The base can be a floor, beams on poles, or an outrigger console. With a high-quality insulated roof, you can use the room all year round, otherwise - only in the summer.
The sun's rays enter the room through vertically located gable windows or inclined ones cut in the roof. Often the room is equipped with a balcony. On the windows, you can pick up special curtains that protect from the sun's rays that cut your eyes.
In the long term, it will be more profitable for a large family to make a full-fledged floor.
Assessment of risks during construction
Before making the 2nd floor in the house, it is worth assessing the possible risks associated with the technical conditions of the home. You can order an inspection report from a specialized organization. The procedure allows you to assess the condition of wall structures, foundations, attic space.
The customer is given an act and a conclusion on the technical condition of the building, as well as calculation calculations and advice on reconstruction.
If the home has certain defects, the homeowner is given advice on how to fix them. The specialist must also calculate the cost of construction work.
Features of the construction of the second floor
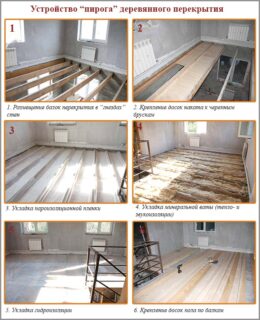
Work begins with the laying of floor beams. Their section is determined by the length of the span (the maximum allowable value of this parameter is 6 m). It also depends on the planned load. If the floor is residential, it will be approximately 350-400 kg per m². If the owner wants to put a cast-iron boiler, other heavy unit or piece of furniture in the house, special calculations will be needed.
When installing beams, the following rules should be observed:
- If they are reinforced in equipped nests, the ends should be trimmed at an angle of 60 degrees. If the beams go through the inner walls through and through, they are spliced into the wall thickness.
- When fixed with metal fasteners, the ends of the elements are left even. It is better not to use these parts on the outer walls - the accumulating condensation will spoil the appearance of the tree.
- When the beams are mounted in a brick building, their ends (or areas extending above the walls) must be coated with bitumen mastic and covered with a waterproofing material in two layers. Every fifth element is fixed with a metal anchor. In general, the beams are inserted into nests of 0.1-0.15 m. If they are installed in a wooden house, this value can be reduced to 7 cm. I cover the ends with a waterproofing layer to prevent the floors from squeaking.
- Beams begin to lay with a pair of side elements located 0.5 m from the walls. The remaining area is divided into equal parts. In this case, the distance between adjacent beams should be no more than 0.6 m.
- A building level is used to align the elements.
- It is forbidden to install vapor-proof materials from the side of the unheated second floor. Otherwise, the accumulation of condensate initiates putrefactive processes in the beams.
When the beams and sub-floor are ready, the walls can be erected. If it is decided to build a light frame or timber floor in a building where the lower walls are made of bricks, a waterproofing dividing layer is required between the two materials. First, the lower strapping is organized, then the timber is laid.
The disadvantage of this configuration is the difference between the floors in terms of heat capacity and, accordingly, in the load on the heating system. It is important to take this into account when purchasing a boiler so that its power characteristics are sufficient to service the entire building.
If you have to make an additional floor in an already residential building, the principle of work is generally the same. It will first be necessary to dismantle the roof and ceiling of the attic. Using the columns, organized along the outer perimeter of the dwelling, you can increase the bearing capacity of the latter. Piles are most often used as a basis - screw or bored. They need to be deepened to the level of the supporting layer (at least a meter, if we are talking about soil rich in sand).
Ways to strengthen the foundation and walls
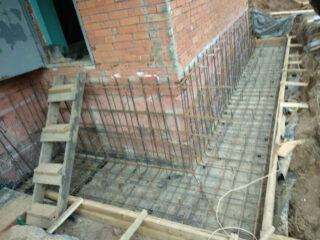
In order for the building to serve for a long time, before the superstructure, it is necessary to take care of strengthening the base and walls. This can be done in several ways.
Replacing the foundation support
This should be done in a team of 2-3 people. Previously, furniture is taken out of the house, the floor is dismantled, the doors are removed. By means of a hydraulic type jack, the building is lifted and a fresh base is poured.
Strengthening the foundation with an armopoyas
Such a belt looks like a closed tape made of reinforced concrete, poured along the perimeter of the dwelling. A trench is preliminarily organized to a depth of 80 cm. A sand-gravel-crushed stone pillow is placed in the base. Then a plywood sheathing is created, into which the mixture is poured. When the belt is ready, you need to wait at least a year before proceeding with the superstructure of the new floor so that the structure does not shrink.
Also, only corners can be reinforced. This method is suitable if the upper floor is planned to be made in the form of a light frame.The corners are dug in 1 m in diameter to a depth of 50 cm. A grating is welded to the rods of the previous foundation and the free space is poured with concrete mixture.
Erection of an external or internal frame
This method of unloading the walls of the house is also possible. The external frame with beams and columns makes it possible to make partitions. It is important to consider that the floors must be connected by common communications.
DIY construction of the second floor
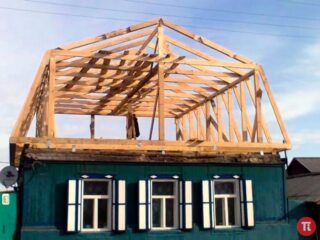
There are different methods for adding a new floor. You can use logs or beams, or make masonry. Often, the upper floor is made of a lighter material than the lower one. Frame and panel technologies are widespread.
Step-by-step instructions for implementing such a project on an already finished house looks like this:
- The roof is dismantled. The roof is removed, the rafters are disassembled and the beam elements are removed.
- The panels go up (you need an assistant for this).
- The end parts are mounted. Then they are connected by longitudinal beams. The latter will then need to be equipped with a rafter system. In places where it is planned to install windows, vertical beams are placed.
- End walls are sheathed. To do this, you will need chipboard plates, sealing and thermal insulation materials.
A crate is placed on the roof frame and a roofing cake is laid. Then on the floor it will be necessary to equip the floor, mount windows, trim the ceiling.

