The problem of energy saving is relevant for private real estate, as it determines the level of living comfort and the size of utility bills for heating. The use of modern materials and technologies allows you to achieve the desired result with a minimum investment of time and effort. Warming a house with penoplex is the most popular way to create reliable protection against dampness and temperature extremes. The procedure is simple enough to do it yourself, saving on the services of paid specialists.
Penoplex advantages
Insulation is produced by extrusion of styrene-based foam polymer mass. Finished products are slabs with step edges. The main difference from analogues is the structure of the substance. It consists of open cells, due to which it has ventilation properties. This makes it possible to carry out foam insulation of buildings of any type, including those erected from timber, logs, bricks and aerated concrete blocks.
In addition, the material has the following advantages:
- minimum thermal conductivity;
- flexibility to finish uneven surfaces;
- fracture and impact strength;
- waterproofness;
- biological inertness - fungus and mold do not start in the mass, animals and insects avoid it;
- resistance to chemically active reagents;
- long service life of 50 years or more;
- wide operating temperature range;
- excellent sound insulation properties;
- a wide variety of types for finishing surfaces of various compositions.
The decision to insulate housing with penoplex has practically no negative sides. The main one is the high cost, justified by the peculiarities of manufacturing. Despite the fact that the estimate for repairs can be impressive, the investment will pay off with a comfortable stay in the building.
Please note that the material decomposes on contact with toluene and acetone-based liquids. When polystyrene burns, it emits a large amount of corrosive toxic smoke.
Selection of assembly mixtures and related materials
In order to properly insulate the house outside with penoplex with your own hands, you will need to prepare a place for work, assembly mixtures, fasteners and tools corresponding to the surface.
The main attention should be paid to the choice of adhesive. It is selected based on the composition of the treated surfaces. For concrete and brick buildings, cement-based mixtures that are used for laying ceramic tiles are best suited. They have good adhesion and tightness. This is true if there are cracks in the walls, which is typical for old buildings.
When it is necessary to insulate frame, wooden and gas silicate walls, you need to choose a mixture based on gypsum. They are characterized by sufficient vapor permeability to ensure the removal of moisture from the premises. A similar choice is made for facade plaster, which is used at the final stage of the work.
To carry out wall insulation with penoplex, you will need the following tools:
- puncher;
- a hammer;
- oil level;
- roulette;
- square;
- hacksaw for metal;
- office knife with spare blades;
- mixer for mixing the solution;
- notched and even trowel;
- grater or metal brush;
- scissors;
- marker;
- a stable step-ladder, at least 2.5 m high.
This set can be found in any homeowner's workshop. Before starting work, it is necessary to put the equipment in order.
Insulation of walls outside with penoplex requires the acquisition of such materials:
- start profile;
- deep penetration primer;
- adhesive mixture;
- reinforcing plastic mesh;
- reinforced corners;
- plaster in the form of a dry mix or ready-made solution;
- disc dowels;
- acrylic paint;
- siding.
When choosing materials, one should take into account the climatic conditions of the region. If the climate is characterized by high solar activity and frequent winds, you need to choose mixtures that are resistant to UV and abrasion.
Preparatory work
The correct approach to the insulation of a house involves the preparation of load-bearing structures for pasting with plates and subsequent finishing.
At this stage, the following activities are carried out:
- Wires, plates, lamps, switches and other items are removed from the foundation, basement and walls. If there is an old finish, it is removed and disposed of.
- The surfaces are cleaned from mildew, mold, dirt and fatty deposits. You can use a spatula, brush, trowel and thinner.
- Expansion and sealing of small cracks is being carried out. Depressions are closed, protruding fragments are knocked off or grinded.
- The base is treated with a deep penetration primer. The procedure must be repeated until the liquid ceases to be absorbed.
- The starting profile is fixed on the lower part of the wall. It is needed to set the correct laying direction and keep the slabs from slipping.
When preparing for thermal insulation from the inside, all activities are carried out in a similar sequence. The only difference is that you do not need to set a starting profile, since the floor of the room will be the support.
Polystyrene boards installation technology
It is recommended to carry out external insulation of buildings. Despite the fact that it is more difficult to do this and the appearance of the facade changes, there are much more advantages in such a solution. The main advantage is that the supporting structures will be protected from moisture, ultraviolet radiation, temperature changes, microorganisms, animals and birds. Thanks to this, the preserved base retains better and lasts longer. Such a disadvantage as a change in the appearance of the building can be compensated for by the use of modern finishes that imitate a wide variety of materials. Penoplex insulation technology involves sheathing the slabs with panels or covering them with plaster.
Sequence of work:
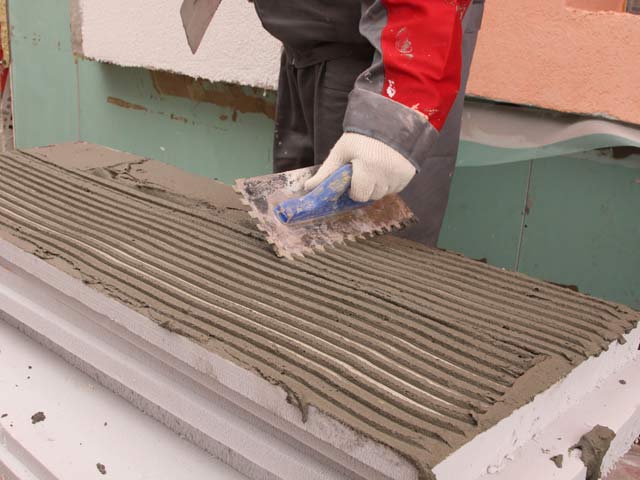
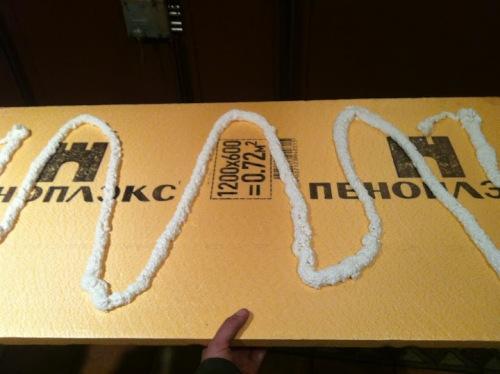
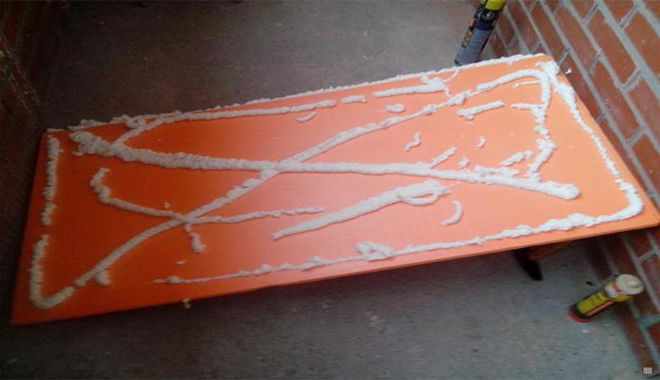
- Bonding the first row of boards. It starts from one of the corners and runs along the starting profile. You can smear the plates with adhesive over the entire area or at 5 points - in the center and in the corners. Since the surface of the material is smooth, the adhesive does not adhere well to it. To increase adhesion, the boards are processed with a float or wire brush. The glue must be applied so that it is also on the sides of each piece.
- Bonding subsequent rows. Each time, an offset is made by half of the sheet to avoid the appearance of cracks and cold bridges after the glue hardens. At the corners of the plate, it is necessary to output the protrusions to the thickness of the fragment in a checkerboard pattern. Elements of the top row are marked and cut to size.
- Checking the quality of joints. Small cracks are blown out with polyurethane foam, large ones are sealed with pieces of foam and glue. Excess material is removed with a spatula or cut with a knife flush with the surface.
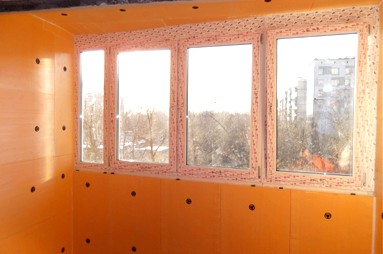
- If there is a balcony or loggia on the facade, the parapets of these structures are also insulated.The exception is non-glazed structures. Their fences can be sheathed with cladding material to match the overall background.
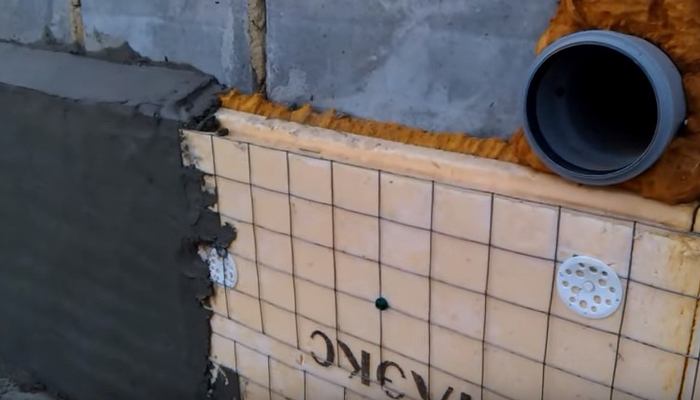
- Insulation fixation. It is performed with long dowels with wide caps. When working on concrete and brick, 5 holes are first made for each square - in the corners and in the center. Then dowels are hammered into them. It is recommended to use plastic products as they have a lower thermal conductivity. Fixation to wood is carried out with long self-tapping screws through drilling without preliminary drilling.
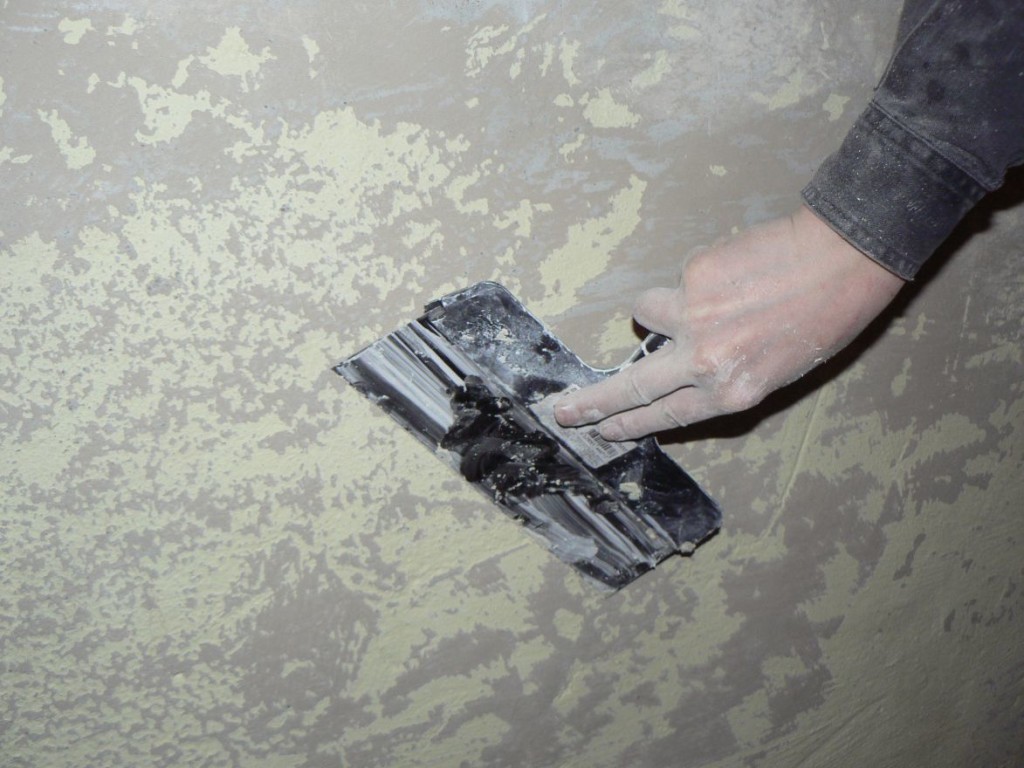
- Surface reinforcement. This procedure begins with priming. Then special plastic profiles are glued in the corners. The next step is to glue the plastic mesh. It must be fastened in strips from bottom to top, grabbing the previous strip by 10-15 cm. First, the solution is applied, and then the mesh is pressed into it with a roller.
If it is planned to apply insulation in 2 layers, the rows are shifted by half the size of the fragment horizontally and vertically. This technique will prevent the surface from cracking after the solution dries.
Laying the protective compound
On the trading floors, there is a large selection of finishing materials that differ in purpose, performance and cost. Considering that the decoration of the house is done for decades, you should choose the most expensive, high-quality and frost-resistant materials. To increase the protective properties of foam, it is recommended to buy mixtures with ball fillers. They will improve the thermal insulation of the building and allow thicker coating layers without increasing the weight of the entire structure. Light solutions with a thickness of 2 cm have a weight of up to 5 kg / m2. after complete drying. This allows you not to carry out expensive work to strengthen the foundation.
Step-by-step instructions for exterior finishing of reinforced slabs:
- Clean the base from dust and dirt deposited on it. Treat it with a primer. If the solution is immediately absorbed, repeat the procedure. Wait until the surface is completely dry.
- Prepare spatulas, a perforator with a mixer, a dielectric mat. Supply electricity. Equip a level platform for installing a stepladder. Wear gloves, goggles and a respirator.
- Knead the solution according to the manufacturer's instructions. It should be noted that there are no lumps in it. The consistency must be exactly maintained, since a too liquid mixture will flow down the wall, and a thick mixture will quickly harden and difficult to smooth out.
- Heat the glass, add it to the solution and mix well again. Such a technique will create a pleasant diffused glow of the facade, will not allow birds and insects to destroy it.
- Start plastering. The process is carried out from the bottom up to create a support against slipping of the newly applied layers. The thickness of the applied material should be at least 2 times thicker than the size of the filler, which is responsible for thermal conductivity or texture formation.
- Surface structuring. It is carried out in accordance with the intended pattern using a float, spatula or other device purchased for this purpose. Forming a decorative and protective layer, it is necessary to act continuously so that the coating turns out to be uniform and without errors.
- Painting of decorative and protective coatings. For this, a roller, brush or spray gun is used. An additional finish gives the surface extra strength and resistance to moisture.
Another option for applying a protective coating is to use panels made of steel, plastic, artificial stone and natural wood. First, boards are fixed to the walls in a vertical orientation. For ease of use, the distance between them is taken to be 100 cm - the width of the foam sheet. If a material of a different configuration is purchased, the lathing is adjusted to its dimensions.After priming, the slab surfaces are greased with glue and inserted into the cavities from bottom to top. By analogy with the "wet facade" technology, the gaps are sealed and the plates are fixed with hardware. Then a windproof film is stuffed onto the frame. The final stage is the sheathing of the lathing with metal siding or other protective coating of the selected texture.


