Insulation of the foundation of a wooden house is one of the construction stages that requires time and money. However, ignoring this phase of building construction is fraught with big problems in the very near future. To carry out this event, they hire specialists, but you can insulate the foundation of a wooden house from the outside with your own hands, saving a considerable amount. To do this, you should familiarize yourself with the characteristics of the materials available on the market and the technology for their installation.
The need to insulate the foundation of a wooden house from the outside
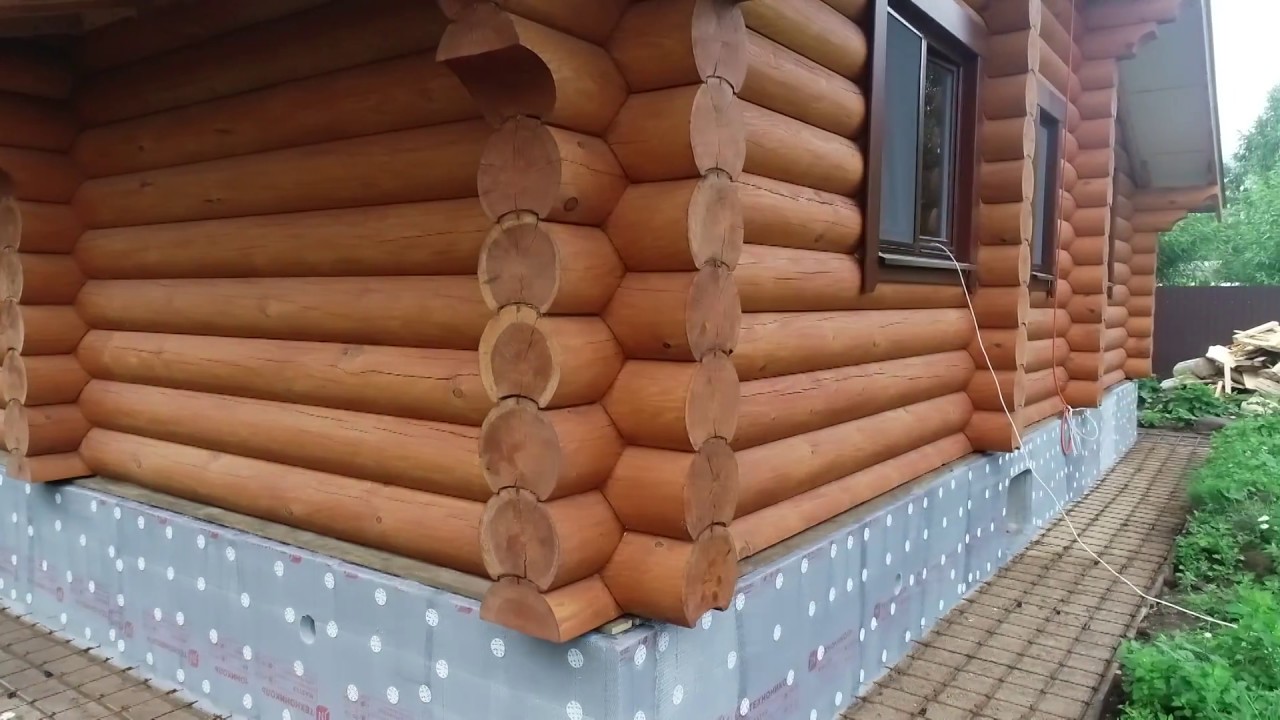
Compared to analogs made of concrete, brick and foam block, timber buildings are lightweight. This is a plus, since there is no need to equip a powerful and heavy foundation, which has a positive effect on the budget and construction time. But this is also the negative side of the issue. The shallow base is thin, freezes quickly and thaws just as quickly. It does not represent a reliable barrier against external influences.
Reasons for thermal insulation of the foundation:
- Reducing heat loss of the building. The floor and walls are insulated from the frozen ground.
- Bloating prevention. Some types of soil increase in volume due to the crystallization of water. Such a phenomenon is fraught with deformation of the house and the destruction of its foundation.
- Reducing the number of freeze and thaw cycles. Each material has a service life of 50 to 150 cycles. In just one winter, there can be up to 10 of them in the absence of thermal insulation.
- Protection against moisture, salts and alkalis contained in the soil. This helps to extend the service life of the structure. In addition, moisture does not penetrate into the wood, which is the cause of rotting and loss of strength.
- Creation and maintenance of a favorable indoor climate. The floors remain warm, there is no excess moisture, there are no prerequisites for the development of mold and mildew.
- Keeping communications in working order. This applies to water supply, heating and sewerage, which do not freeze even in severe frosts.
It is not too late to make thermal insulation even after construction is completed, but more time and effort will have to be spent.
Advantages and disadvantages
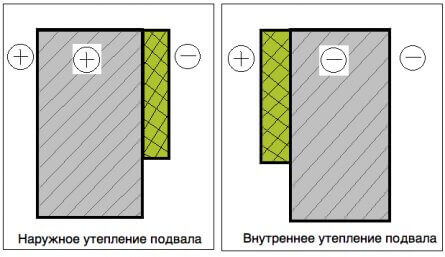
The base of the building can be insulated from the inside and outside. Each technology has its own characteristics, pros and cons.
The following advantages speak in favor of the external option:
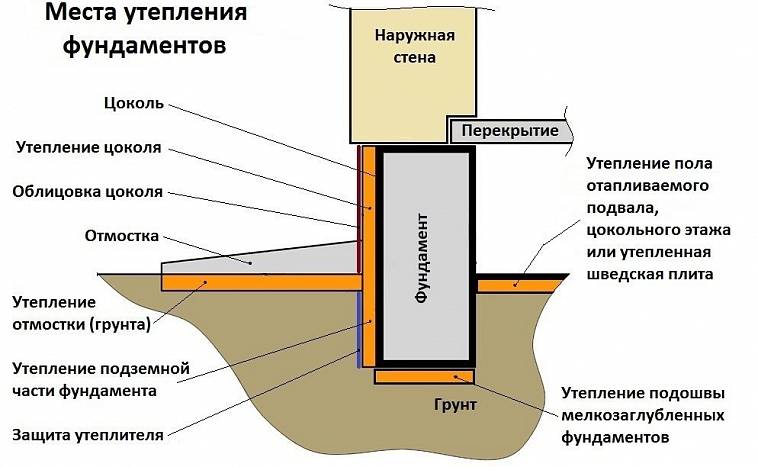
- Moving the dew point away from supporting structures. Condensation does not form on them, the presence of which is negative for all types of material.
- Preservation of the useful volume of the underground, garage, bath and other underground structures under the house.
- Lack of restrictions, cramped and inconvenient work. There is no need to organize lighting and ventilation for it.
- There is no need to waste time and money on finishing. It is enough to glue the insulation and waterproof it.
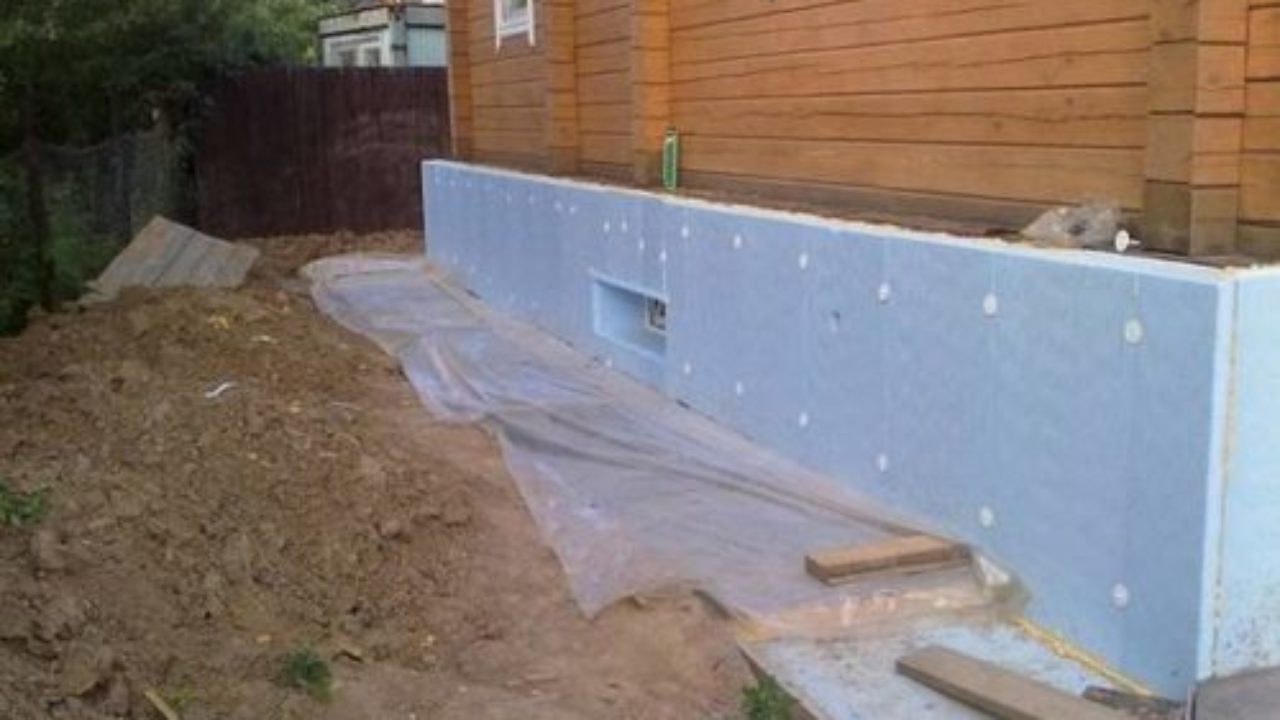
This solution also has disadvantages. The first is that you need to select materials that are resistant to moisture and pressure. The second drawback is that it is necessary to carry out additional excavation work, both for thermal insulation and to provide free space for installation.
The internal method has the following advantages:
- There are no restrictions on the time of insulation, which relate to the weather and season.
- The freedom to choose any material, as it will be protected from outside influences.
The disadvantages of the internal method include a reduction in base / plinth space, a shift of the dew point towards the base and the need for expensive finishing.
Thermal insulation materials
When choosing materials for thermal insulation, you should select products that are characterized by low thermal conductivity, durability, water resistance and lack of hygroscopicity.
Insulation options for the foundation:
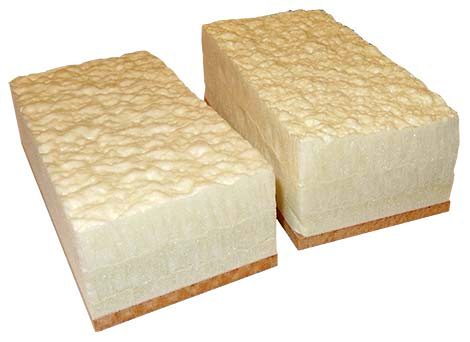
- Styrofoam. It is a slab of porous balls containing 98% air. The heat insulator has an affordable cost, is easy to handle and install. Low thermal conductivity provides reliable protection against temperature extremes.
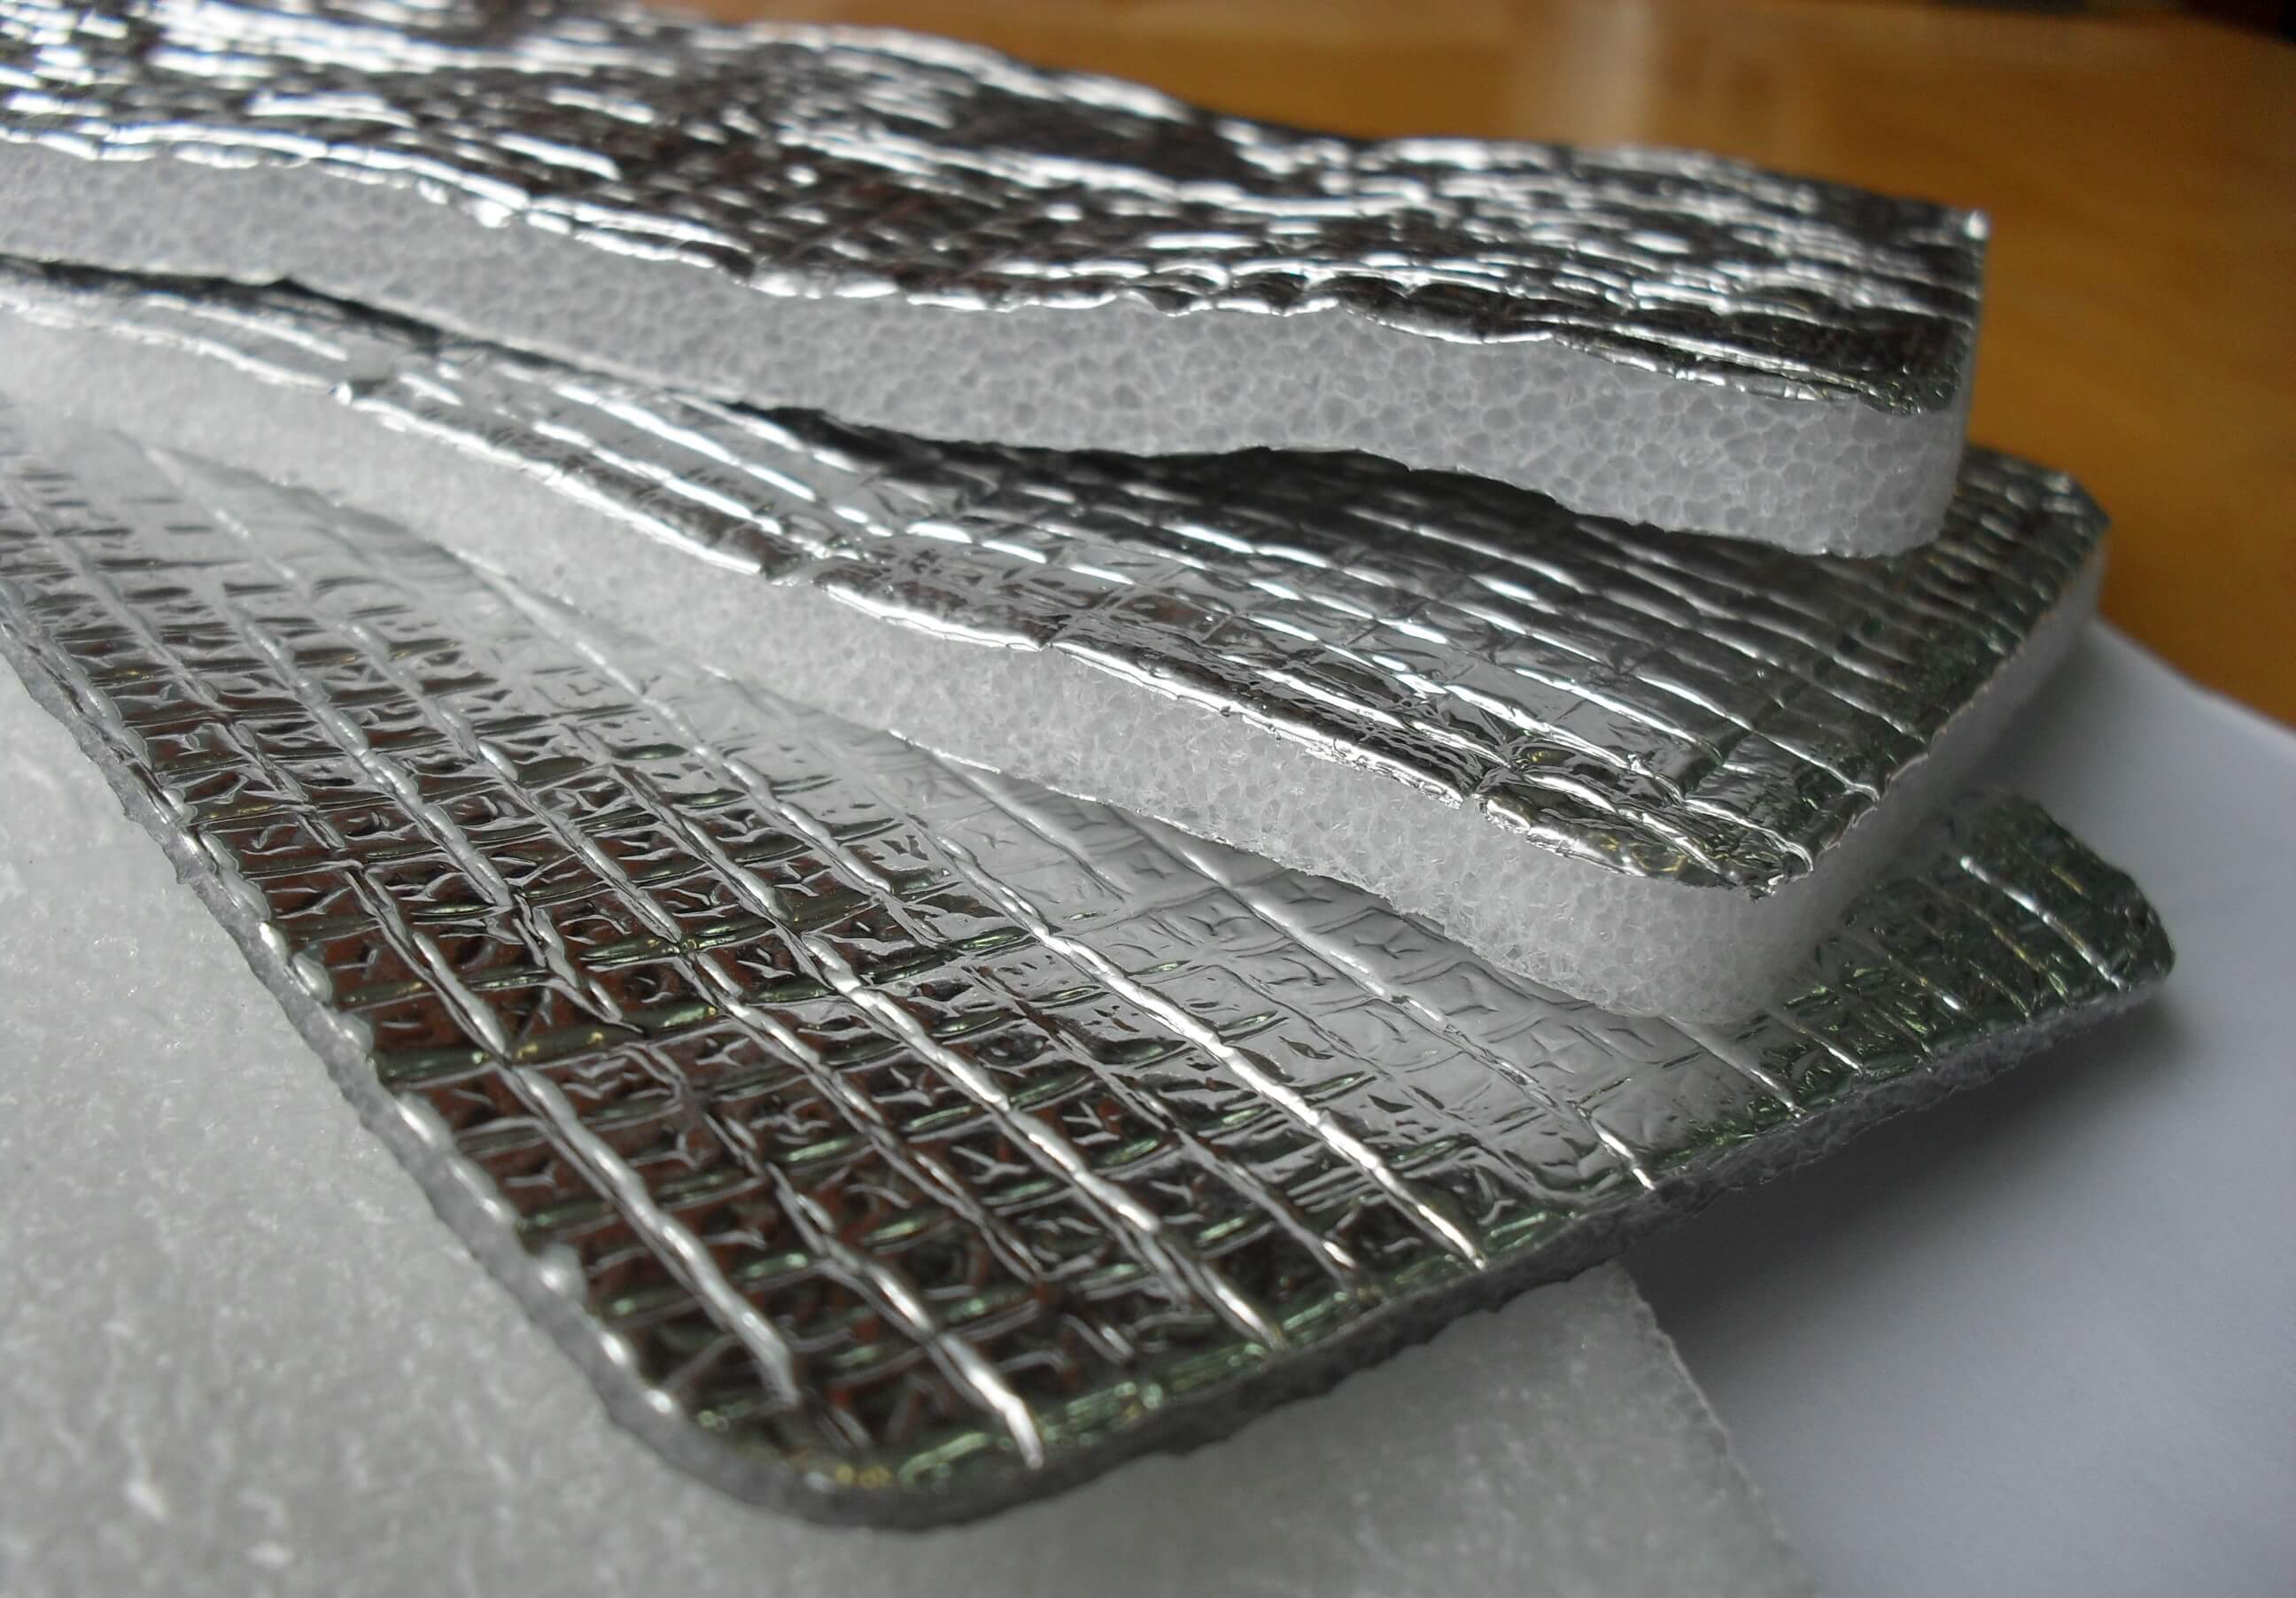
- Penoizol and penofol. It is made in the form of rolls, where the basis is polyethylene foam, enclosed between layers of aluminum foil. The small thickness of the material allows it to be used for interior and exterior decoration with minimal excavation.
- Polyurethane foam. The material has the lowest thermal conductivity, durability and environmental safety. It is produced in the form of plates up to 10 cm thick or sprayed onto the surface with a spray gun.
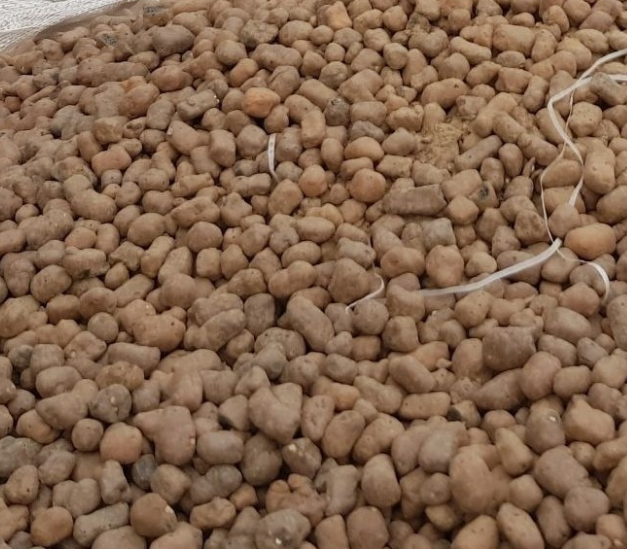
- Expanded clay. Vulcanized clay balls have excellent performance characteristics, but are hygroscopic and tend to shrink. Based on this, it is used in conjunction with cement mortar.
The choice of insulation is determined by the foundation material and soil properties.
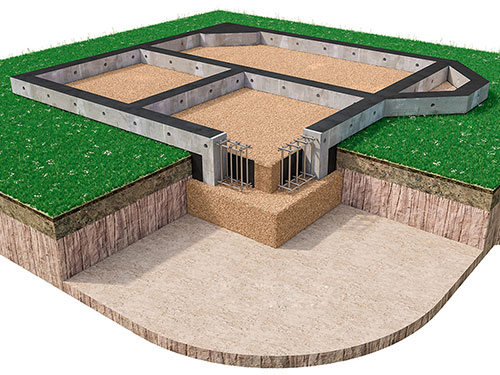
Types of foundations and methods of their insulation
Depending on the configuration of the foundations, various methods of insulating them can be used:
- Shallow. The main task is to protect from cold coming from the sides and bottom, since the structure is exposed to frost from all sides. Based on this, the foundation is pasted over with insulators from the inside and outside, and a thick stand of expanded clay is poured from below or polyurethane foam is laid.
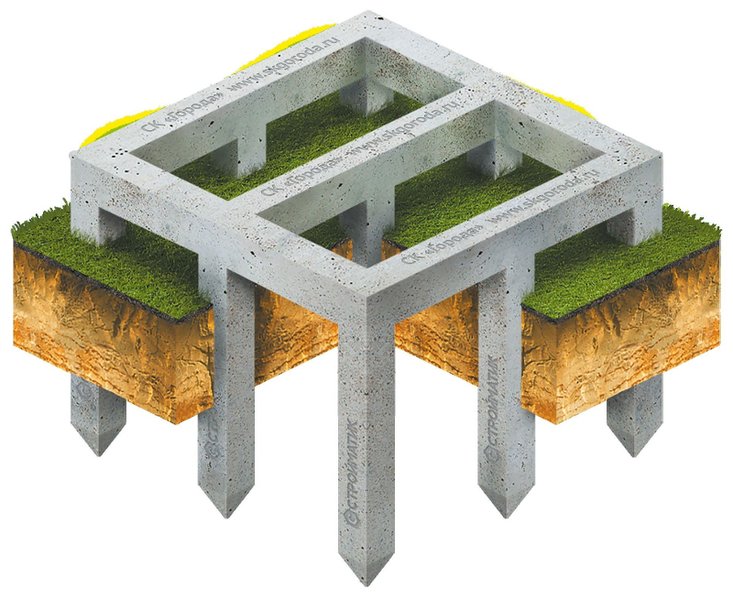
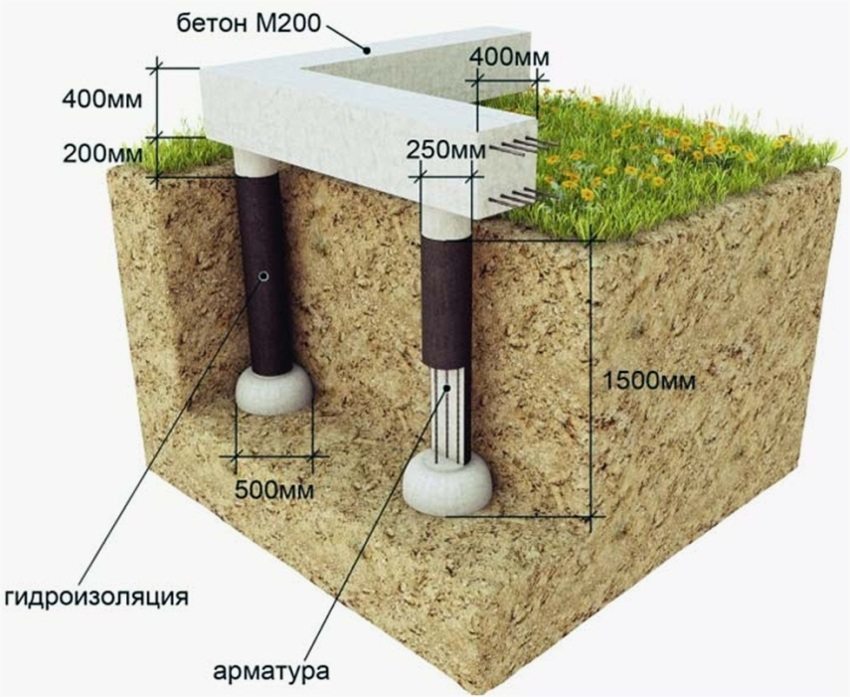
- Columnar. The supports carry an increased load, therefore they are laid at a greater depth. Warming is carried out from the freezing point to the very top. It is better to use slab material, which is glued to the supports in strips, and the joints are sealed with polyurethane foam.
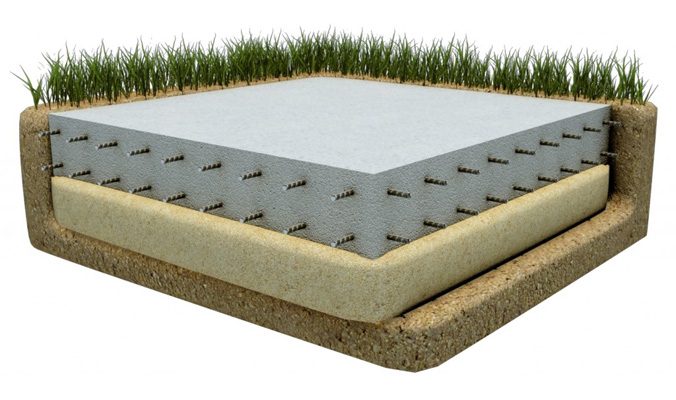
- Monolithic. Externally, the load-bearing plates can be insulated only at the stage of building a house. After its construction, the best solution is foam plastic 10 cm thick, poured over with a concrete screed.
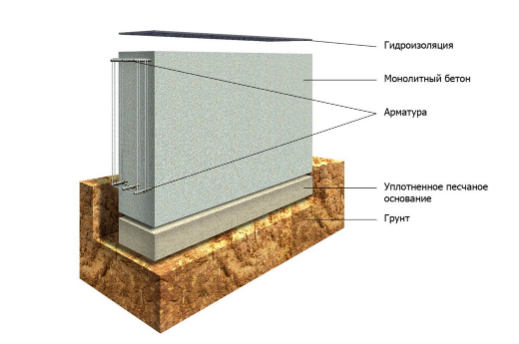
- Tape. Such foundations are laid below the level of freezing of the soil, so they are not afraid of heaving. It is advisable to carry out insulation from the outside by pasting polystyrene foam plates without screwing so as not to weaken the strength of the walls.
- Pile. The best option is pasting with penofol, followed by fixing with aluminum wire, mounting tape or improvised means.
In each case, you should choose the highest quality materials, in the last place focusing on their prices.
Stages of warming the foundation with your own hands
- Select the soil around the foundation if the work is carried out after the construction of the house.
- Clean surfaces from dirt, mold and grease.
- Remove unstable fragments, repair cracks and potholes.
- After the material has dried, treat it with a deep-penetrating primer or anti-corrosion agent.
- Waterproof the base.
- Fix the insulation in accordance with the method recommended by the manufacturer.
- If required, apply another layer of waterproofing or exterior finish.
Backfilling and tamping of the soil can be carried out only after the adhesives have completely solidified.


