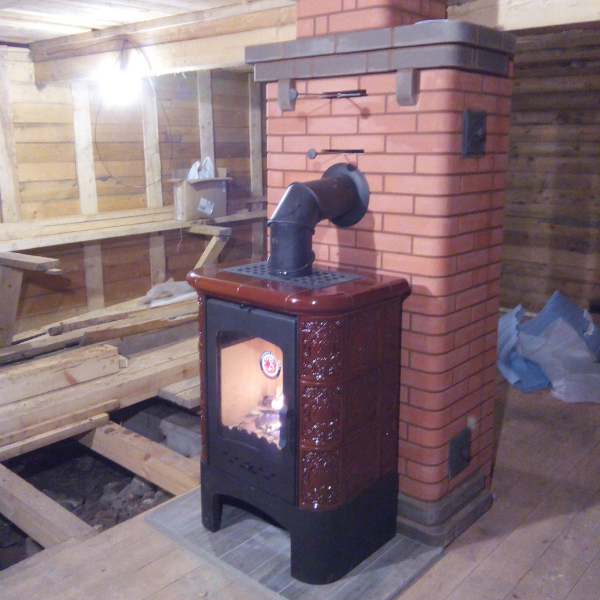
The iron stove provides quick heating of the room, but it has one significant drawback. The metal cools quickly. This problem can be solved by installing a heating shield. He will be responsible for the safe and efficient operation of the entire heating structure.
Heating plate device
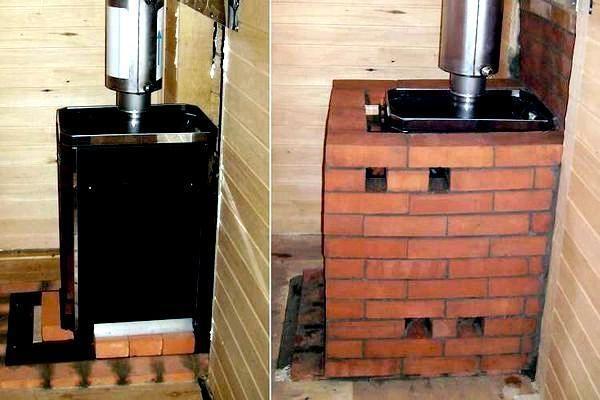
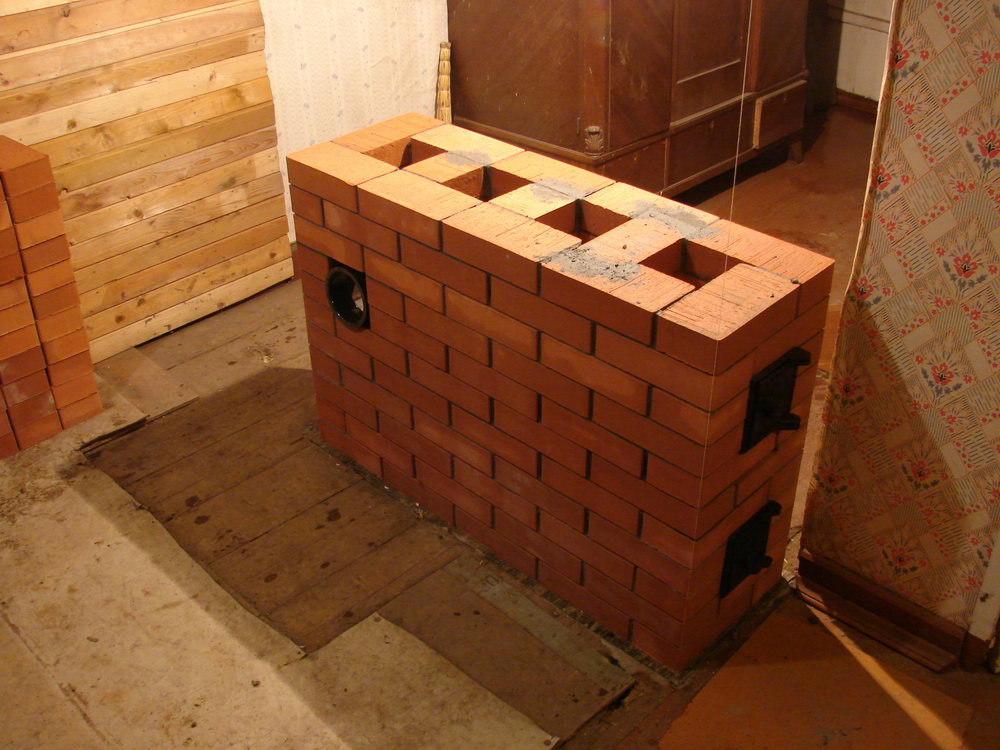
A brick heating plate for an iron stove is an additional extension, a heat exchanger. It is sometimes called a casing. This is a design with chimneys inside. An incandescent gas passes through them, while heating the walls. The brick will keep warm for a long time and heat the room. The installation of a heat shield increases the efficiency of the furnace. The device itself has the following advantages:
- the shield is easy to make on your own, this does not require special knowledge and skills;
- thanks to this design, the room heats up much faster;
- it remains warm for a long time.
Installing a heating shield on a metal stove brings it closer in properties to a brick one. The design is able to retain heat for a long time, thereby saving fuel.
Varieties and schemes
Heating shields are divided into two large groups:
- thin-walled;
- thick-walled.
The second option is laid out in ½ brick. This design meets the fire safety requirements as much as possible, but it has one feature: such a stove can warm up well if it is heated for a long time.
Thin-walled shields are laid out in a quarter of a brick. To ensure fire safety, it is recommended to additionally equip metal covers.
Depending on the season of use, the devices are divided into summer and winter. Summer options warm up only partially, winter ones - completely.
There are two types of shields, depending on the internal structure.
Duct
The flap circuit is a network of chimneys located vertically from each other. Before going outside, the smoke passes through all the channels, heating them.
Bell-type
Such a system is used as an extension to a furnace made of cast iron. The device is equipped with two cameras, which are located vertically. The gas will remain in them until it cools down completely. Only then does he go outside. Since hot smoke stays inside the structure for a long time, the shield heats up much more. The main advantage of such a system is the possibility of installing an additional valve. This way it will be possible to adjust the heating level.
The duct shields are easy to fold on their own, even beginners can handle them. Cap constructions can only be entrusted to professionals.
Masonry recommendations
To fold a brick shield for a metal stove in a bathhouse or house, you need to follow the recommendations:
- The mortar should only be clay-based. You cannot use cement.
- During masonry, immediately remove the remnants of the mixture from the inside of the structure.
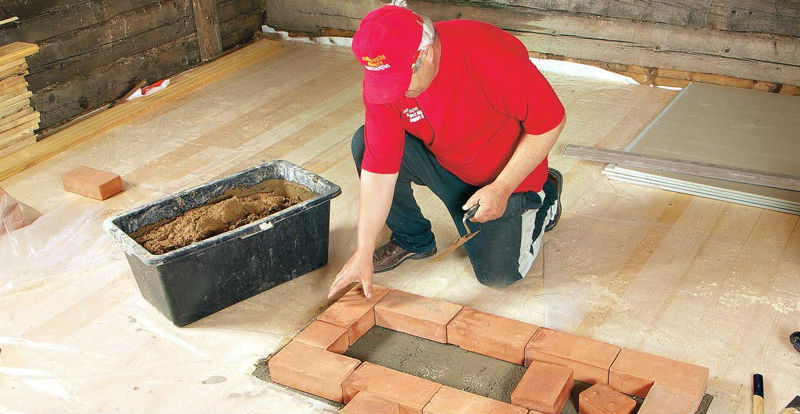
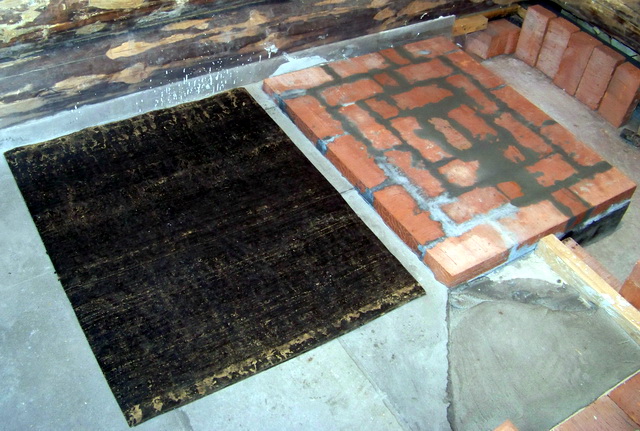
- Construction must begin with the installation of the foundation.It should be separate, not connected to the foundation of the house. First, the brick is laid dry to check the horizontal position. After checking all the parameters, the foundation is fixed with a solution.
- To limit the draft of smoke, you need to install a gate damper at the top of the structure.
The first two rows are laid out deaf, smoke channels are not made in them. This is necessary in accordance with fire safety requirements.
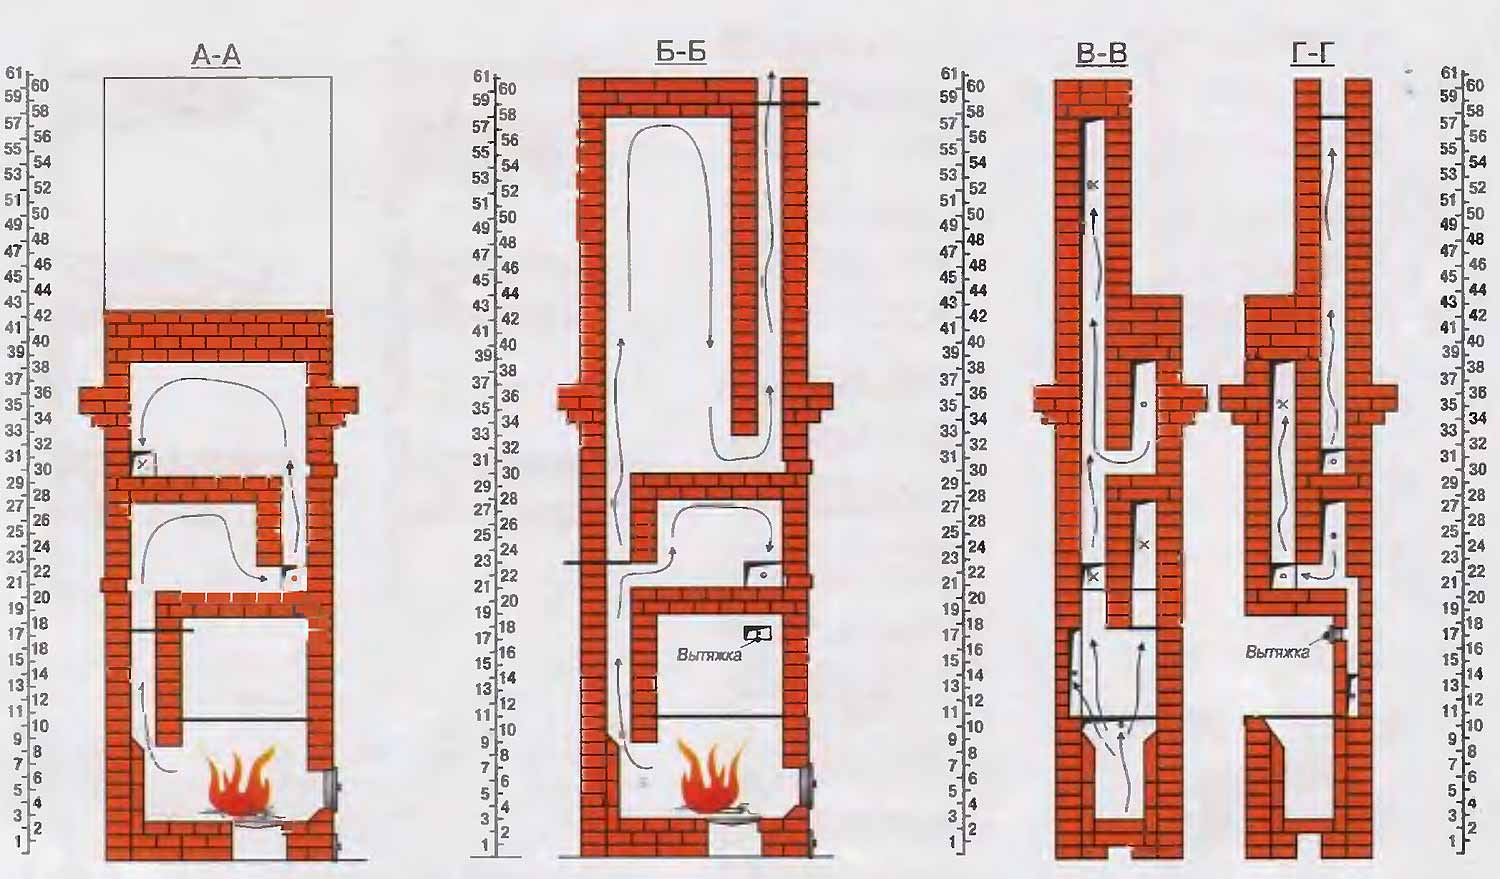
Ordering
The order of the bell-type heating shield is as follows:
- Rows one through three are laid out in the standard way. In the third row, it is necessary to leave an empty space in which the combustion door will be installed.
- On the fourth and fifth rows, a blower and a cleaning door are mounted, and two plugs are also installed here.
- In the sixth row, the number of channels begins to gradually decrease, a heating tank is installed.
- The seventh row is for mounting the grille. In order for it to be securely fixed, you need to cut off all the bricks that might get in the way. The channel is overlapped to further make two forks.
- The eighth row is designed for the installation of two doors.
- On the ninth and tenth, a steel strip insert is placed.
- The next stage is the implementation of door overlaps. From above, they should be greased with a clay solution.
- A cast iron plate is installed on the twelfth row.
- On the sixteenth tier, bricks need to be cut off in the area of the right corner, and on the nineteenth, a valve is installed.
- The twenty-second row is reserved for the installation of the shield and the samovar.
- For expansion on the thirty-first row, the bricks are shrinked, and at the next stage, a ventilation grill is installed.
The order in all cases is individual, but based on the same principles.
Installation Safety
The laying of shields for a metal stove is subject to increased requirements in the field of fire safety. The shield must be laid out on a separate foundation without fail. It is pre-waterproofed.
To eliminate the danger of fire, the first two rows are made deaf - there are no holes for smoke channels in them.
Before installing the structure, you need to make a fireproof finish. If the shield is adjacent to a wall made of flammable material, the partition must be separately laid out in a brick. If the material is non-combustible, the laying is done in half a brick. Particular attention is paid to the corner oven, here you need to make cuts between the wall and the structure on both sides. If the shield is thin-walled, it is recommended to cover it with metal sheets, since the wall heats up completely.
Making a heating shield with your own hands
You can fold the flap yourself. To do this, you will need to prepare the following tools:
- a tape measure for taking measurements that are necessary to calculate the area: based on the data obtained, the amount of material required for the work is determined;
- level with which you can control the masonry vertically and horizontally;
- plumb line and cord;
- a trowel for applying mortar;
- screwdriver, drill;
- angle grinder;
- tools for joining seams;
- diamond discs for cutting;
- containers for the preparation of a solution of sand and clay.
For masonry from materials, you need to purchase refractory bricks, sand and clay for the mixture. It is recommended to purchase 2 meters of roofing material for waterproofing.
Before starting work, you need to prepare about 300 bricks, five buckets of clean sand, the same amount of clay buckets. It needs to be cleaned of debris and dirt. Additionally, you will need three small doors, three smoke dampers, a grate. All these devices are necessary to clean the passages from soot and ash.
Before the start of laying out the main structure, a layer of brick is placed, which is covered with roofing material. It should not be higher than floor level. The next row should be at floor level. Further work goes as follows:
- After the foundation, there are the first three rows in accordance with the existing order. In the fourth and fifth rows, you need to make a small window through which you can clean the passages.
- In the sixth row, two channels are made, then the laying continues, relying on even and odd layers.
- In the seventeenth row, a valve is mounted in the structure, on the twenty-first a samovar is placed. It will be completely overlapped on layer 27, after which all channels on the left are merged together.
- On the thirtieth row, a valve is installed. Further work continues until the thirty-sixth row. It is necessary to leave gaps in it, which are called smoke or ventilation ducts.
If you lay out a shield for a stove, which will have its own firebox, the volume of materials will almost double.
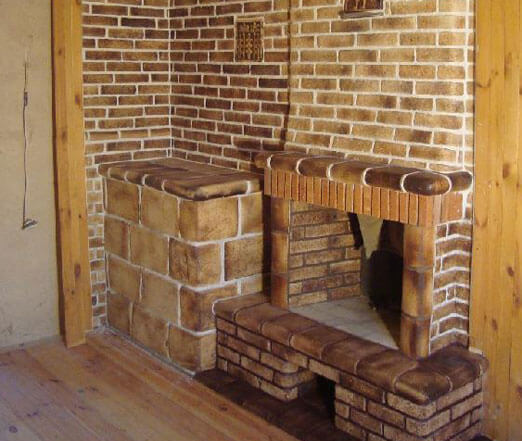
Heat shields will always remain popular despite the large assortment of modern fireplaces. The advantage of the design is that it accumulates heat and acts as a decorative element of the interior.
The brick shield very quickly accumulates and retains heat for a long time, unlike massive furnaces it takes up very little space. Corner structures are considered the most suitable for saving space. Such a shield will fit perfectly into a small room. It is easy to do it yourself, observing the principles of ordering.
Before choosing a design option, you need to draw up a separate project. It includes an accurate calculation of the amount of materials, the size of the room, the presence of insulation.
A heating brick shield, which is made according to all the rules and optimal parameters, will provide a good level of heating, and will cost much less than a large stove.


