Pouring underfloor heating is part of the installation process for floor-type heating structures. The implementation of this event must be treated no less responsibly than the design, choice of materials, installation and finishing. Neglect of the established rules and mistakes made can negatively affect the efficiency of the system, become the causes of emergencies with large material costs. Pouring a warm water floor can be done by hand, saving on the services of professionals. To make the screed even and strong, you need to adhere to the technology for performing each stage of the work.
Temperature gaps
When pouring and in the process of hardening, the concrete is in a cold state. Like any solid material, when heated, the plate expands, increasing in area by 0.5-1%, depending on the temperature of the heater underneath. If the screed rests directly on the walls, when the heating is turned on, it can crack or deform the supporting structures of the house. Both are highly undesirable and even dangerous.
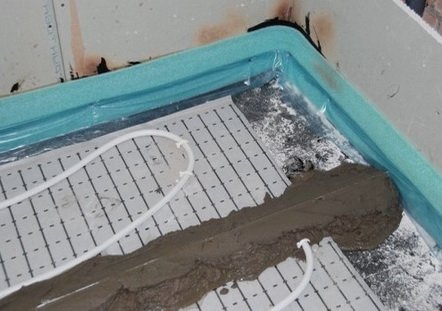
In order to exclude the development of such events, the creation of expansion joints is provided in advance. Their purpose is to provide thermal expansion of the material without losing the integrity of its surface. A damping tape with a thickness of 4 mm or more is best suited for this. A product made of PVC or foamed polyethylene is selected. These materials are water-resistant, resilient, flexible and durable. The damper tape is laid along the perimeter of the room. It is advisable to choose a material with a cross-section in the form of the letter "G", so that it is convenient to attach it to the surface. If one of the sides of the room exceeds 6 meters, each such section is divided into 2-3 sectors. For this, a damper tape already with a T-shaped section is used. The height of the spacers should correspond to the projected screed thickness and be 1-2 cm larger.
In addition to compensating for the expansion of the slab, the gaskets perform the function of waterproofing. If a leak occurs in the kitchen or bathroom, the water will remain inside the premises and will not flood the downstairs neighbors. This is another reason for the correct arrangement of expansion joints.
Preparatory work before pouring

Pour a warm water floor on a well-prepared base. It should be smooth, firm and airtight. The last requirement is especially important, since even the slightest probability of contour rupture cannot be ruled out.
Preparatory work before pouring includes the following activities:
- Removal of furniture, plumbing fixtures and household appliances from the premises.
- Removal of old finishes (self-leveling composition, ceramic tiles). This must be done in order to reduce the weight of the final structure and to prevent it from rising above the threshold. In addition, dismantling the base and cladding will allow access to the floor slab.
- General cleaning of the room. Grinding off strongly protruding fragments, removing construction debris and dust. If there are deep holes or cracks, they must be sealed with sealant.Pay special attention to the bottom corners.
- Treatment of a concrete slab with a deep penetration primer. The procedure must be performed several times until the liquid ceases to be absorbed.
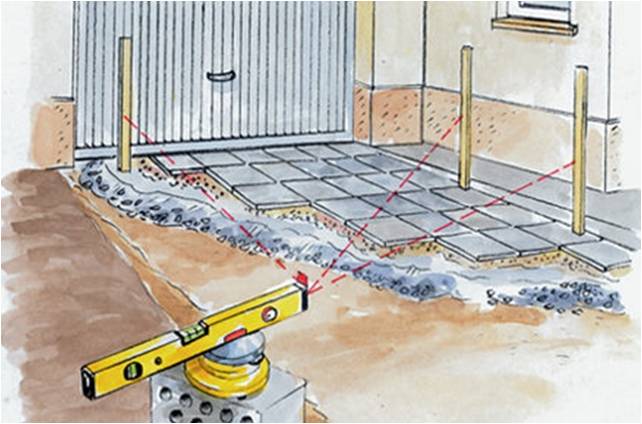
- Measuring the curvature of the slab using a level. Exposing lighthouses. The calculation must be done so that the elevation of the rough screed is 2 cm above the highest angle.
- Putty on the bottom of the wall. It is leveled and primed so that the damper tape can be installed evenly.
- Making a rough screed. In order not to make the structure heavier, light gypsum-based mixtures are selected. There is no need to worry about the strength, since the fill will not experience a bearing load. The mixture is poured and leveled according to the rule of the beacons. The permissible accuracy is no more than 5 mm of the level difference over the area of the room. After leveling the mortar, it is rolled with a needle roller to remove air bubbles.
- Waterproofing. Lubricating or roll materials are used. If a film is used, it is laid so that the edges overlap the walls by 20 cm, and the strips are superimposed on each other by 15-20 cm. The joints are glued with aluminum tape.
- Installation of a heat-insulating layer. The best option is to use foam or extruded polystyrene foam. The slabs are cut to size and stacked in staggered rows. Fastening is carried out with glue. The slots are blown out with foam, the joints are glued with an assembly mesh. If possible, it is better to use molded blocks in which channels are already made for laying pipes or heating cables.
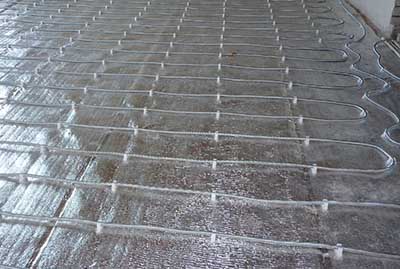
- Surface reinforcement. A polymer mesh is used, which is firmly fixed to the insulation. Fixation is done with staples or silicone using a glue gun.
- Laying heating elements. The procedure is carried out according to a previously drawn up scheme, taking into account the location of furniture and household appliances in the apartment. The nuance is that the contours must be firmly fixed on the base so that they do not float, since the concrete solution has a high density and specific gravity.
- Manufacturing, laying and fixing of a steel frame from reinforcement. The lattice should be 1.5-2 cm from the future surface. It is better to connect the rods with a plastic tie or copper wire. Welding damages the metal surface. The resulting rust tends to expand and tear the concrete.
After that, the installation of the collector, thermostats and other necessary equipment is carried out.
Tools and building materials for pouring
Floor contours can be filled with any cement-based mortar. The presence of this substance is necessary due to its strength, water resistance and high thermal conductivity. If gypsum mixtures are used, they will reduce the heating effect by absorbing the energy released by the circuit. It is recommended to use plasticizers, which make the mortar stronger, more elastic and viscous, which ensures that all irregularities are filled and an even smooth surface is obtained. The following tools are required:
- oil or laser level;
- puncher for making holes in concrete;
- mixer for mixing solutions;
- long rule;
- scissors, stationery knife;
- hacksaw for metal;
- hammer, chisel;
- wide steel spatulas;
- container for the preparation of mixtures;
- tape measure, square, miter box, marker.
The work is dirty and dusty, using electric tools. It should be performed with goggles, gloves, rubber boots and a respirator. To exclude electric shock, you need to use devices in which there is a ground terminal on the plug and in the sockets. To make cleaning after installation take less time and effort, it is worth renting an industrial vacuum cleaner.
From building materials, you need to purchase:
- damper tape;
- insulation (penofol, polystyrene, expanded polystyrene);
- polyethylene film;
- mounting grid;
- beacon profiles or dimes;
- screws, staples;
- aluminum tape;
- cement, sand, granite screenings;
- fiber;
- plasticizers;
- nylon ties;
- shields for walking along the contours during work.
When planning work, you need to initially decide what concrete and mortar are, what are the differences between them, the pros and cons of each material. The mortar is made from sand, cement and various additives.
Filling with a solution is carried out by wet and semi-dry methods:
- The wet method is the easiest to implement, since the solution contains a large percentage of water, it is easily distributed over the base and is easily leveled. The downside is that the plate shrinks a little and does not have sufficient strength.
- The dry method involves preparing a thick mixture that is difficult to drag across the floor and shape. The effort is worth it, since the board is strong and without shrinkage. Thanks to this technology, the pouring can be made thinner, reducing construction costs and pressure on the building's supporting structures.
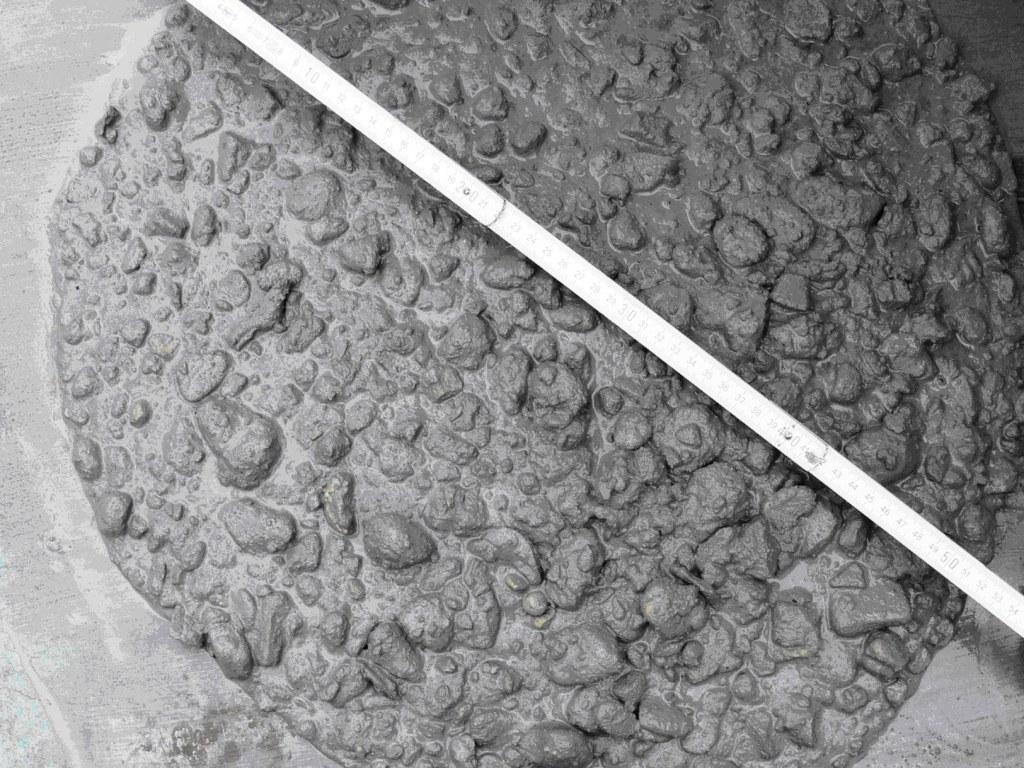
Half of the concrete volume is occupied by fine crushed stone with a fraction of 3-8 mm. The edges of the stones are sharp and uneven, due to which a reliable adhesion to the cement is achieved. The chipped edges prevent the stones from moving vertically and horizontally. Pouring from concrete is much stronger than from grout. The downside is that mixing by hand is very difficult, you have to rent a portable concrete mixer, and this is an extra cost.
Underfloor heating technology
Having decided on the technology and materials, you can proceed to the most responsible and laborious stage of repair - filling the contour with cement mortar.
This procedure has the following features:
- It must be performed continuously, so that each new portion is added before the previous one grabs. Otherwise, delamination will occur, in this place the plate will crack. This situation is fraught with damage to the finish and rupture of the heating circuit.
- The total load per square meter should not exceed the standards in force for this type of structure. Excessive weight can negatively affect walls and foundations.
- The thickness of the poured slab should not be less than two outer diameters of the contour contained in it. It is recommended to make a screed in the range of 3-5 cm depending on the composition of the mixture.
- After pouring the solution, you need to stand for 3-4 hours and cover it with plastic wrap to ensure uniform solidification of the mixture throughout the entire volume. So that the upper layer does not dry faster than the lower one, it must be moistened with water daily.
- For the arrangement of water floors in residential premises, it is recommended to use a solution of the M200 brand. The material has sufficient strength and relatively low weight.
- You need to work with the solution at room temperature. In the cold, it becomes viscous, it is difficult to work with it, there is a possibility of the formation of voids and incomplete filling of the frame. In extreme heat, the mixture quickly sets and cracks.
After taking into account all the features of the process, you can proceed to its practical stage.
Screed arrangement technology
To properly fill the warm floor, you need to correctly and consistently perform the following manipulations:
- Carry out the purchase of the necessary materials, if necessary, rent construction equipment. Check the readiness of tools, equipment and equipment.
- Set up beacons.You can make them from cement or gypsum, install factory materials or fix the guides from a profile pipe. This method is the most reliable, although it takes longer, since after the solution has solidified, the pipes must be removed, and the remaining grooves must be sealed with mortar.
- Fix the damper tape according to the diagram. If it does not hold well, use glue or nails to fix it.
- Lay pre-prepared shields on the contour. They need to be placed over the entire area of the room, except for the one that will be covered with a solution. This technique will eliminate the possibility of damage to the system in case of unsuccessful movement or accidental fall.
- Prepare buckets, shovel and rule. Start mixing the solution. First, sand and cement are mixed in it, then water and crushed stone are added. Plasticizers are added last, as some of them tend to foam. After 5-7 minutes, you need to stop and wait for a pause of 8-10 minutes. This is necessary to soften all the lumps not soaked in water.
- Stir the solution again to break up the stuck together fragments. 3-5 minutes are enough this time.
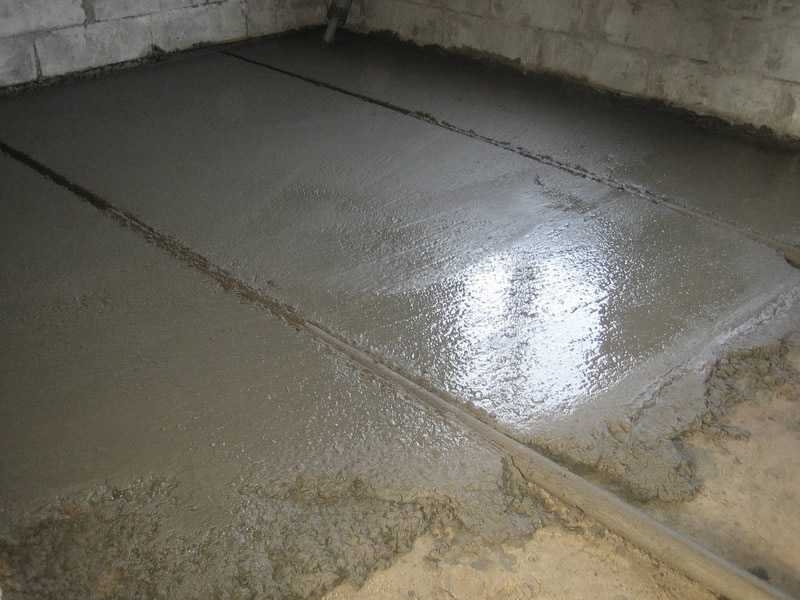
- Pour the mixture as close to the corner farthest from the front door as possible. Smooth it out with a spatula and, as a rule, flush with the beacons or guides.
- Repeat the procedure, pouring the mortar towards the wall, leveling it. If grooves remain, they must be immediately filled with the next batch and repaired.
- After the mixture has hardened, remove the guides and eliminate defects if they remain after pouring. Treat the surface with an antiseptic and a primer.
The final step is to install the topcoat. Usually they are tiles. For a living room, you can choose linoleum without a warm backing.


