High-quality thermal insulation makes the house comfortable and cozy, and reduces heating costs. When choosing insulation with suitable performance characteristics, many buyers prefer penoplex. It reliably protects against cold, safe for health, easy to install. It is important for apartment residents to know whether it is possible to insulate with foam inside the premises. According to building codes, this is allowed, the main thing is to observe the technology of installing thermal insulation.
Penoplex characteristics
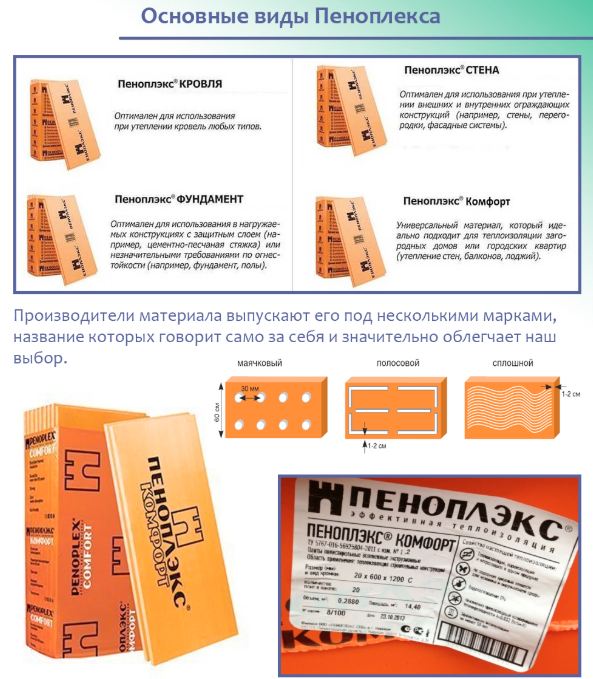
Extruded polystyrene foam (EPS) or penoplex is a Russian-made insulation. Thermal insulation material is made on the basis of synthetic raw materials by extrusion. The molten composition is pressed through the holes, then molded. The production technology ensures the density and closed structure of the cells of the material. Manufacturers offer 4 types of extruded polystyrene foam, differing in properties and purpose:
- Roof - material for thermal insulation of all types of roofs.
- Wall - slabs for insulation of external and internal enclosing structures.
- Comfort is a universal insulation for interior work.
- Foundation - products with high density for loaded areas, used under the screed.
Plates are of the same orange color, but have external design features. Stripes are applied to the wall material to improve adhesion to the substrate. Insulation Comfort has an L-shaped edge, which reduces heat loss at the seams.
Main characteristics of EPS:
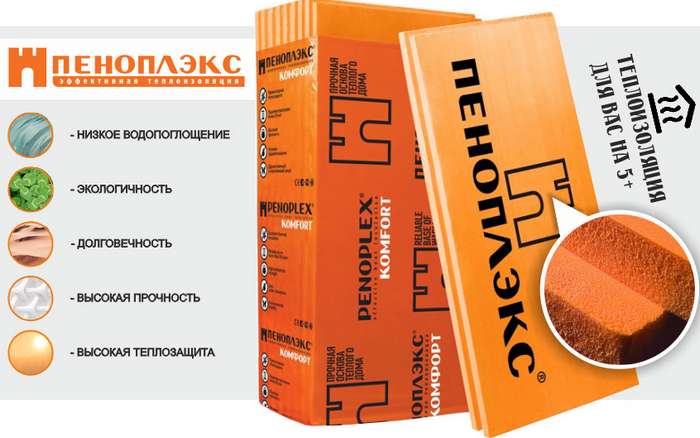
- The dense structure of the slabs provides low water absorption - up to 0.5% in 28 days.
- The thermal conductivity coefficient of 0.03 remains unchanged throughout the entire period of operation.
- Low vapor permeability - 0.007-0.008, the material does not allow water vapor to pass through.
- Sound insulation when using a 50 mm thick slab is 41 dB.
- Service life 50 years.
- Flammability class - G1-G4. Insulation used for interior and exterior decoration is made with the addition of fire retardants. Foundation materials are not protected against fire.
- Working temperature from -50 to + 75 ° C. Penoplex is not used in areas where the temperature may rise above 80 ° C.
EPPS has no harmful emissions. When using the material, you do not have to worry about the negative impact of thermal insulation on the health and well-being of people. It does not cause allergies or other negative reactions. The material is not affected by mold and mildew. The shape of the insulation makes it easy to calculate the material, it is convenient for installation. Plates are easily cut with a construction knife, do not crumble.
Pros and cons of the material
Penoplex is a synthetic material made of polystyrene. It is produced in slabs of 600 × 1200 mm in various thicknesses. There are 5 types of penoplex: 31, 31C, 35, 45 and 45C. They have different densities and strengths, while the thermal conductivity remains unchanged. The indicator is not affected by the level of humidity or temperature. This is the main plus of the insulation. In addition to excellent insulating properties, other advantages of EPS can be distinguished:
- The material is resistant to biological effects, freezing and temperature fluctuations.
- Plates have high strength indicators, withstand significant loads.
- Ease of installation allows you to carry out insulation of walls with foam inside the house with your own hands.
- Extruded polystyrene foam is not afraid of the effects of chemical compounds - bitumen, cement mortar, lime, plaster.
- Penoplex insulation for walls inside houses is environmentally friendly.
- The minimum water absorption rate allows the material to be used in high humidity conditions without additional waterproofing.
- EPPS protects against cold and prevents noise propagation. The porous structure makes it a good sound insulator.
- The insulation has a long service life, at least 50 years. The specified parameter is not a limit, the material does not deteriorate even after half a century.
- The small weight of the slabs does not make the structure heavier, simplifies transportation and unloading.
The disadvantages of the insulation are:
- Low UV resistance. Even during storage, the boards need protection. They are sold packed in plastic wrap. When using foam for thermal insulation of buildings, the outside must be finished.
- Extruded polystyrene foam is damaged by solvents, petroleum products, oil paints.
- Some brands of insulation have a G4 flammability class, which means low fire safety. It is not necessary to insulate ceilings with penoplex with high flammability, it is better to pay extra for material with the addition of fire retardants.
- The smooth surface of the boards has low adhesion, which makes it difficult to install on the ceiling and walls.
The cost of foam is higher than foam and mineral wool. But the excellent performance of the material has made it popular as an insulation material.
Application area
- insulation of swimming pools, utilities, wells, storage tanks;
- insulation of the foundation and blind areas of private houses;
- use for a flat roof with reinforced concrete slabs for roll roofing;
- thermal insulation of a pitched roof, attic, attic, balcony or loggia;
- insulation of the ceiling with penoplex, as well as the floor and partitions;
- insulation of walls of residential buildings, garages, warehouses, industrial facilities;
- used in the construction of an airfield runway.
Before purchasing the material, it is necessary to check the certificates of conformity. Conscientious manufacturers always supply products with the necessary documents. Their absence indicates the low quality of the goods. Such insulation is made in violation of the norms and GOSTs.
Sequence of work
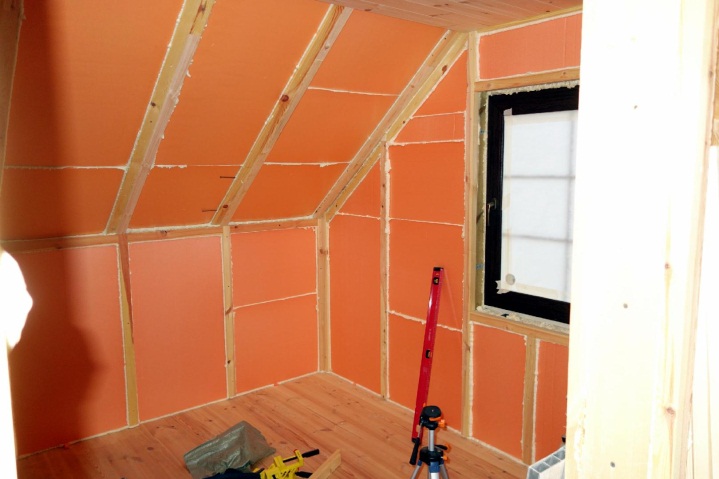
Thermal insulation of a house, garage or bath is an objective necessity. After installing the insulation, heating costs are reduced, and the room temperature remains stable. Outside placement of the insulator avoids condensation, dampness problems and reduced space.
It is not always possible to insulate a panel or frame house from the outside. Residents have to insulate the walls of the house with foam from the inside. The material is suitable for interior work by its properties. To do the work, you can hire builders or do the installation of plates and finishing the apartment yourself.
Preparatory activities
At the preparation stage, the necessary materials are purchased. To complete the work you will need:
- Plates of penoplex in the estimated amount, plus a small margin for trimming.
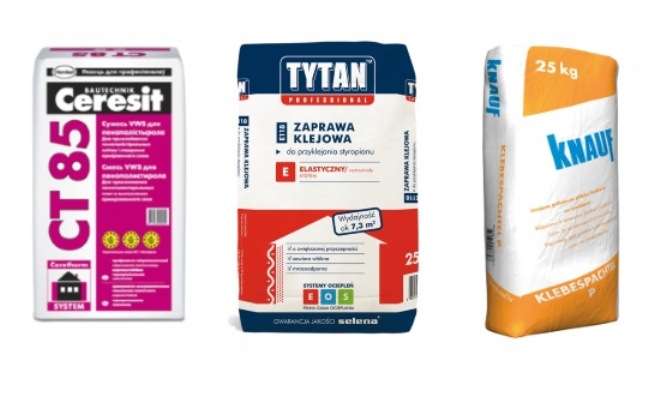
- Special adhesive for extruded polystyrene foam, sold as a dry mix.
- Construction film for insulating joints between slabs.
- Fiberglass reinforcing mesh for plastering.
- Plastic disc dowels for fixing the insulation - 5 pieces per plate.
- Dry plaster mix.
- Finishing materials - drywall, lining.
When insulating concrete and brick walls, a vapor barrier is required. For high-quality surface preparation, a primer is purchased. If finishing with drywall sheets is provided, you need to buy wooden slats or a metal profile to collect the frame.
Instruments

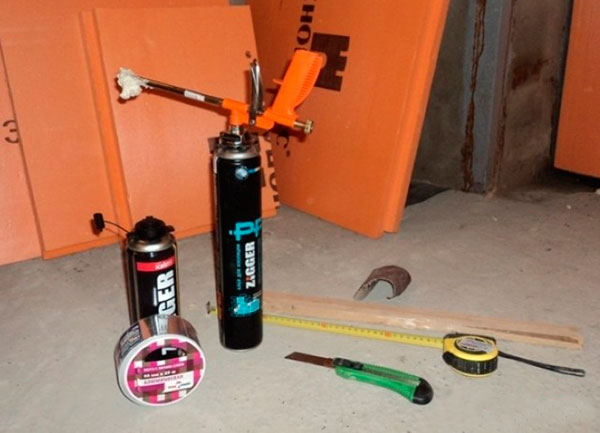
At the stage of preparatory work, the necessary tools are collected:
- drill with mixer attachment;
- hacksaw;
- a grater with emery paper or a needle roller;
- building level (bubble, laser);
- a hammer;
- puncher;
- notched trowel.
In order to mount the slabs to the ceiling, it is recommended to install scaffolding.
Surface leveling
Before starting repair work, it is necessary to prepare the surface of the walls and ceiling for fixing the insulation. To improve adhesion, remove the remnants of the cement mortar, the old finish. The structure is cleaned of dust and dirt. The level will check the plane of the base. If slopes are marked, leveling with plaster is necessary. Cracks and holes in the wall are also filled with putty mortar. Thermal insulation is started after the solution has dried.
The prepared surface is treated with a primer. The composition penetrates into layers of plaster, preventing the development of mold. Also, the primer improves the adhesion of the insulation to the walls and flow. After the composition has dried, the main work begins.
Insulation installation
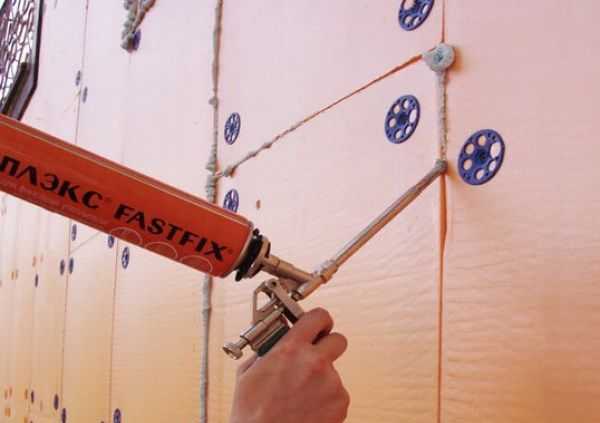
Penoplex plates are laid on the insulated surface using glue or combined technology. In the second case, they are additionally fixed with disc dowels. To fix the plates, a special glue is used, which is diluted before starting work. The surface of the foam is passed with a grater or a needle roller to reduce the smoothness. The solution is applied to it with a notched trowel. Depending on the scale of the surface to be insulated, the glue is distributed over the entire plate or along the perimeter and middle.
The insulation is mounted using a frame or frameless method. A frame made of wooden blocks or special guides is assembled under drywall or wooden lining. Installation begins with marking the ceiling, then the lines are transferred to the walls. The guides are fastened with a pitch of 600 mm - this is the width of the foam boards. When using wooden blocks, the material is pre-treated with an antiseptic. The heat insulator will fit snugly between the crate. The frameless method is less costly and time consuming. The finishing material is attached directly to the insulation.
On the walls
Penoplex installation technology depends on the material of the walls. For concrete structures that do not have external insulation, it is recommended to use a vapor barrier. Freezing of the walls will cause condensation and constant dampness. This problem does not arise in wooden houses.
Insulation starts from the bottom corner. In each next row, it is advisable to shift the plates by half the width. Staggered installation reduces the length of the seams. Fastening to the wall takes place using various compounds:
- Bituminous mastic - used as a fixer and waterproofing in rooms with high humidity.
- Cement based mineral adhesive is the most common option. The composition hardens quickly, so it is mixed in small portions. Thorough mixing is required until the solution is homogeneous.
- Polyurethane glue in cans - easy to use, one package is enough for 12-15 sq. m.
- Polyurethane foam - a universal composition will provide reliable adhesion to brick, concrete, aerated concrete. The foam dries quickly and creates a tight seam.
Penoplex with applied glue is firmly pressed against the wall and held for 40-60 seconds. Plates for reliability are fixed with 5 dowels, fasteners are hammered in the corners and in the center.
To get a flat surface, a bubble level is periodically applied to the thermal insulation. By increasing or decreasing the adhesive layer, you can adjust the plane.
The gaps between the penoplex are filled with foam. After drying, the protruding parts are cut off. When warming with the frame method, the plates are laid in a similar way.
To the ceiling
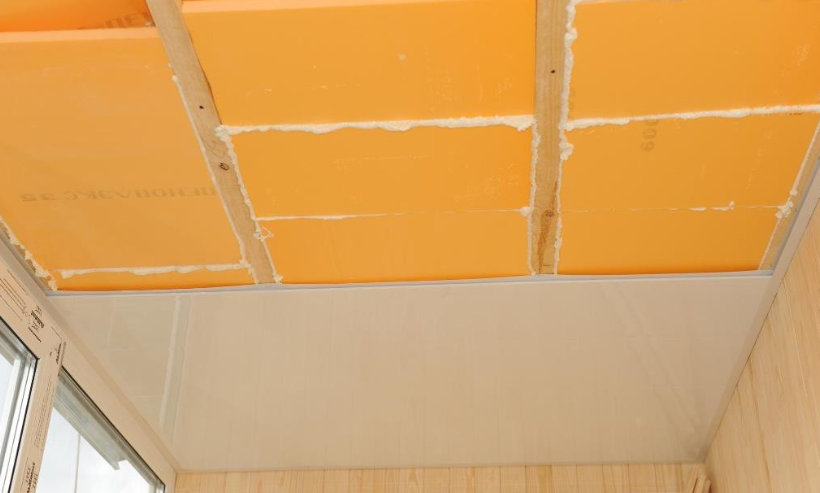
Ceiling insulation is carried out from the inside or outside. In a private house, to reduce heat loss, penoplex is laid on the floor of the attic. Fixation takes place on an adhesive composition. On top of the heat insulator, boards are attached to the crate. There is no such possibility in apartments, so the insulation is done from the inside. The surface is prepared in the same way as the walls - it is cleaned, leveled and primed.
Glue is applied to the surface of the slabs, then they are firmly pressed against the ceiling. Fixing with dowels securely fixes the insulation. If a frame is provided, the penoplex is laid between the guides. All seams are filled with construction foam.
Finishing
After the glue solution has completely dried, proceed to the final finishing. The first step is to apply reinforcing plaster. This will require a putty, you can use a mineral adhesive. A reinforcing mesh is laid on a layer of wet mortar. On top of it, another layer is applied with a thickness of up to 3 mm. After drying, the finishing putty remains, which is the basis for tiling or wallpapering.
If plasterboard installation is provided, plastering is not required. After the glue dries, the gypsum board sheets are screwed to the frame with self-tapping screws, the fixing step is 30 cm. The joints of the sheets and the places where the caps of the self-tapping screws are recessed are putty using a reinforcing tape. The finishing gypsum putty is applied in a thin layer and carefully sanded. The final stage is wallpapering.
The excellent heat and sound insulation properties of foam made it a popular insulation. The material is safe for health, so it can be used for interior work. Simplicity and speed of installation allow you to do the job on your own.


