The transfer of the heating radiator to the loggia is carried out when it is necessary to insulate the space when expanding bedrooms, halls or kitchens. This will provide a more comfortable microclimate in the house and reduce heat loss with the arrival of cold weather. However, this is not an easy task. First, you need to correctly calculate and design everything, then approve it by the specialists of the service organizations.
The nuances of removing the radiator to the balcony
At the design stage of a residential building, many criteria are taken into account: the operating temperature of the coolant and the number of batteries installed in the house, the in-system pressure. As soon as an additional battery is installed in the loggia, the pressure in the closed circuit and the temperature of the coolant drop.
If the project has 100 radiators installed, and there will be 101, the changes will be invisible. But if the majority of homeowners decide to move the radiators to the balcony, the temperature in apartments in winter will be several degrees lower. Therefore, it is difficult to obtain a special permit to carry out these works.
If the temperature in the loggia drops below zero, the system may become clogged due to freezing of water in the pipes, a rupture of the heating radiator. In this case, you will have to restore the system and pay a fine for an administrative offense. Therefore, it is recommended to consider alternative heating methods.
If the decision is still made to move the heating devices, you need to be patient to implement the following steps:
- Carrying out engineering calculations of the thermal conductivity of the insulation.
- Obtaining a conclusion from a specialist that freezing of the system is impossible even at abnormally low temperatures outside the window.
- Obtaining permission to install a radiator in the loggia.
- Directly installation.
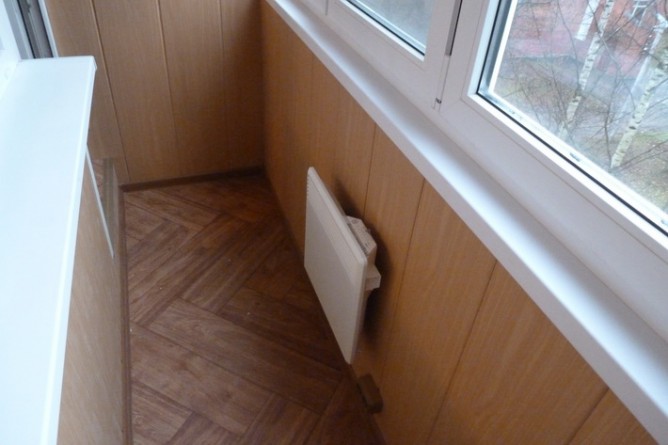
As an alternative way to heat the area, you can use infrared and / or oil heaters, air conditioners and electric converters. It is forbidden to use gas and solid fuel stoves on the balconies of apartment buildings, since if the operating rules are not followed, it can be explosive and fire hazardous.
How to choose a battery for the balcony
The most preferable option for work on the balcony is aluminum sectional batteries. They are considered the most effective due to their increased surface area and high thermal conductivity. They are lightweight and maintain / withstand system pressure.
Different manufacturers indicate different heat transfer rates, but the difference is insignificant. You need to be an expert in this industry to understand the differences in the technical characteristics of the proposed modifications.
Counting rules required number of sections
There are universal rules for calculating the required number of sections:
- One section of an aluminum radiator is capable of heating no more than 2 square meters, and bimetallic batteries - 1.5 square meters.
- To calculate the optimal amount, you need to divide the area of the loggia by 2 or 1.5 (depending on which batteries will be used).
Experts recommend additionally installing 1-2 sections in case the coolant in the system is not very hot.
Radiator installation
It is difficult to carry out all the installation work on your own without experience.To save money and time, it is better to invite a professional plumber to do the job. If this option is excluded, and the work will be carried out independently, you need to prepare working inventory:
- sealant;
- Mayevsky crane;
- welding machine;
- control and shut-off valves;
- roulette;
- foot nuts and plugs;
- die and vice;
- pipes;
- puncher;
- Bulgarian;
- fitting.
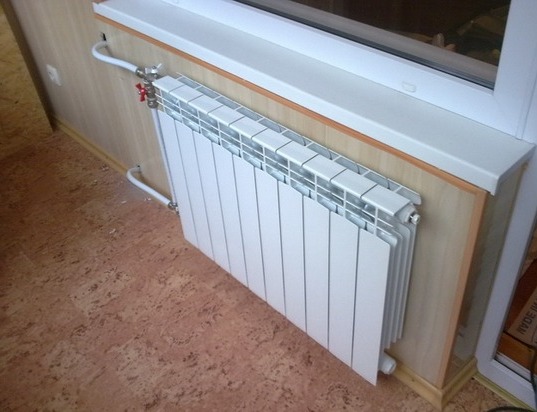
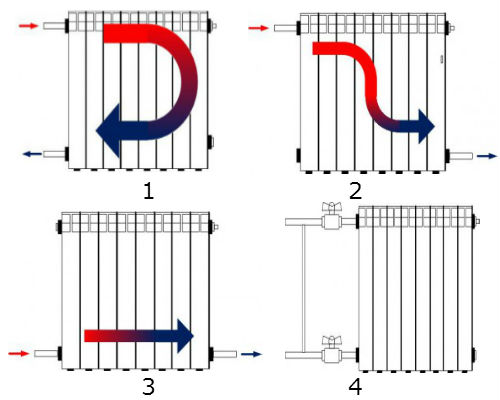
Before proceeding with the installation, you need to decide on what scheme the connection will be carried out. It is better to give preference to the method with the presence of a jumper, since it allows you to perform any manipulations with the battery in winter and summer.
Connection is carried out using the following technology:
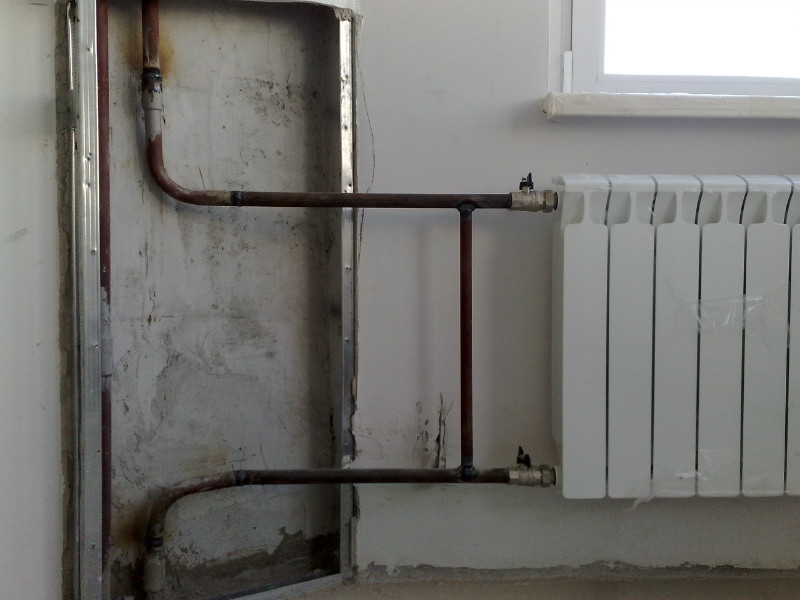
- Connection to the main pipe. Using a grinder, make small cuts on the outside of the threads on the pipes and fasten them with fittings that have additional branches. To ensure waterproofing, fum tape or tow is used.
- Pipes with threads applied to them are passed through the holes in the wall. They should protrude about 8-9 cm beyond the wall. An angled fitting is attached to the second end of the pipe, which should occupy a strictly vertical position in space.
- Hang up the radiator. It is necessary to mark on the wall with a pencil the places where the brackets will be attached. Using a puncher, make a hole in the wall and fix the bracket.
- The battery is secured by placing a rubber washer between the parts and the bracket.
- Using the building level, the location of the radiator is adjusted.
- Connecting the liner. Two pipes about 25-30 cm long are brought out from the radiator, one end is connected to the battery, and the other is closed with a fitting.
- In conclusion, they proceed to the vertical installation of pipes, which are necessary for supplying and removing the coolant from the radiator. They are screwed into finished fittings, all connections must be tight.
When carrying out construction work, it is preferable to use polypropylene plastic pipes, which are connected with fittings by soldering. For the system to be more efficient, it is recommended to install foil heat-reflecting shields on the wall behind the radiators.


