If you live in a rural settlement, a country house or if you have a summer cottage, it makes no sense to spend money on expensive heating equipment. Available materials and faulty household appliances will help to save money. From them you can assemble a heating boiler for a private house with your own hands. Before work, it is worth studying the types of units and a step-by-step algorithm of actions.
- Varieties of heating boilers
- Specificity of solid fuel models
- Characteristics of electric boilers
- Features of gas devices
- Oil heating boilers
- DIY tools and materials
- Cutting out the parts and installing the boiler
- Creating a boiler from a pipe
- Executing an electrical model
- Features of the assembly of heating elements
- The procedure for checking and starting the device
Varieties of heating boilers
The range of heating units allows you to choose the installation according to the financial capabilities and personal preferences of the owners. When choosing a device, it is advisable to pay attention to the type of fuel.
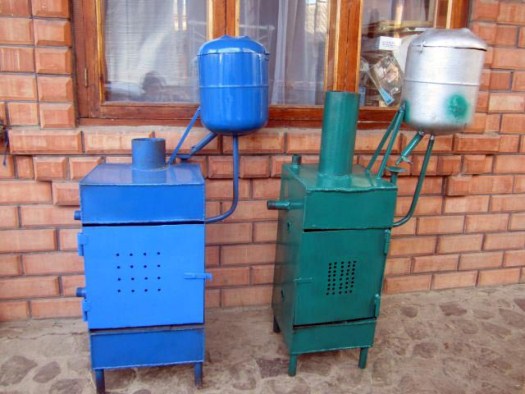
Specificity of solid fuel models
In rural areas or if you want to save on fuel, you can install a wood-burning, briquette, coal unit. The line of solid fuel models also includes boilers for sawdust and coke. All devices are environmentally friendly and safe. According to the principle of work, there are:
- Classic - they heat the room by direct combustion of fuel materials. Bookmarking is done in 5-6 hours.
- Pyrolysis - operate on the principle of afterburning the gas released in the combustion chamber. Fuel is loaded every 12-14 hours.
When making a solid fuel model on your own, you need to organize a chimney with high-quality draft, a place for fuel.
Care of solid fuel units consists in periodic cleaning of the combustion chamber.
Characteristics of electric boilers
The electric type of heaters is compact, quiet operation, affordable cost. Products differ in the type of heating elements:
- On heating elements. Tubular heater versions are suitable for floor and wall installation. The disadvantage is the formation of scale on the heating element.
- On the electrodes. Suitable for a 1-2 battery system or large room. The devices are efficient, quickly heat water, but are sensitive to its chemical composition.
- Induction. They quickly heat up any type of heat carrier, have an efficiency of 100%, and are equipped with an overheating protection system.
Induction equipment is the most expensive among electrical models.
Features of gas devices
A gas heater can be selected according to several parameters:
- The number of contours. Single-circuit options work only for heating, double-circuit options, in addition to heating, are connected to the DHW system.
- Water heating method. A flow-through column or a built-in boiler for 150-180 liters is used.
- Number of double-circuit heat exchangers. A single bithermic element heats water for heating and hot water supply. For units with two heat exchangers, the primary is used for heating, the secondary for hot water supply.
- Combustion chamber type. The open draft boiler is installed in a separate ventilated room and equipped with a vertical flue gas outlet, because picks up air masses in a natural way. Closed equipment is equipped with a coaxial chimney located horizontally, and air is supplied to it by a fan or cooler.
- Ignition method. Electric is used for appliances that burn intermittently.Modifications with piezo ignition are switched on manually.
The best option for a private house is a condensing model, which has a water economizer.
Oil heating boilers
A diesel heating unit is installed in a country house, in a country or private house in accordance with fire safety requirements. It is located in a special room with high-quality ventilation or a powerful exhaust hood. For storage of liquid fuel, special containers are used. The advantages of liquid fuel options are high power and performance indicators.
DIY tools and materials
In the private sector or in the country, the easiest way is to make a boiler for a water system. Only electricity or solid fuel can be used to power a homemade installation.
The simplest option would be a classic direct combustion boiler that runs on wood. For him you will need the following materials:
- alloy steel (stainless steel) 5 mm thick for the body and 7 mm thick for the grates;
- ordinary steel St20 3 mm thick for a water jacket;
- smoke tubes with a diameter of 48-76 mm from St20;
- metal strips or corner profiles 50x50 for stiffeners;
- asbestos, basalt fiber for fireproof insulation;
- asbestos cord for door sash;
- threaded rods with hinge joints;
- nozzles for handles made of ebonite or PCB.
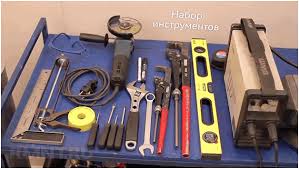
For manufacturing, tools will also be needed:
- welding machine;
- grinder and discs for cutting and grinding;
- electric drill with drills for metal;
- gas keys No. 1 and No. 2;
- hammer, pliers, square;
- keys (open-end or folding), screwdrivers.
For protection, you need to use a welding mask, goggles, gloves.
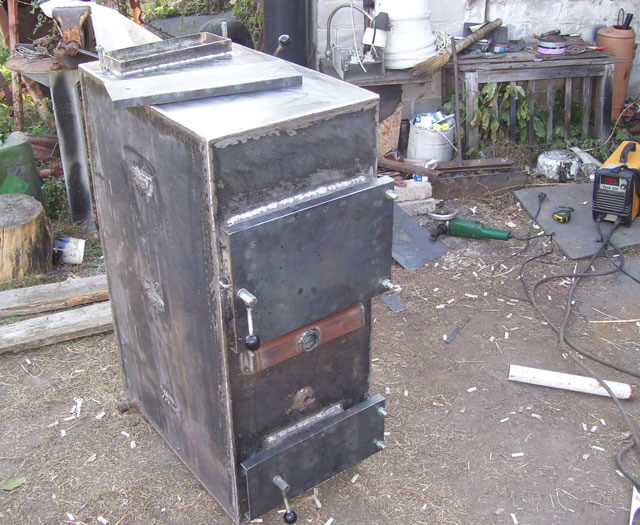
Cutting out the parts and installing the boiler
Before starting the assembly of homemade wood-burning boilers, you will need to complete a drawing taking into account the features of the heating system for a private house. Products have the form of 2 compartments, located "nesting dolls". The outer box is a combustion chamber, the inner box is a reservoir for heating water. Elements do not communicate with each other.
The preparation of parts is done like this:
- The walls of the unit are cut from the sheet of metal.
- Partitions for the stove are made of metal with a thickness of 10-12 mm.
- A hole is made on the upper part for a chimney with a diameter of 10 cm.
- The sides are welded to the bottom, and then metal strips 3 cm wide under the grate are welded onto vertical parts.
- Support strips for partitions are attached to the side parts.
- They are made and installed on the door hinges, the doors for the firebox and ash pan are cut out.
- Partitions are attached in the form of a labyrinth - they will increase the heating efficiency by creating a barrier to air.
- A 20 cm high sleeve is welded onto the lid with a hole for the chimney.
- The cover is welded to the body, the chimney is mounted.
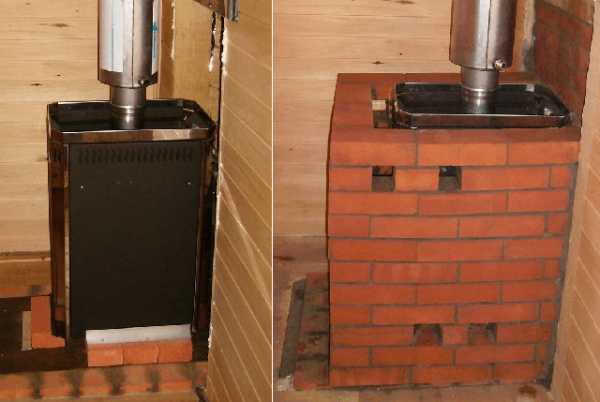
Installation of the device is carried out in a selected place with external cladding with fireclay bricks. The masonry should be 15-20 cm away from the body.
Creating a boiler from a pipe
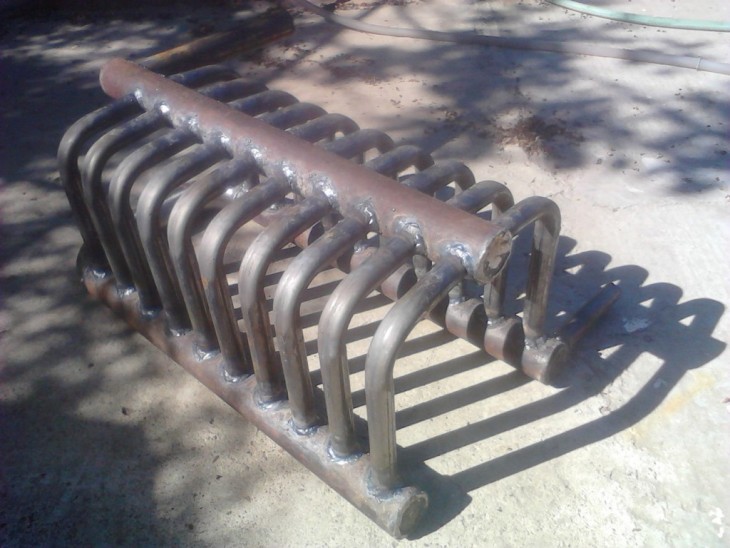
A wood-fired or coal-fired boiler is made from a pipe and has a U-shape. On the upper part there is a fitting, on the lower part there is a return line. The unit is easy to make if you follow the step-by-step recommendations:
- Selection of tools and materials. You will need several metal pipes with a diameter of 1.5-2 inches, as well as a welding inverter, a grinder with a nozzle for cutting metal, a tape measure, and a hammer.
- Cutting a metal pipe to size.
- Welding the edges of the lower part in the form of the letter P.
- Burning holes for vertical posts.
- Arrangement of vertical elements from corners or pipes of a smaller diameter.
- Production of the upper part from a pipe of the same diameter and holes for vertical parts.
- Welding the union onto the supply and air supply branch pipe.
- Implementation of the firebox and blowing. Rectangular holes of 20x10 cm for the firebox and 20x3 cm for the blower are cut in the pipe.
The tightness of the device depends on the quality of the weld.
Executing an electrical model
A do-it-yourself electric boiler for heating a house is made using the following materials and tools:
- angle grinder or grinder;
- inverter welding machine;
- multimeter;
- sheet steel with a thickness of 2 mm;
- adapters for connection to the system;
- Heating elements - heaters can be bought or assembled by yourself;
- steel pipe 159 mm in diameter and 50-60 cm long.
The algorithm for creating an electric-type unit consists of the following stages:
- Making branch pipes for connecting to a pipe system. You will need 3 pieces of 3, 2 and 1.5 inches in diameter.
- Making a container for a tank from a pipe. They make a markup, cut a hole along it and process the seams.
- Welding pipes to holes.
- Cutting two circles out of a larger diameter pipe for the heating compartment.
- Welding to the top of the 1.25 in. Diameter nipple.
- Placement under the heater. Two holes are made in the bottom.
- Connecting the boiler to the system by means of branch pipes.
- Installation of a low-power heating element with a thermostat on the upper branch pipe.
In the absence of skills, it is not recommended to connect the boiler to the network on your own.
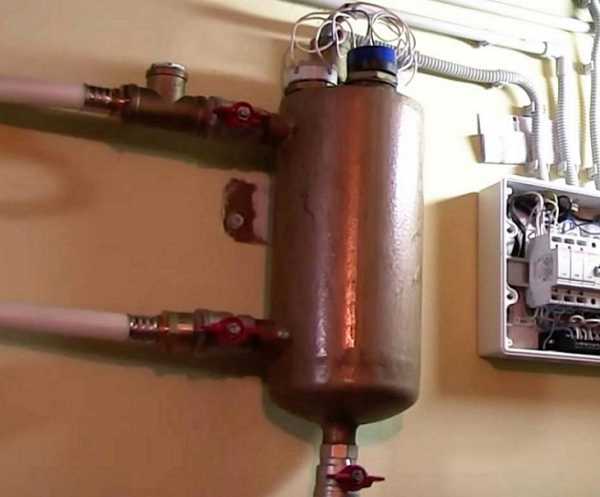
Features of the assembly of heating elements
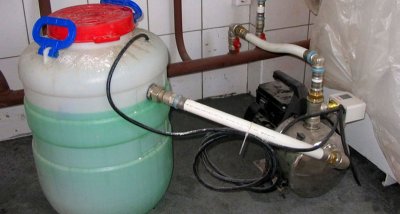
It is possible to weld a boiler with heaters on the basis of a purchased heating element with a capacity of 1-1.5 kW. You will also need a pipe, flanges with fasteners, and two pieces of a water supply pipe.
At the bottom of the boiler, from a piece of steel pipe made by hand, a heating element is installed according to the flange method. At the top there will be an expansion tank with an opening for water filling. The water pipes are connected to the return and supply.
The procedure for checking and starting the device
A homemade boiler starts up only when the system is filled with water, the wiring and connections are inspected. In the presence of forced circulation, a pump is installed for uniform heating of the coolant. In systems with natural circulation, a slight slope is made at the outlet to the return flow. Pinched or torn power line cables are replaced or re-insulated so that the heating element does not fail. To protect against voltage fluctuations, an RCD is mounted.
The heating unit is cleaned of dust and dirt, and then painted with a heat-resistant agent. Before applying paint, it is required to sand and prime the surface. The coating is applied in 2 layers.
Water is supplied to the communications so that there are no air jams. Taps on radiators are used to control airing. Then they turn on the boiler to the network, wait for warming up. The water temperature is checked with a multimeter.
You can independently make a solid fuel boiler from sheet metal or an electric one from a professional pipe. In terms of the cost of materials and labor costs, the construction will cost less than a special unit. The disadvantage of the device is possible damage and malfunctions in the system if the installation is performed incorrectly.


