An outdoor oven is a great idea for a summer cottage and the yard of a private house. The functions of this facility are not limited to cooking food only. Having installed the hearth on a flat, solid base and equipped it with comfortable furniture, you can get a multifunctional platform at your disposal. The scope of its application is wide, from a place for eating, to holding mass events and just a pleasant pastime in the fresh air. There are many approaches to making a stove on the street for a do-it-yourself dacha. To make the best decision, you need to familiarize yourself with the designs of the hearths, the materials used and the assembly rules.
What an outdoor oven consists of
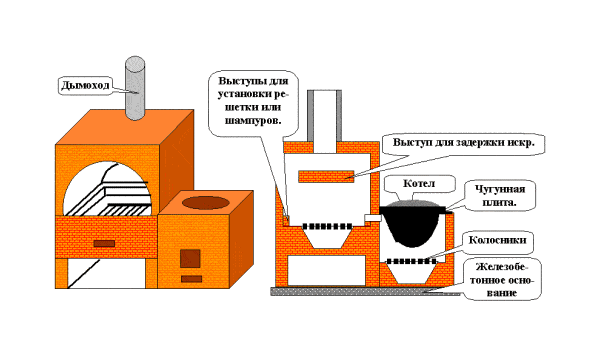
All outdoor stoves for summer cottages have approximately the same structure and principle of operation, differing significantly in size and appearance.
Objects consist of the following parts:
- Base. Most often, it is a concrete slab, which is bought ready-made or cast on its own.
- Housing. Serves for the location of all units and mechanisms inherent in each type of product.
- The combustion chamber. Manufactured in open and closed design. Designed for the production of heat and smoke through fuel combustion.
- Cooking surface. Dishes, food on skewers, skewers or wire racks are placed on it.
- Chimney. The structure is designed to remove combustion products to a distance where they cannot annoy the cook and those present.
Additional accessories include cutting tables, awnings, shelves for storing firewood, coal, crockery and cutlery.
Types of outdoor stoves
When choosing a stove model on the street, many factors should be taken into account, the main of which is the purpose and performance of the product. It is necessary to summarize the taste priorities of all residents of the house and their possible guests, and then make a decision. In addition, you need to evaluate your construction skills and financial capabilities so as not to stretch the construction for several years.
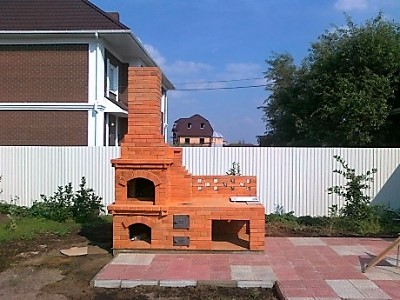
Russian stove
A Russian brick stove on the street looks beautiful if it has an environment corresponding to its size. You should think about the issues of arranging the site with tables and benches in advance. A canopy is made without fail, since the clay between the bricks becomes soft from getting wet.
The Russian stove can be used for cooking, frying and smoking. If you think over the configuration of the removable hob correctly, the hearth is suitable for cooking barbecue.
Since the structure is not intended for heating, the outside is covered with heat-insulating materials. The finish must be durable and waterproof. Depending on the size, 2500-3500 bricks are required to build the kiln.
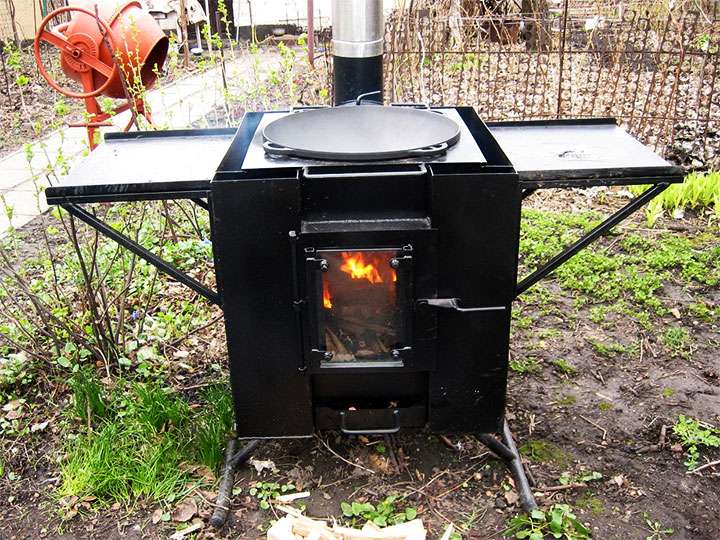
Oven with hob
This is a simple design, not distinguished by originality and functionality. The choice in favor of a brew-type hearth is made in cases where the dacha is visited occasionally to work in the garden and vegetable garden, and the stove is used to heat food and water for taking a bath.
The best option is to use thick sheet steel or cast iron for assembly. The top of the hearth is made wide and flat for the convenience of placing the dishes. The expansion of the boiler's functionality is carried out by welding metal plates along the edges of the body to dry clothes.To prevent the product from becoming a victim of scrap metal hunters, it is made in a portable version or welded to mortgages embedded in the foundation.
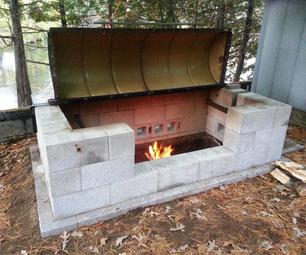
Brazier
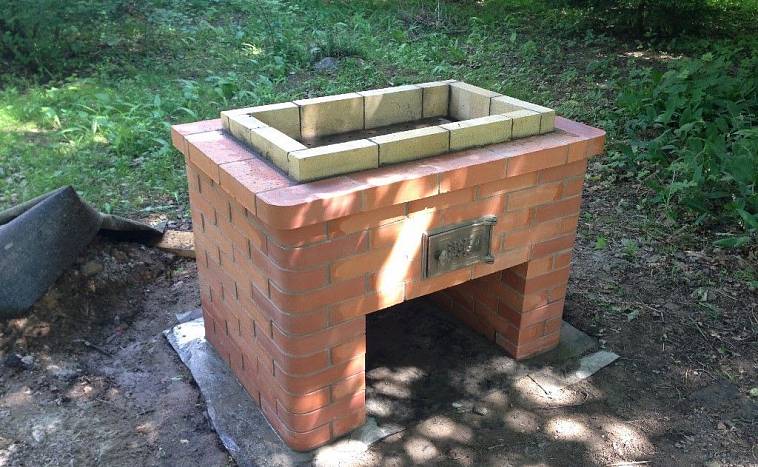
This is a classic associated with life in the private sector. The brazier is made in the form of a rectangular container. In its lower part, holes are made for air flow, and slots for skewers are made along the upper edges. In production, metal is used with a thickness of at least 6 mm to withstand the intense heat emanating from the coals.
The base of the structure can be in the following design:
- embedded in concrete;
- on legs;
- on wheels;
- on runners.
Despite the fact that the summer grill was originally intended for cooking barbecue, it can be successfully used for cooking in a cauldron, a saucepan and in a frying pan. For this, stands are made, which are fixed on the upper part of the hearth. Thanks to such a simple solution, a small product becomes functional, replacing complex and bulky kitchen complexes.
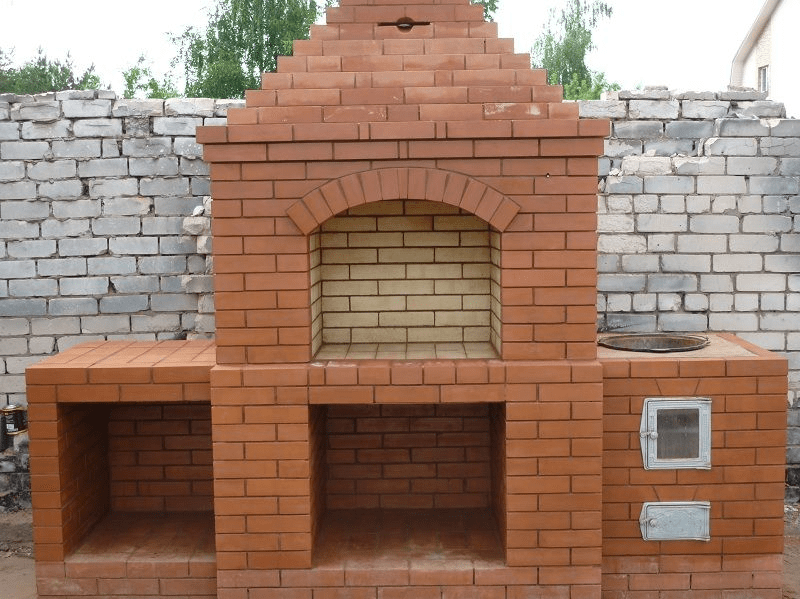
B-B-Q
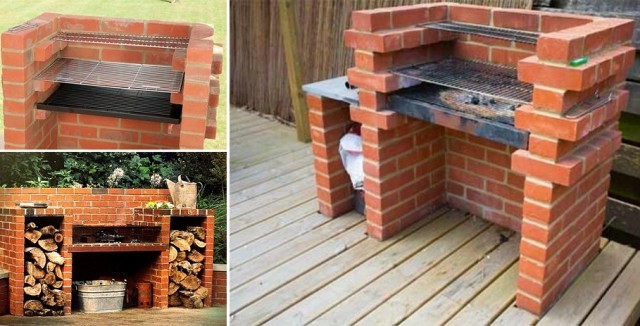
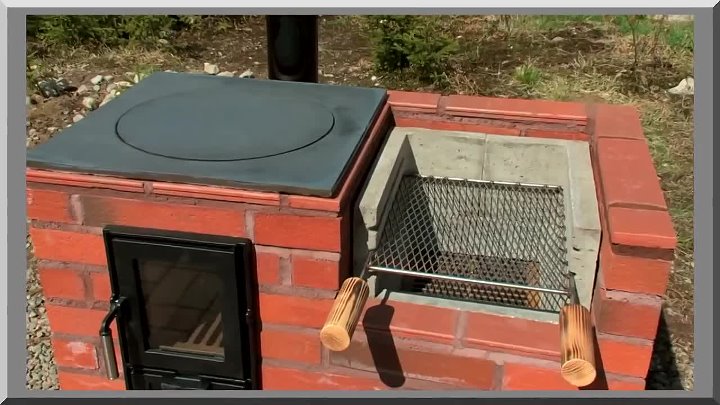
Barbecues are distinguished by their simple design and versatility. You can boil, smoke, bake and fry on a wood-burning hearth. The body is laid out of bricks, a firebox is made at the bottom, and a platform for placing dishes, grates, skewers and skewers on top.
It is not difficult to make such an outdoor brick stove with your own hands. It looks great both against the background of a Finnish house and next to a timber structure. You can improve the functionality of the structure by making shelves for food and dishes.
Tandoor
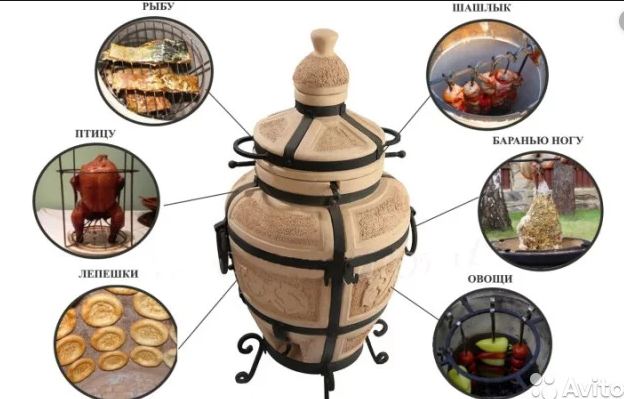
The stove is laid out of refractory bricks or stone. The finished structure has the shape of a jug and looks quite exotic without spoiling the design of the site. Some craftsmen use an iron barrel to make a tandoor, coating it inside and out with several layers of clay. For the preparation of various dishes, not only the neck of the vessel is involved, but also its walls, on which cakes are applied.
A cauldron is installed on top of various supports, lattices and other devices are laid. Heat treatment of products in the tandoor occurs due to the heat that is released from the heated walls.
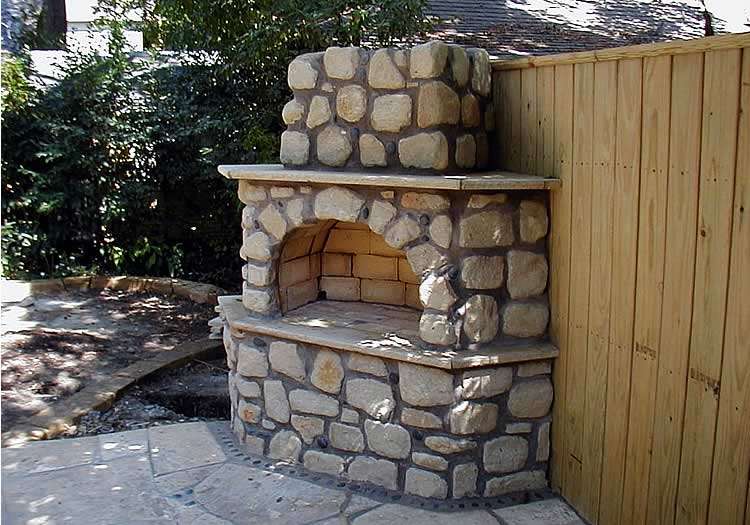
Fireplace
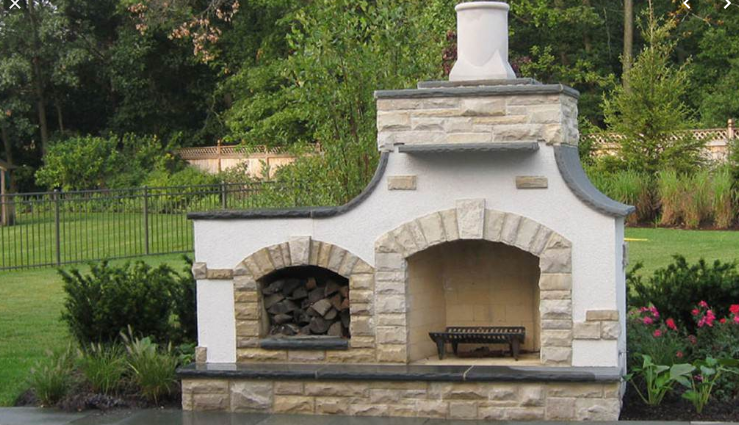
Competently and tastefully built fireplace performs the functions of heating, brazier and decoration of the site. In most cases, such structures are placed in closed gazebos. A grate is installed above the firebox, which serves as a support for dishes, grates and skewers. Fireplaces are made of stone, brick or metal, followed by facing with decorative material.
DIY materials for construction
To build a stove on the street, you need to choose a material that has a number of qualities necessary to create a strong and durable structure. The hearth must be resistant to high and low temperatures, moisture and ultraviolet light.
There are the following options for choosing a material for construction:
- Brick. A time-tested method. The brick hearth looks great anywhere. Its walls quickly warm up and retain heat for a long time. We use heat-resistant products that can withstand heating up to +1000 ° C without damage. To protect the structure from moisture, special plaster or ceramic tiles are used. In order not to be mistaken in choosing a cladding, you need to carefully read the manufacturer's instructions.
- Aerated concrete. The advantage of the blocks is their lightness and large size. For the hearth, there is no need to equip a powerful and expensive foundation. The disadvantage is the hygroscopicity of aerated concrete. It must be insulated from both the outside and the inside.
- Natural stone. In construction, dolomite paving stones are used, the cracks are filled with chamotte clay with granite chips. The finished structures do not need finishing, have a representative appearance, are characterized by strength and durability.
- Metal.Iron furnaces are easy to make based on the simplest homemade drawing and if you have a welding machine. To assemble the hearth, sheet metal or blanks from suitable structures are used. Iron is distinguished by its strength, lightness, the possibility of forging decoration and repeated modification. The downside is that the walls of the furnace rust and gradually become thinner.
When choosing a material, one should not forget about its aesthetics, so that the finished structure fits organically into the surrounding landscape.
Place selection
Drawing up a project begins with linking the hearth to a place on the territory of the site. The best option is to place it next to a previously built gazebo, shed or terrace. If the yard is being arranged from scratch, the stove should be assembled as far away from the house as possible in order to exclude the possibility of smoke and fire.
It is necessary to locate the hearth at a distance of at least 1 m from the fence, shed, garage and other combustible structures. There should be no trees and bushes nearby, and there should be no underground utilities under the stove. If possible, build a hearth on the leeward side of the house. It is also recommended to provide for the future availability of space for a platform, tables, benches and chairs.
Furnace masonry

A do-it-yourself garden oven is assembled on the basis of a well-thought-out diagram, which indicates the order, all the constituent parts of the structure are shown in detail.
A step-by-step guide to making a furnace:
- Site clearance and marking.
- Digging a pit.
- Making a cushion of sand and rubble.
- Formwork manufacturing.
- Laying the frame from the reinforcement.
- Foundation casting.
- Laying waterproofing.
- Laying out the base, blower and smoke channels.
- Installation of the firebox.
- Securing the hob.
- Chimney installation.
- Completion of finishing works.
After drying and shrinkage of the solution, the first furnace is carried out at a low temperature.


