The basic building material of the walls does not always look attractive. The cinder block or foam block has an uneven surface of a dirty gray color, on which stains from dampness and after severe frosts remain. Finishing the facade with vinyl siding protects the walls from the effects of rain, sun and frost, making them more attractive.
Material description
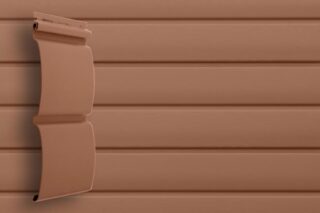
Vinyl siding is made of polyvinyl chloride with the addition of titanium dioxide, calcium carbonate, coloring pigments and modifiers. Siding is produced in the form of lamellas of various colors.
A quality material is considered to be at least 80% vinyl.
The material is very light, during molding it allows you to give itself any shape. If initially only smooth matte lamellas were produced, now the consumer is offered a finish that imitates the texture of wood and stone.
Lamellas differ somewhat from each other in typical sizes and configurations. On these grounds, the following types are distinguished.
- Timber siding - reproduces the characteristic squared masonry. The surface is matt, but not smooth, but imitating the surface of a tree.
- Block house - reproduces the laying of a log. Such a profile has a soil surface with a small radius. The block house is used for both exterior and interior decoration. The color and texture of the lamellas are similar to the texture of wood.
- The ship board is a version with a flat surface, most of all the planking resembles a deck, for which it received this name. Compared to planking, this option looks much neater.
- Herringbone - such a relief surface is obtained if each subsequent board is overlapped on the previous one. The lamella includes at least 1 such "step". A very peculiar finish, but it looks beautiful in a style like the Canadian one.
The range of colors includes every imaginable shade. However, more often they choose neutral and light tones close to natural wood: beige, pale yellow, cream, terracotta.
Advantages and disadvantages
Vinyl siding has many benefits.
- The material weighs little, in contrast to metal or fiber cement, with a sufficiently high mechanical strength. Finishing does not increase the load on the foundation and walls, since even very old buildings can be sheathed with siding.
- PVC does not conduct electricity and is not subject to any kind of corrosion.
- Plastic dampens noise, so the rain drumming on the skin is hardly audible.
- The cost of vinyl is low. In addition, many additional elements are produced for it, which greatly facilitates installation.
- PVC panels withstand temperatures from -50 C to +50 C. However, it is allowed to install it only at temperatures not lower than -5 C.
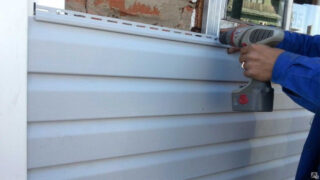
- Installation of vinyl siding is very simple. Lamellas are available with grooves and ridges for better joining and are fastened with the most common self-tapping screws.
- They put the siding on the crate. This allows you to insulate the facade, if necessary, and create a ventilation gap that protects the finish and insulation from moisture accumulation.
- Vinyl siding is available in any color, imitating wood or stone, or with a smooth surface. The decoration always looks neat and beautiful.
Cons of material:
- Although special additives are added to the original mass in the manufacture of plastic, the material is still classified as combustible. It burns with difficulty, is prone to self-extinguishing, but under the influence of temperatures above + 100 ° C, it deforms, loses its shape and melts.
- Vinyl gets dirty pretty quickly, even the walls need to be washed.
- When the temperature or humidity changes, the lamellas change in volume. When installing, it is necessary to take this into account and leave technical clearances for fastening.
- The casing is vapor-tight. It is impossible to lay it tightly on the wall or insulation: moisture will accumulate under it. It is necessary to make a ventilation gap.
Siding is available in several sizes and shapes. Any slats are equally simple and easy to install, but when calculating, you need to take into account the difference in area.
Installation principles
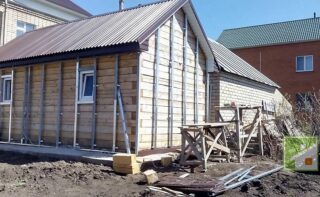
Facade decoration is carried out according to the same principle. First, a frame or crate is erected, then insulation is installed, if needed, then siding is laid. However, this should take into account the characteristics of the material.
The main task of the lathing is to create a perfectly flat plane. Only in this case the lamellas will fit easily and will not be subjected to additional stress.
The installation is carried out sequentially, following the step-by-step instructions. Installation should not be started by fixing the lamellas, forgetting about the corner elements or the window profile.
Correct fastening of the material is extremely important. Plastic siding expands quite a bit as the temperature rises. If at 0 ° С the panels are rigidly fixed, then already at + 10 ° С the material will experience the strongest loads. When the panels are rigidly fixed, they bend and break. When fastening, the self-tapping screw should be placed exactly in the center of the oval hole, and a gap of 5 to 12 mm should be left between the cap and the plastic, depending on the temperature conditions during installation. In this case, when the temperature rises, the panels will move along the self-tapping screw, and not break.
Insulation is not an obligatory element of the facade cladding. However, wall insulation always pays off.
Vinyl siding is a fairly resilient and resilient material. However, it is not resistant to mechanical damage and can bend even under its own weight. The material should be transported and stored carefully.
Instrument preparation

To finish the building you will need:
- a hacksaw for wood or scissors for cutting plastic;
- screwdriver and screwdriver;
- hammer and mallet to correct the position of the lamellas;
- pliers, notch cutter;
- screwdriver, tape measure, pencil.
Gloves and goggles are recommended when working with vinyl siding.
Selection and calculation of components
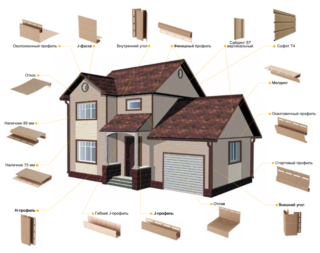
The casing is completed with many additional accessories. Some of them are interchangeable. But before you buy siding and additional elements, you need to calculate their volume.
- Siding - calculate the total area of the walls and subtract the area of windows and doors from it. If the pediment is also sewn up with lamellas, its area is also calculated. It is recommended to increase the obtained value by 10-15%. Calculations are usually much more complicated, since it is necessary to take into account the maximum length of the lamellas and the length of the wall so that one part of the wall does not have to be sheathed with scraps, and the J-profile is mounted close to the edge of the facade.
- Start profile - installed around the perimeter of the entire house. And so it is calculated.
- The finishing strip is the final siding lock. Installed around the perimeter of the entire building.
- The outer and inner corner is also a required element. Calculated by the height of the building.
- Window-side - slope bar. It is used for edging doors and windows. Can be replaced with a J-profile.
- T-, L-, H-profile - connecting strips differ from each other in the degree of masking of the joints.
- J is a universal strip for framing all horizontal and inclined surfaces.
There are more specialized elements, like a soffit for sewing cornices, edging strips, ebbs and more.
Preparing the walls
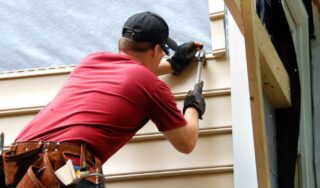
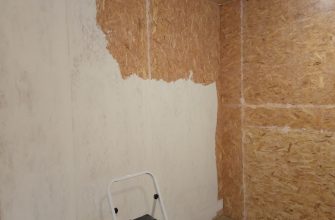
Prepare the walls for finishing in the usual way. Cleaned from dust and debris, remove the old finish, if any. It is advisable to get rid of the old plaster too.
If the walls are uneven, it is recommended to repair the deepest dents and damage. Small defects can be compensated for by the frame.
Works are performed only in dry weather.
Lathing for siding
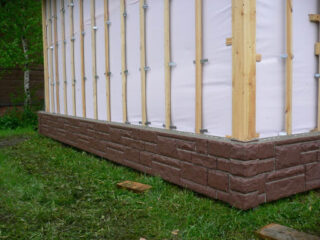
To install vinyl siding with your own hands, use both wooden and steel crate. The first option is placed on log or squared walls. However, it must be borne in mind that this option is weakly resistant to moisture and is not durable. This solution is acceptable only in warm regions with infrequent rainfall.
Galvanized steel profile is much more reliable. You can also use aluminum. Both options are resistant to corrosion, durable and withstand sufficient stress.
- The frame racks are installed vertically, since the lamellas are attached to the facade only horizontally.
- The lathing does not touch the ground, but is mounted at the basement level or slightly below.
- The distance between the metal profile or the bars is 30–40 cm.
- Installation begins from the left corner, where the vertical rack is attached. Then the lower horizontal is installed, and then the extreme right. Then they tie the window and door openings.
- The rest of the vertical posts are fixed strictly according to the level. You can stretch the cord from the corner elements and set the profile along it.
- Fasten the frame with dowels, self-tapping screws, depending on the wall material.
Galvanized profile lathing will cost 30% more.
Warming and waterproofing
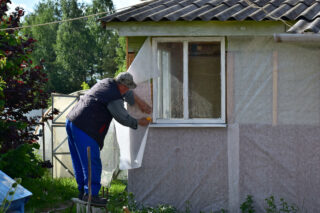
If insulation is laid, the step-by-step guide includes several additional steps.
- On the walls, preferably a vapor barrier or windproof film is laid under the frame.
- Insulation is placed in the cavities between the frame racks: mineral, basalt wool, foam or foam plastic slabs.
- The insulation is closed with a hydro-barrier. The film is laid horizontally or vertically, necessarily with an overlap and fastened with a stapler. If the frame is wooden, then the waterproofing covers the frame, and a counter-lattice is placed on top for installing the siding.
The lamellas must not be placed directly on the waterproofing. The distance between the wall and the plane of the siding attachment must be sufficient to maintain a ventilation gap.
Installation process
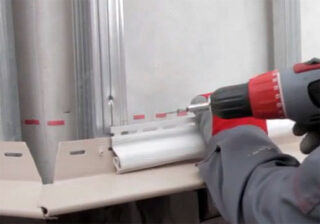
Installation of siding is carried out, precisely following a certain scheme.
- Work begins with the fastening of the starting strip.
- Determine the lower edge of the cladding. This is usually just above the foundation level. They retreat from this conditional border at a distance of 7–8 cm and drive nails into the corners of the building from both sides of the corner.
- A cord is pulled over the nails.
- The position of the future finish bar is marked in the same way. At the same time, they try to fit an integer number of lamellas between the two lines. If this does not work, it is better to move the upper or lower border a couple of centimeters.
- Install window profiles. For this, a J-profile or a special strip is cut along the length of each side of the window, cut at an angle and fastened along the perimeter of the opening. The method is not important, the main thing is to ensure the natural drainage of the water.
- Corresponding elements are installed on the corners - for the outer and inner corners. Fasten in accordance with the rules. Corner pieces can be replaced with a J-profile. For this, 2 elements are joined so that on both sides of the corner there are grooves for inserting lamellas.
- Since the length of the lamellas is limited, they have to be joined to cover the entire facade. This is done using the H-profile. They try to install the rack in the center of the facade, or symmetrically relative to each other. The element is trimmed so as not to be inserted into the starter bar. Attached to the frame.
- After the assembly of the additional elements is completed, the siding is mounted. Start the installation from the bottom. The lamella is inserted into the starting plate until it clicks and is attached through the comb to the crate.
- The next lamella is inserted into the groove of the previous one, as well as the H-profile and corner elements, and fixed in the same way.
- When going around windows, the lamellas usually have to be cut. In order for such a part to be inserted into the groove, it is necessary to punch new holes on the edge made with pliers or serif scissors and bend their edges.
- The last lamella is inserted into the groove of the previous one and into the groove of the finishing strip. If you need to cut, then they definitely make new locks for docking.
Vinyl trim installation is straightforward. The very design of lamellas and additional elements allows you to avoid many mistakes when connecting parts. It is only important to properly fix the material.

