Building a strong, durable and airtight roof involves the installation of a roof covering and the installation of many accessories to ensure effective moisture removal. A drip tip for corrugated board is one such detail. Many aspiring developers see this fixture as a waste of time and money. However, the installation of a drip on the roof made of corrugated board significantly extends its service life and significantly improves the appearance of the cornices.
What is a drip
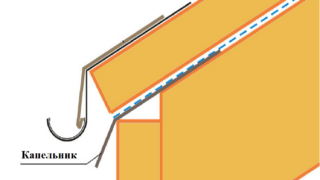
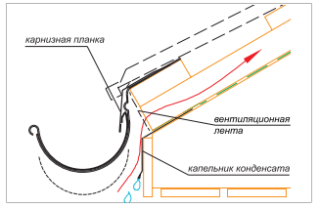
A dripper is a specifically curved metal profile designed to close the roof overhangs.
The products on sale have such a device:
- The foundation. This is a galvanized steel sheet with a thickness of 0.3-0.5 mm. Strength, ease of installation and service life of the strips depend on this parameter.
- Protective covering. It is applied to one or both sides of the profile. Materials such as pural, polyester, plastisol are used.
The coating is smooth and textured, matte and glossy. The length standard is 125 and 200 cm.
Functions of a drip tip on a metal roof
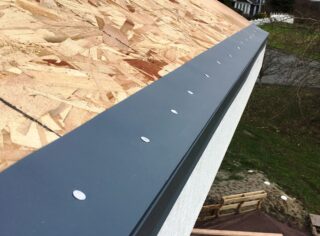
The dropper, with its small size, performs several important and diverse tasks.
- Waterproofing. The plank removes water from the wall and roof frame, prevents them from getting wet, mold and moss formation, preserves the structure of finishing materials.
- Presentability. The profile masks the end portions of the roof, which gives the structure a harmonious, attractive appearance and an overall sense of completeness.
- Soundproofing. The planks reflect sound waves from the outside, dampen vibrations and vibration of the flooring, which contributes to the comfort of living.
- Reduced wind load. The lamellas reduce the wind lift on the roof covering. With them, there is much less risk of breaking it during strong gusts and storms.
Planks can be plain coated or contrasting. Here the decision is made individually.
What is the difference between a curtain rod and a drip
The drip closes the gap between the rafter system and the floor slab. This helps to preserve the integrity of finishing materials and supporting structures, and also prevents the formation of drafts in the attic.
The cornice strip is visible and, in addition to the main one, performs an aesthetic function. The drip is almost invisible, but this does not in any way diminish its importance in ensuring the tightness of the roofing cake.
Types of roof drippers
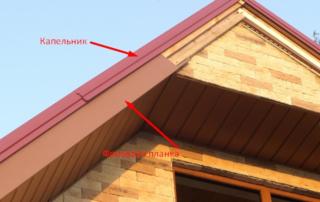
Depending on the architecture of the building, the following types of condensate droppers can be used for metal tiles:
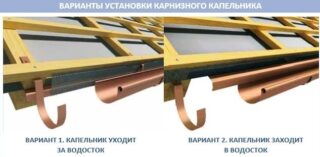
- Cornice.Designed to drain water from the waterproofing into the tray or down, where the drops fall on the base / plinth protected from moisture. The profile has two bends, one of which divides it in half, and the second serves as a stiffener. Both edges of the part are seamed to prevent deformation during installation.
- Gable. It has a more complex shape, as it is mounted at the junction of the slope and the pediment. The placket has an apron, skirt and step. This configuration and the presence of stiffening ribs ensure the efficiency of moisture removal from the roof. Direct contact of gutters and supporting structures is excluded.
Depending on the model, the width of the shelves varies between 15-30 cm; slats with larger or smaller dimensions can be made to order.
How to make a choice
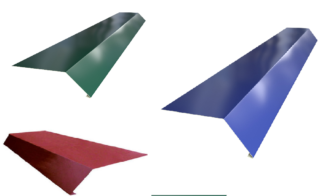
To make the right choice of a drip, you need to make accurate measurements and draw up a detailed drawing of the roofing structure, based on it, make a scheme for fastening the strips.
There are the following criteria that you should be guided by when purchasing drips:
- The composition of the material. You should take strips made of the best steel grades with a plate thickness of at least 0.5 mm. These parts will last a long time and will not have to be replaced every few years.
- Protective covering. It must be resistant to temperature extremes, moisture, ultraviolet and mechanical stress. Such details can be found in the instructions attached to the product.
- Color. There are two options here - fully matching the flooring or radically contrasting. It is a matter of taste and design features of the building.
- Dimensions. They should match as closely as possible with the object being trimmed so that there is no slack and too tight contact. In the first case, there will be no tightness, in the second, the finished structure can be ripped off when the wood expands from moisture.
The last thing to look at is the price. Installation of a drip under the metal tile is done on the basis of decades of service. The planks themselves protect structures that are hundreds of times more expensive.
How to install correctly
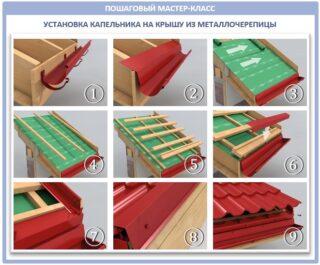
Fastening of droppers is carried out in a certain sequence:
- Prepare the workplace. Put up a solid and stable ladder, and preferably a forest. Fence the site, think over the question of self-insurance.
- Prepare tools and equipment, wear sturdy clothing, a construction helmet, goggles and gloves.
- Lay out the planks on the site where no one will step on them. Inspect the profiles for damage.
- Remove the shipping tape from the front of the parts. You cannot leave it: the protective functions are weak, over time it becomes cloudy and turns white, it goes like burdocks.
- Install the first profile on the base. Fix it with self-tapping screws or galvanized nails. Install the following fragments with a 20 cm overlay. Cut the last segment to length, paint over the edge.
Cornice profiles must be installed from the edges to the center, and pediment profiles from bottom to top. This will minimize the likelihood of water getting under them.
General recommendations
Installation must be carried out in a specific sequence. Each layer should be at its own level. Otherwise, instead of benefit, the rafter system and walls will be damaged.
It is recommended to install a layer of waterproofing material between the profiles and the eaves to prevent moisture penetration and to ensure air circulation in the space under the roof.
The lower planks are placed immediately after the Mauerlat is laid. Upper ones - after installing the drain and immediately before laying the metal tile.It is necessary to calculate everything so that the dropper with its lower part captures at least 20 mm of the gutter. The upper part should be no more than the width of the frontal crate.
A separate issue is the choice of the method of fastening the profiles. Expensive, but the most optimal are self-tapping screws with a silicone washer. This will completely eliminate the likelihood of leakage, metal corrosion, wood wetting. An alternative is galvanized or brass nails. It is cheap, fast, but fraught with the development of rust in the places of breakdown. Condensation is inevitable and must be taken into account. The best solution may be to nail the planks with nails with homemade rubber washers. This will ensure tightness and the metal will not bend from impacts.
Required tools
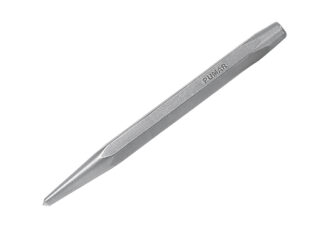
To attach the drip tips, a standard set of household tools will be enough:
- roulette;
- a hammer;
- level;
- square;
- scissors for metal;
- screwdriver;
- marker;
- core;
- paint brush.
Ladder or scaffolding can be rented. If another construction is to come, it makes sense to purchase these devices for yourself or to share with neighbors.

