Correct installation of a polycarbonate greenhouse is not only about observing the technology of assembling the frame and fixing transparent elements. The yield of plants, the convenience of working inside the building, and the duration of its service depend on a competent approach to choosing a place for its construction. Here it is necessary to take into account the design of the site so that the greenhouse fits into it organically, without spoiling the view and without interfering with the movement of people.
How to efficiently locate the greenhouse on the site
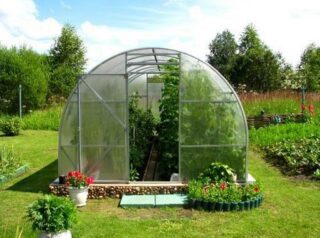
To decide where is best install a polycarbonate greenhouse on the site, you need to consider and examine a number of factorsthat directly affect the functionality of such buildings. The wrong choice is fraught with the fact that the structure will be non-functional and unclaimed.
The first criterion is soil features... Here you need to take into account the following parameters:
- Terrain relief. It is more difficult to build on uneven sites, and in lowlands there is a high probability of flooding.
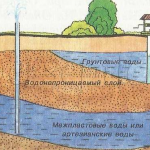
- Groundwater height. When they are high, there is a risk of rotting plant roots, the development of mold and moss in the house. Piling and drainage is expensive and difficult.
- Acidity and salinity of the soil. Each crop has its own maximum permissible norms. If the land is oversaturated with minerals, you will have to purchase a fertile mixture.
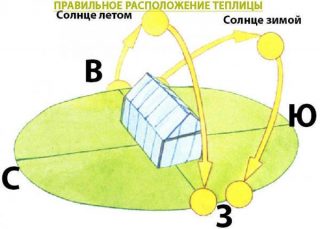
The meridian orientation is more suitable for growing in the spring and autumn. The greens will be better warmed at noon, when the light will penetrate the entire volume of the greenhouse. Here, the morning and evening hours do not pay special attention to the process of photosynthesis, since sunrise occurs late and sunset early.
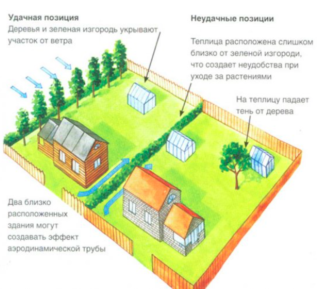
- Wind load. Strong air currents can not only greatly cool the room, but even destroy it. This can be avoided by installing a screen protector, growing hedges, or placing a polycarbonate greenhouse next to the building.
- Lighting. Installing a greenhouse next to a residential building is attractive for many reasons. Near communications, no need to go far with a heavy burden. At the same time, the structure creates a shade that negatively affects the yield.
- Trees... They saturate the air with oxygen, make the site more picturesque and beautiful, but are incompatible with a greenhouse. Roots take nutrients from the ground and in the long term can destroy the foundation. Shade prevents crops from thriving, falling foliage sticks to the glazing, and falling branches are a potential hazard to transparent panels.
If a decision is made to assemble a greenhouse next to a residential building, this can be done from its northern side. The fence can be no more than 1.5 m high so that no shadow is cast on the greenery.
Site preparation for greenhouse installation
It is advisable to carry out such Events:
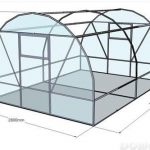
- Decide on the size and shape garden structure. It should be borne in mind that a large building is difficult to build, and subsequent work in it takes a lot of time and effort. There will not be much sense from a small greenhouse, so it is better to stay at medium parameters. The optimal size is 6x2x2 m.
- Draw up a project, carry out the purchase of materials, prepare tools and equipment. It is imperative to think over safety issues.
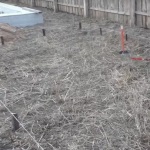
- Carry out markings on the ground, clean it of vegetation and small yard objects. Perform planning if necessary.
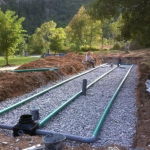
- Arrange the drainage system. It consists of reservoirs, channels for moisture removal and a closed ditch filled with drainage from sand and gravel. Perforated pipes wrapped in geotextile can be laid inside the trenches.
- Equip the work site. Provide access roads, storage areas for building materials, garbage bags. It is advisable to make a flooring of boards for movement in cloudy weather. It is recommended to make a canopy to protect the equipment from rain.
In conclusion, it is necessary to carry out communications. Water and electricity will be required. It is imperative to equip grounding.
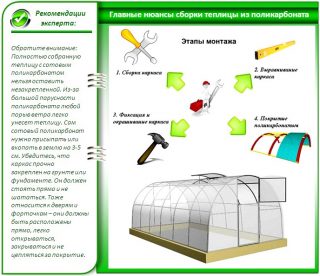
Installation steps
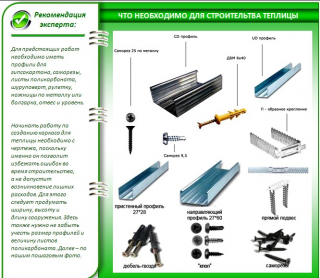
- level, tape measure;
- shovel;
- screwdriver, drill;
- timber or steel profiles;
- longitudinal and cross connectors (crabs);
- lugs;
- hardware for assembling the frame and attaching polycarbonate to them;
- a set of plastic additional parts and profiles.
The panels will require the assistance of two people. For them, you need to prepare protective gloves, goggles and helmets.
- Trace, mark places for digging. Remove the top layer of soil, move it to another area for further use.
- Make a pit under the foundation, level and compact the bottom of the pit, lay geotextile fabric in it.
- Install the base... It can be a structure of a belt, columnar, slab or pile type. Each has its own technology.
- Assemble the frame... The distance between the vertical guides is taken 70 cm, and the crossbars are placed at intervals of 80-100 cm, depending on the thickness of the sheets and the shape of the roof.
- Fasten to the frame connecting profiles and sealing tapes.
- Apply markings to the panels. Drill holes in them, remove chips from the honeycomb using a compressor.
- Stack sheetsusing special self-tapping screws with thermal washers for fixing. The optimal screwing step is 30-50 cm.
- Remove protective film... Close butt profiles with caps
- Seal open the edges of the slabs with perforated membrane tape. Seal them with end caps.
- Collect and hang on loops doors, windows and vents.
It remains to adjust the fittings, bring communications, connect the lighting, heating and irrigation systems.

