The metal profile as a roof covering is in great demand among private developers. The material combines strength, visual appeal, practicality and the ability to do it yourself. To achieve the desired result, you need to know a number of nuances, for example, how to put the first sheet of corrugated board on the roof. If done correctly, further styling will not cause any problems. Otherwise, the error will lead to serious complications.
Installation rules
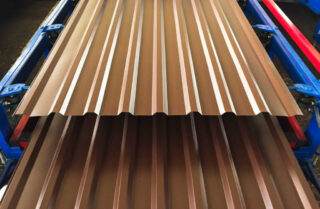
To create the roofing, sheets of grade H and HC are used with a thickness of 0.45-0.6 mm, a ridge height of 30-75 mm and drainage capillary grooves. In accordance with GOST, the width is in the range of 90-110 cm with a length of 50-600 cm. Since steel has a low level of sound insulation, the profiled sheet is laid using noise-absorbing materials, and waterproofing is used to protect the rafter system from dampness. Profiled sheet is a rather specific type of cladding. Sheets require very careful and careful handling, as they are easy to deform.
It is necessary to transport, store and lay the corrugated board in compliance with the following rules:
- Lay horizontally in the box on a wooden pallet. Fix the stacks with straps so as not to wrinkle the edges of the panels against the sides of the car.
- Make sure that the plates do not rub during transportation, as this may compromise the integrity of the polymer coating, and rust will appear in such places.
- It is better to lift the sheets in bundles, and already on the roof, remove individual fragments from them. This technique will minimize the risk of their deformation.
- Correctly lay the corrugated sheet on the roof in calm weather. The canvases have a large windage, which poses a danger to craftsmen and a high probability of curvature of the sheet.
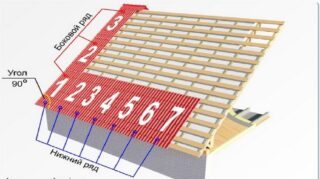
- First, put exactly 1 sheet of corrugated board on the roof, and only then lay the rest.
- You need to cover the house, put up a fence in tight gloves so as not to injure your hands.
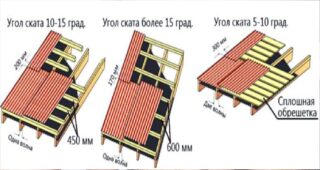
- It is imperative to overlap the profiled sheet vertically by 15-20 cm and horizontally by one wave, creating a connection in the lock.
In order to beautifully and correctly put the profiled sheet on the roof with your own hands, you will have to cut it along the edges, and sometimes diagonally. To do this, it is better to use a nibbler, slotted scissors or a special attachment for a cordless screwdriver.
The influence of the angle of inclination of the roof on the installation of the profiled sheet
You must follow these rules:
- When the slope of the slopes is less than 15 degrees, a continuous crate is made, and the overlap is 30 cm in height and 2 ridges in width.
- When the angle is 15-30 degrees, the technological distances are reduced. The overlap of the panels is already done 20 cm and one wave horizontally, but with a sealant. The step of the lathing, depending on the brand of the sheet, is 30-60 cm.
- With a steepness of 30-60 degrees, the overlap can be reduced to 10 cm, with an increase in the sheathing step up to 100 cm.
The removal of the cornice relative to the walls of the building is done 20-60 cm. The use of gutters and snow retainers allows you to take advantage of the minimum values and reduce the budget.
Materials and tools
Step-by-step instructions for installing corrugated roofing involve the use of additional parts. To ensure the tightness of the joints, cornice strips and drips, connecting profiles, valleys, internal and external corners, ventilation hoods and penetrations are used. Parts under the deck can be nailed with galvanized nails. Of the external fasteners, use galvanized and polymer-coated self-tapping screws 35x4.8 mm with a drill. For screwing the ridge, hardware 80 mm long is taken. The joints are sealed with silicone or special sealing tapes.
The success of the manufacture of roofing from profiled sheet is largely determined by the availability of a complete set of quality tools and fixtures.
For work you will need:
- roulette;
- level;
- a hammer;
- mallet;
- screwdriver;
- scissors for metal;
- marker;
- paint brush.
You should take care of the convenience of manipulation at height. Stable ladders, rigging and safety devices are needed.
Methods of multi-row laying of corrugated board
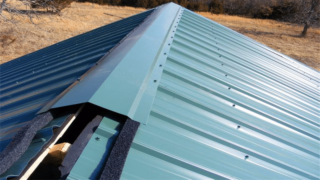
On the crate, sheets can be displayed in the following ways:
- In rows. First, the first panel is suspended on one self-tapping screw. After its alignment, the final fixation is carried out. Then the first row is installed, then the second and subsequent ones to the very top. This option is somewhat complicated by the fact that the master has to move a lot on a complex surface.
- Blocks. The most common technology is when the first sheet of the bottom row is laid, after which the first sheet of the second row is laid and attached to it. Next, the second sheets of the first and second rows are similarly stacked, as a result of which a block is obtained, including four sheets, to which the next block is further joined.
After removing both slopes, the upper rows are trimmed so that a gap of 20 cm remains between adjacent strips. It is filled with heat, steam, and waterproofing. Then it closes with a ridge profile. Here you can use simple triangular, semicircular and U-shaped lamellas. The ends of the ridge profile are muffled, aerators are placed on top.
Stages of installation of corrugated board on the roof
Installation technique:
- Prepare the workplace, equipment and equipment.
- Fasten cornice strips, inner valleys and abutment corners to the frame.
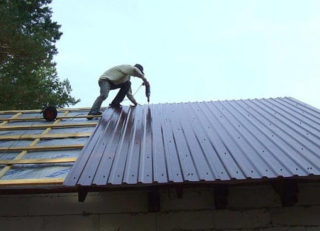
- Place the first panel on the crate, align it with the eaves overhang. Fasten it in the center with one self-tapping screw with medium tightening torque.
- Similarly, install a few more sheets in accordance with the selected technology. After correcting the position, fix it with a full set of hardware.
- Cover all ramps. Fit sheets along the top and side edges.
In conclusion, you need to install external additional parts and a drainage system.
Safety engineering
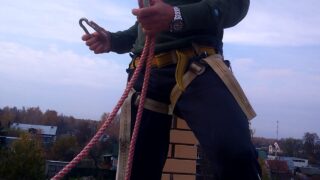
Before starting work, the area at a distance of 2 m from the building should be fenced off with a tape or rope with red flags.
Installation is allowed after fastening to the insurance. It includes a belt and a cable attached to a rafter leg or brick pipe. Eyes and hands must be protected.
It is contraindicated to use a grinder or open fire. This damages the protective coating and increases the risk of fire.
In the process of lifting the sheets to the roof, there should be no people and pets below.

