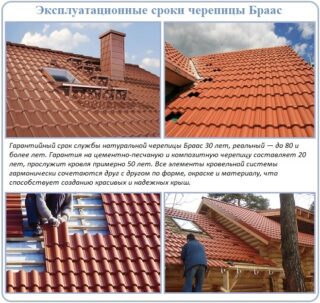
Clay tile is a natural material with a long service life. A house with such a roof can last 100 years. The products are suitable for walls made of any material, but the foundation must have sufficient bearing capacity, since the tiles are quite heavy. Piece tiles are easy to lay with your own hands.
What is a ceramic tile
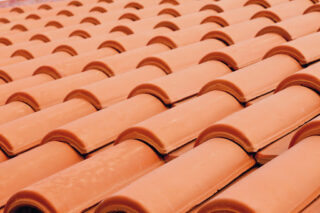
Ceramic tiles are made from fatty low-melting clay. The standard manufacturing procedure includes molding the pieces with a press, drying and firing at very high temperatures (up to thousands of degrees Celsius). On sale you can find not only natural-colored tiles, but also glazed and engobe-coated options. In their production, a decorative layer is applied before firing. Plants are often located directly next to the clay mining site.
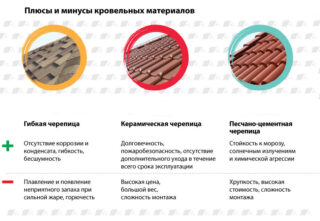
Such tiles can be used for finishing different types of roofs (ordinary gable, hip and others), but the minimum slope should be 22 degrees to ensure timely water drainage without compromising tightness. The material has a low thermal conductivity, due to which heat is retained in the attic or attic room in winter. It is also suitable for rainy areas and areas where hail often occurs, as ceramics are resistant to moisture and do not create unnecessary noise. In addition to traditional clay products, on the market you can find composite tiles and coatings based on sand and cement. They have decent performance but are less durable than ceramic products.
Advantages and disadvantages
- long service life;
- the ability to pass steam, sufficient so that condensate does not accumulate under the coating;
- fire resistance - the tile does not spread it and does not catch fire in case of fire;
- no color loss with intense exposure to ultraviolet rays;
- reluctance to accumulate static electricity (as opposed to metal roofing materials);
- lack of predisposition to seeding with fungus and mold;
- ease of repair: if any tiles are damaged, it is easy to dismantle them and install new ones.
The disadvantage, besides the rather high price, is the large weight of the coating. A square meter of area can weigh over 50 kg. Therefore, the rafter system must be solid and durable. Also, tiles require careful transportation and laying due to their fragility.
Types of ceramic tiles
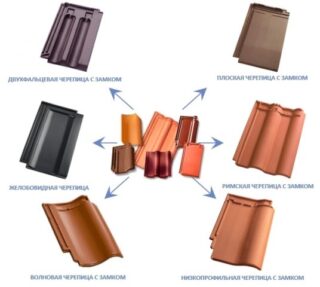
- Products with a wavy profile. On one or two sides, they are provided with grooves for tight sealed adhesion. Such shingles can have a single or double wave.
- Products with grooves, sometimes called "monk-nun". Some of the elements are concave (they are placed below), while others are convex (mounted on top).The design turns out to be textured and durable, but it also has a minus: the material consumption is almost twice that for other varieties.
- Flattened tiles are well suited for roofs with slopes greater than 35 degrees. Their profile shape is different. The most common type is the beaver tail, mounted in a single layer (while other varieties are laid with an overlap like fish scales).
Products differ in color. Tiles without dyes and coatings are red or yellow. The specific shade depends on the composition of the clay and the temperature during manufacture. Products can be given different shades by introducing special additives: for example, manganese makes products dark (close to black), and iron hydroxide - bright red.
Product selection and popular brands
When choosing, you should pay attention to the minimum slope angle of the slope recommended by the manufacturer (it is given on the product packaging). It is important that it matches the planned roof structure. Also, attention is paid to the dimensions of the products - they determine the step between the elements of the crate during its installation.
Knowing the dimensions of one cladding unit and the surface area to be covered, it is easy to calculate how much material needs to be purchased.
Installation of a tiled roof
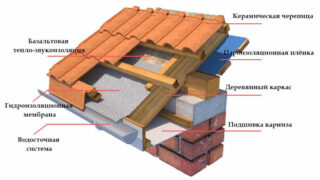
For the installation of ceramic tiles, a reinforced rafter system is needed. From the side of the attic, a vapor barrier membrane is attached to it, while the pieces of material are laid with an overlap of at least 10 cm and glued with tape. For insulation, mineral wool slabs are used. If their width exceeds the distance between the rafters, the plates are cut into fragments of the required dimensions and inserted between the legs. The waterproofing membrane is fastened with the steam outlet side up. The amount of overlap is the same as that of the vapor barrier.
Counter-lattice bars are nailed on top. They create a ventilation gap that prevents the accumulation of condensate, which can ruin the insulation and start the process of destruction of the rafters. On top of the bars at right angles to the rafters, a crate is stuffed. To do this, use boards with a thickness of at least 3 cm and a width of at least 5 cm. The distance between them depends on the dimensions of the tiles. The gutter is installed before the shingles are laid on the battens. In this case, holders are attached to the frontal board.
The tile laying technology is quite simple. First you need to check that there are no noticeable deviations in height on the plane. Beforehand, the tiles can be laid out on the lathing without fastening in order to determine how many elements will be in the row.
The lower layer is carried out beyond the borders of the roof by 1/3 of the diameter of the gutter. For fastening, use long (5 cm) self-tapping screws. On the hip roof, the layout begins from the center of the ramp.
In the area of the valleys, they organize a continuous crate. It must have a minimum width of 35 cm on each side. A self-adhesive belt is installed on the valley and a counter-beam with a waterproofing seal is attached. The edges of the tiles are trimmed in a straight line. Self-tapping screws are used for fixing.

