Siding is a slatted finishing material that is distinguished by its presentable appearance, strength and durability. Even a novice master can assemble the trim with good quality by hand. To do this, you need to understand the installation rules, get acquainted with the list and technology for using additional parts, among which the most versatile and useful is the J profile for siding.
What the J-profile can be used for
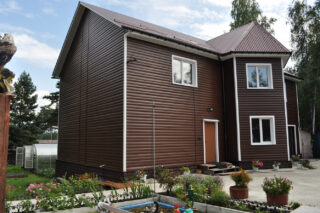
When decorating a wall with plastic or metal panels, a frame is first made, and then horizontally oriented fragments are fixed on it. They form joints, corners, between the rows there are gaps for windows and doors. All these places need to be beautifully and reliably repaired so that the finished structure is strong and beautiful.
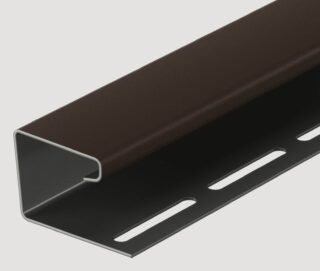
The J-rail for siding is a versatile support and fixing type product. It got its name for the side contour corresponding to the form of the letter of the English alphabet.
A ji-plank is used for siding for the following purposes:
- decoration of window and door openings;
- joining of panels at the points of convergence of walls and at the corners of the house;
- closing the shield from above as a finishing panel.
Special profiles are much more expensive with almost the same quality of fasteners. You cannot use the Ji profile for siding as a starting bar. Water and dirt will accumulate in the semicircular part, the strength of the product is limited. During strong winds, the coating can simply rip off.
Species overview
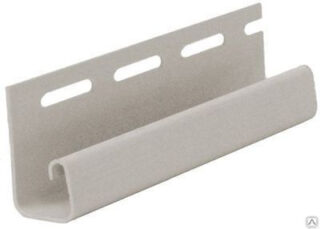
When finishing a building, there may be even and curly joints, openings, protruding and recessed parts. To design them, you need to use profiles of different sizes and configurations.
To address these issues, the J-bar for siding of the following types can be used:
- Standard. Has a height of 46 mm and a heel width of 23 mm. The use is carried out on conventional panels, where there is no need for their decorative design.
- Wide. With a heel size of 23 mm, the shelf height is increased to 85-91 mm. Performs the function of decoration and closing wide gaps in case of errors in work.
- Arched (flexible). The dimensions are the same as a standard rail, but the shelves have notches that allow it to bend in different directions. Serves for framing arched and round openings.
G-rail for siding is made of a material similar to the panels. The standard length is 200 and 300 cm. The texture is smooth and embossed, matte and glossy.
Popular brands
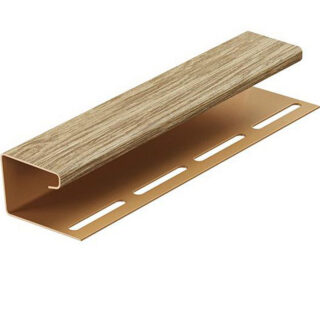
Products of foreign and domestic manufacturers are presented on the market.
Döcke:
- manufacturer: "Docke Extrusion" (Russia);
- length: 3050 mm;
- palette of colors: "ice cream", "pomegranate", "chocolate";
- approximate cost: 620 rubles apiece.
"Alta":
- manufacturer: "Alta-Profile" (Russia);
- length: 3000 mm;
- palette of colors: golden, brown, peach, light gray, "light oak";
- approximate cost: 167 rubles apiece.
"GRAND LINE" J-profile for spotlights:
- manufacturer: "Retail chain Grandline" (Russia);
- length: 3000 and 3050 millimeters;
- palette of colors: white, beige, "vanilla", yellow, blue, "golden sand", "caramel", "cream", brown, light green, peach, dark beige, gray;
- approximate cost: from 190 to 600 rubles apiece.
In order not to run into a fake, the goods should be bought at trusted retail outlets after reading the quality certificates.
Dimensions and calculation of the amount of material
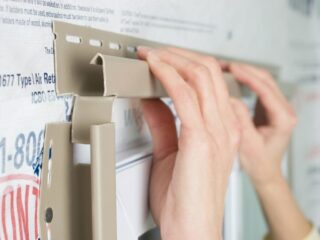
Calculations must be treated responsibly, so as not to overpay for excess material and not be left without it in the midst of construction.
When drawing up a project and an estimate, it is necessary to measure the following elements of the building:
- openings of windows and doors;
- sides of soffits;
- end parts of roof gables;
- the height of the walls in each of the corners.
Next, all the numbers obtained are added, the result is divided by the length of one bar, followed by rounding up to a whole. The installation of the profile is carried out so that there are no joints around the perimeter of the openings. It is better to do the calculation schematically, putting every detail on the drawing.
It is necessary to provide for the consumption of fasteners. For each running meter, 5 self-tapping screws are required. Hardware must be taken with a 40x6 mm rod and an 8 mm head.
Installing the J-profile
Along the perimeter of the window
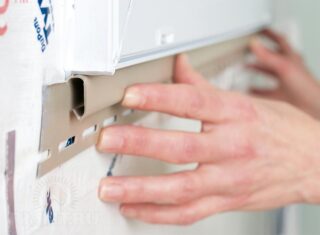
Depending on the dimensions of the opening, whole slats or those remaining after the trimming corners are used.
Installation is carried out in the following sequence:
- Cutting blanks in accordance with the openings. Immediately they are given angles of 45 degrees at the edges.
- Manufacturing of reeds 2 cm long to protect the inside of the cladding.
- Fastening the bottom strip along the window sill with self-tapping screws with a slight tightening slack.
- Attaching the side portions of the slope. Correction of their position and preliminary tightening of hardware.
- Alignment of reeds and side sections of the profile. Alignment of the structure and final tightening of the fasteners.
Screwing must be carried out exactly in the center of the technological holes of the strips for the movement of parts during thermal expansion.
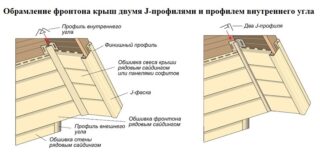
On the gables
Installation sequence:
- Making templates from trim strips for each seam. All mates will differ between 45 and 90 degrees.
- Attaching the profile to the pediment. Alignment with a piece, cutting a fragment.
- A similar fit of the second part is carried out in relation to the second corner.
- Attaching both blanks to the frame. The resulting overlap is removed in the middle of the wall.
After the final alignment of the planks vertically and horizontally, their final screwing is carried out.
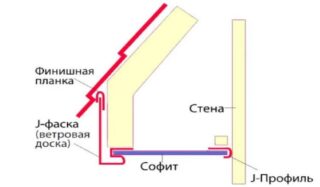
For spotlights
- Pinning a wooden beam to the wall. It will be a support for the planks.
- Cutting blanks to the required length. Cutting from each by 12 mm.
- Attaching the strips through the perforated holes, inserting soffit parts into their grooves.
When everything is aligned, the structure is finally fixed.
Tips for Beginners
The siding installation technology is quite well developed, but for novice craftsmen there are several recommendations that will allow them to make their work easier and avoid mistakes.
Complementary details are selected in a shade similar or contrasting with the flooring. Here you need to first make sketches, and only then make a decision. It should be borne in mind that darker details will heat up more in the sun and expand more.
So that the slats located near the roof do not deform from heating, it is necessary to make an indent between them up to 25 mm, closing the slots with slats with wide shelves. Thanks to this technique, the integrity of the flooring and its waterproofing properties will be preserved.
The competent use of the J-profile allows you to save a lot on corner and finishing rails while maintaining the quality and reliability of the entire structure.

