Slate is a well-known and demanded roofing material for a long time. Buyers are attracted by the affordable price, relative durability, the ability to muffle sound and ease of installation. However, slate sheets are quite fragile and difficult to cut due to their fibrous structure.
Slate installation rules
Slate is a building material for cladding roof and wall structures. Natural slate, asbestos-cement, fiber-cement, polycarbonate and other types are produced. Their properties are markedly different.
Most often, the consumer deals with material based on asbestos and cement. It is produced in the form of flat sheets and with a wave relief 175 cm long and 98 to 113 cm wide. It is used to cover the roofs of residential buildings, utility and industrial buildings.
Slate has a number of advantages: it is non-combustible, heats up slightly in the sun, and absorbs sound. The slate roof is easy to install and repair if necessary. At the same time, the sheets are quite fragile, you need to be careful when transporting and laying the material.
This combination of qualities determines a number of rules that must be followed when covering the roof.
- The sheets are laid only with an overlap, it is impossible to join them.
- The slate is fastened to the lathing, the sheets are laid across the slats.
- The coefficient of expansion of the material is minimal, therefore, only well-dried wood is taken for the lathing. Otherwise, the sheets will crack and collapse due to deformation.
- The minimum angle of inclination of the roof for asbestos-cement slate is 22 degrees. With a smaller slope, moisture will accumulate in the grooves.
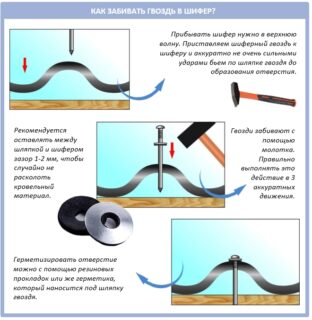
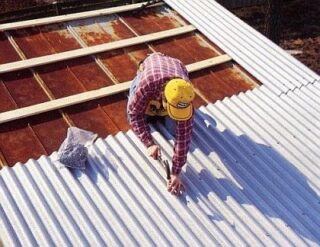
- Installation is carried out on roofing nails or self-tapping screws with press washers. There should be a gap of 3-4 mm between the head of the fastener and the deck.
The number of fasteners per sheet, the amount of overlap, the sequence of laying depend on the angle of the slope and the weather conditions of the region.
How to lift sheets to the roof
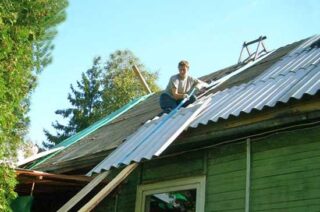
You can transfer sheets only with two people, and with a long length - with three people. They are not held by the edge, but by the groove from below.
To a shed or garage, single or gable, the slate can be lifted up the stairs. To do this, use a ladder or install two inclined beams parallel to each other. The sheet is laid on bars, tied with two ropes, fastening them in the middle of the sheet, and lifted along the guides. You can do this manually by placing a second ladder next to it for lifting people.
When lifting to the roof of a house higher than 12 m, the slate must be placed on a pallet with dimensions slightly larger than the dimensions of the sheet. Ropes are tied at the corners of the pallet, at a certain height they are tied together and the structure is suspended by 1 rope thrown over the block. On the roof, the cable is attached to some fixed element - to a pipe, for example. Two people are enough to lift the slate pallet.
It is recommended to lift the sheets one at a time, especially in strong winds.
Slate laying methods
There are 2 main installation methods.
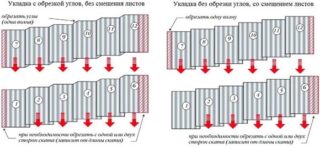
- Breakaway - when laying, the sheet of the next row is shifted relative to the previous one by 1–4 waves in a checkerboard pattern.This is how a stepped joint line is formed. This option is used when laying a wide roof, but narrow along the slope.
- No displacement - the slate is laid in order, in even rows, without displacement, the joints are on the same line. In this case, a double overlap is formed, and this must be avoided. With this method of stacking, each sheet has to be cut at an angle of 30-60 degrees. The method is more time consuming.
How to install slate depends on its type. The first option is more often used when installing wavy material. It is more difficult to cut because of the relief. In fact, the method without offset is more economical, since despite the trimming during installation, in the end, you do not have to trim the sheets in length and width.
Installation technology
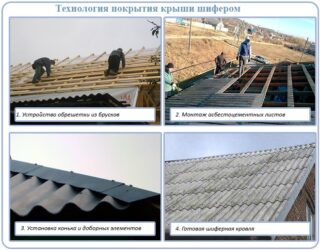
Sparse lathing is much more common. For it, they take a wooden beam with a cross section of 40 * 70 cm. Thinner slats do not withstand the load of snow, thicker ones themselves create too much load on the rafters.
The arrangement of the lathing has some peculiarities.
- It is allowed to use only a well-dried tree, so that later the roof "does not lead".
- The bars are fastened parallel to the ridge, across the slope. The step of the lathing depends on the length of the sheet: with a length of 175 cm, the distance will be 70–75 cm.
- It is recommended to lay bars of different heights according to a specific pattern. In odd rows, a standard bar with a cross section of 60 * 60 mm is attached, and for even ones they take a bar slightly higher. Its height depends on the thickness of the slate. With a material thickness of 6 mm, the height of the bar will be 63 mm.
- For the eaves, a higher bar is also used - 66 mm.
- If the slats are of the same height, the elements for the even row are increased: fix the gasket with a thickness of 3 and 6 mm, respectively.
- An additional crate is mounted around the chimney or window.
Install 1-2 lathing beams along the ridge on each slope. Ridge elements are attached to them.
Features of fastening slate on the roof
- Roofing nails - steel, galvanized with an enlarged head - reach 14 mm in diameter. The length of the nails should be 10 mm higher than the height of the tallest wave and the thickness of the sheathing beam. If the nail goes through the entire structure, you do not need to bend its end.
- Self-tapping screws - hex, with a rubber gasket under the head. When screwed in, the spacer creates a buffer between the deck and the head.
Self-tapping screws are usually produced painted, so that the color of the nails can be matched to the shade of the slate.
Fastening is done in 2 ways.
- Holes with a diameter of 2-3 mm larger than the section of the fastener are pre-drilled for nails. So that after fixing it does not let water through, a piece of rubber or roofing paper is placed under the hat. Self-tapping screws with press washers are supplied with a gasket by default.
- Drilling holes can be dispensed with. In this case, it is allowed to use only roofing nails and without spacers. Cover the crate with a sheet, then fix the fasteners with a hammer, very carefully so that the slate does not crack. On impact, the nail is held strictly at an angle of 90 degrees. Be sure to leave a gap between the cap and the flooring.
The material is fastened only through the crest of the wave and only in the areas of contact of the wave with the crate. The minimum distance from the edge of the sheet is 8–10 cm.
Usually 6 nails are enough for 1 sheet. But if the slope is steep, and the wind load in the area is large, you will need to increase the number of fixation points.

