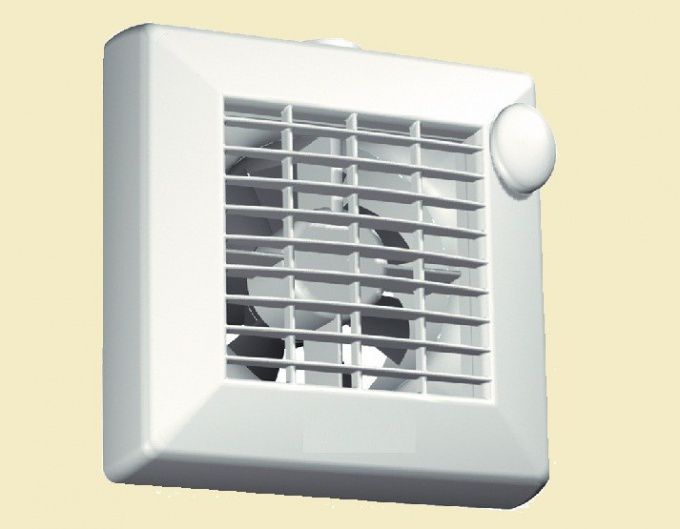
The process of installing a fan in the bathroom does not take as much time to install as it does to preparatory work. To get down to business, you need to draw up a clear plan of action, decide on the type and model of the ventilation system, study the electrical wiring of the apartment, and also choose the way to turn on the hood.
It is worth noting that the question: how to connect a fan in the bathroom, can be answered by experts in various forums. In case of any complications, this will simplify the installation work.
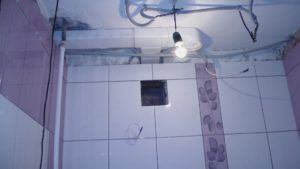
Extraction in the bathroom, as a rule, is not necessary in all cases. If a standard ventilation system does its job perfectly, you shouldn't waste time installing a more efficient system. However, when basic ventilation is insufficient, serious problems can arise:
- lack of oxygen;
- unpleasant odors;
- condensation on walls, mirrors, etc.
- destruction of tiles;
- the emergence of pathogenic microbes (mainly mold and microbes).
If any of the above problems occurs, it is recommended to check the standard ventilation for functionality. To do this, you need to take a match and bring it to the air duct grill. If at this moment the flame of the match goes out or stretches towards the ventilation, the system works quite efficiently. Of course, with the opposite behavior of the fire, we can safely conclude that the standard air duct is not functioning.
In some, rather rare cases, it is possible to resume the natural ventilation process. However, to do it yourself, you need to spend a huge amount of time. In addition, during the renovation process, the aesthetic appearance of the bathroom can be severely affected.
What is required to install the hood
In order for the installed device to function for a long time and cope with its purpose, it is necessary to create favorable conditions for it.
- A properly functioning ventilation duct must be present in the bathroom. In case of clogging and similar problems, after installing the hood, the system will not work. Therefore, thoroughly clean the air duct before installing the fan.
- When buying a device, you should carefully study its technical characteristics. The fan must fully comply with the operating conditions of the bathroom. It is recommended to pay more attention to: cost, functionality, level of generated noise and efficiency indicators.
- Since the ventilation system in the bathroom is entirely based on replacing humid air with fresh air, care should be taken to ensure its source. For these purposes, as a rule, you need to make a 2 cm hole under the door. Thanks to these simple manipulations, fresh air will flow into the room through the gap made.
It is worth paying special attention to the fact that installing a fan with your own hands requires a responsible attitude to the installation process. Thus, by the time of installation, all the nuances must be thought out. Ideally, it is best to draw up a work plan and follow the instructions. Also, in case of any complications, it is recommended to contact special forums on the Internet or to specialists.
Preparing to install the fan
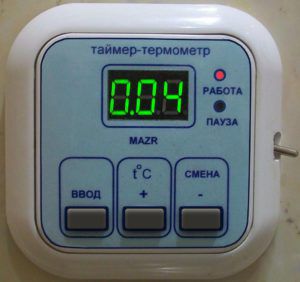
First of all, you need to decide on the model of the fan itself. The selected device must fully comply with the operating conditions. It is recommended to use devices with the following layout:
- timer, for self-switching on and off the fan if necessary;
- a hydrostat so that the humidity level in the bathroom is also under control.
Most often, bathrooms use fans with all the necessary qualities, including moisture resistance, a timer and independence from an uninterruptible power supply.
When installing the hood with your own hands, you should study the wiring in detail, since it is from it, subsequently, that the device will be powered. In general, installing a fan requires:
- laying of independent power supply;
- installing the device directly into the ventilation duct;
- sealing joints with polyurethane foam and putty.
If you correctly draw up an action plan, the entire installation process will not cause any difficulties. However, in case of problems in understanding and the process of work, it is recommended to seek help from specialists. In extreme cases, there may be a problem with the entire power supply of the apartment.
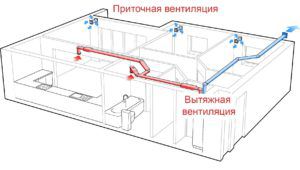
More efficiency of the exhaust ventilation system can be achieved if there is an additional source of fresh air on one side of the bathroom (supply ventilation). The inlet air duct and the exhaust hood must be located opposite each other, otherwise (in a close location) the ventilation of the room will greatly decrease.
Working with power supply
The ease of use of the installed hood is directly influenced by both the technical capabilities of the device and the method of switching it on. For each DIY installation method, as a rule, a unique fan connection diagram is required. All the required drawings can be easily found on the net in various forums.
Before you finally decide on the choice of the method for turning on the device, you should study the positive and negative sides in detail. In this way, inconvenience problems can be simply avoided.
Through lighting
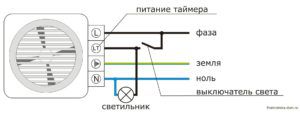
The most convenient, in some cases, is the way to turn on the fan at the same time as lighting the bathroom. That is, every time a person enters the bathroom, the hood automatically turns on. Thus, when the light is turned off, the ventilation system is also deactivated.
The main problem with this method of switching on is the impossibility of using a timer, which is why the device will not have time to clean the air in the room while in the bathroom. In addition, if a non-silent fan is used, it is simply impossible to take a bath at night due to strong noises and vibrations.
Do not forget that connecting the device to the same line with lighting can also cause technical problems with an insufficiently responsible approach to work. From this it follows that it is best to turn to specialists, and not engage in connection with your own hands.
With a cord
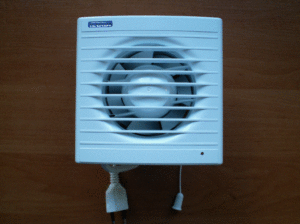
Many fan models initially have their own switch. Often this switch is in the form of a cord extending from the housing. By manipulating the cord (pulling) the fan turns on or off.
It is worth paying attention to the fact that this way of turning on the device is, most often, inconvenient. This is due to the high location of the ventilation duct (under the ceiling). In addition, sometimes it is necessary to install the hood in hard-to-reach places, which is why direct access to it is very limited.
This way of switching on and off is most convenient in case of repair work.In addition, you can safely, in addition to the main cord, lay additional wires and install an independent switch for the fan. However, it should be borne in mind that when laying the wiring outside of repair work, the aesthetics of the bathroom walls may be severely affected. Also, do not forget about the need to connect the main wiring to the hood.
Automatic (self) inclusion
With this method of turning on the fan, it can be turned on or off manually. However, in the active state, the device itself will analyze the situation in the bathroom and deactivate if necessary. A timer, a motion sensor or a hydrostat can be responsible for analyzing the room.
It is worth noting that a fan with an automatic shutdown system, most often, is equipped so that it turns on when people are detected in the room and turns off according to a built-in timer. However, be that as it may, such fans are not in great demand in the market due to their high cost.
Self-switch
When installing a fan in the bathroom with your own hands, you can conduct separate wiring for the device by connecting it through an independent switch. The option of turning on the device through a cord is completely similar to this method, but more convenient because there is no need for direct access to ventilation.
The most common way of switching on is through a two-key switch, that is, at the exit from the bathroom, instead of the usual light switch, a new one is mounted - a two-key.
This type of switch is not suitable only in case of high humidity in the room.
Wiring
When working with laying, the wire should be repelled by the instructions and safety precautions. Under no circumstances can you work with active wiring - the apartment must be de-energized before the installation process.
When connecting wires to each other, it is recommended to use special stamps. Thanks to such connections, the contact between the wires will be much better.
It is also necessary to lead a copper wire to the ventilation duct (fan). Ideally, it should be carried out during cosmetic repairs, under the tiles. If repairs are not planned, the wiring is carried out over the wall covering.
Installation work
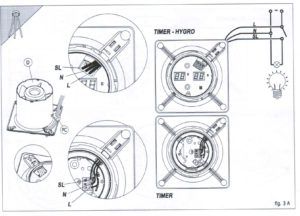
Usually, in the complete set of the fan you can find special instructions for installing the device. In addition, there are also all instructions for further operation and maintenance of the device. All further work must be carried out in full accordance with the regulations.
Fan installation takes much less time than preparatory work. Thus, it will take about 15 minutes to install the fan in the bathroom.
- It is necessary to remove the front side of the fan.
- Glue or silicone must be applied to the joints between the device and the walls.
- The fan must be carefully placed in the air duct and pressed firmly for a few minutes (drying time of the connecting substance).
- It is necessary to fix the cover of the device with self-tapping screws. Most often, all the necessary components are supplied with the device.
In addition to basic installation work, it is recommended to install a mosquito net over the device.
The entire installation process can be considered complete. After installing the device, but before closing the cover, as a rule, it is necessary to connect the fan to the previously laid wire.
In case of any non-observance of safety standards, serious problems are possible, fraught with both unstable power supply of the entire apartment, due to short circuits, and inoperability of the installed fan.
It should be noted that the question of how to connect a fan in the toilet and bathroom can be considered settled. You can find out incomprehensible nuances on the forums on the Internet or read the instructions attached to the fan.

